


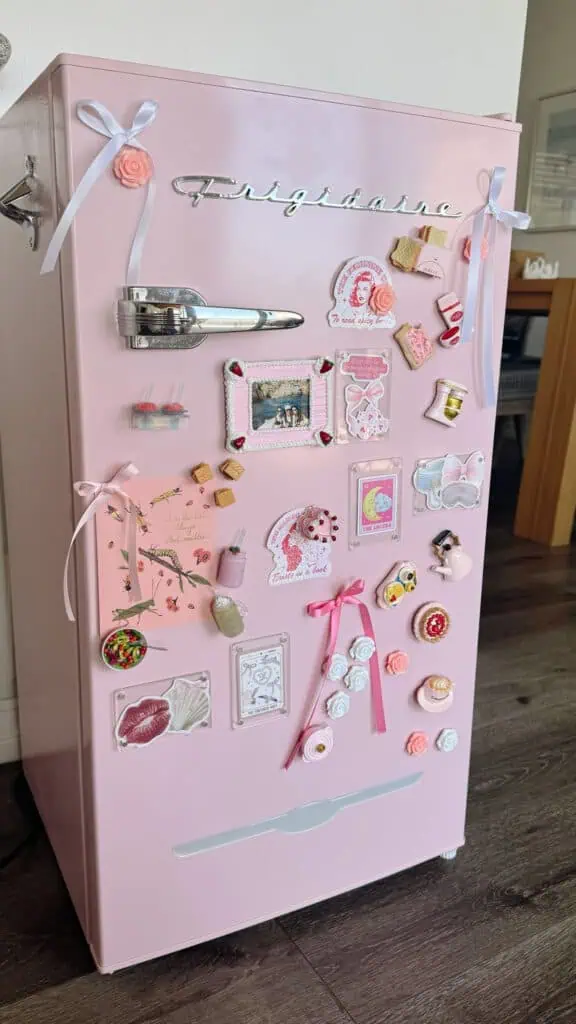
DIY Refrigerator Magnets
I had so much fun decorating my mini fridge a couple weeks ago, and decided to make my own magnets using MiniVerse’s Diner collection!


I had so much fun decorating my mini fridge a couple weeks ago, and decided to make my own DIY refrigerator magnets using MiniVerse’s Diner collection! I love a DIY project and I’ve been seeing people online make the cutest air dry clay magnets, but this felt was much easier to do!
Keep reading to see how I made my food magnets + the rest of my refrigerator decor!
DIY Refrigerator Magnets
Personalized Refrigerator Magnets
There are so many different types of personalized refrigerator magnets that you can make & use to decorate that boring blank space! Here are some of my favorite ways!

1. MiniVerse DIY Magnets
This DIY refrigerator magnet craft idea is perfect for an easy activity for a girls night in! The first step to a craft night is a cute setup!
What You Need:


The Crafting Setup:


These placemats are my favorite for craft nights because they’re so easy to clean! The resin from this project wiped right off.
These MiniVerse crafts are so much fun! I used the diner collection, but they have so many collections to to choose from!
Cute MiniVerse collections to browse:
- Hello Kitty
- Seasonal (Halloween and Christmas!)
- Harry Potter
- Botanicals
- Sushi restaurant
*Be sure to follow safety guide and warnings when making the MiniVerse as you are working with resin!
How to Make DIY Refrigerator Magnets

Step One:
Unwrap the MiniVerse, and using the collector’s guide, follow the instructions to make each MiniVerse item.
Step Two:
Allow the resin to dry completely in UV light for around 5-15 minutes, depending on the item.


Step Three:
Once the MiniVerse food item is completely dry, use super glue to attach a magnet to the back of the MiniVerse item.
Step Four:
Decorate your refrigerator with your DIY magnets
Scroll to shop the rest of my refrigerator magnets!
Watch me make the magnets:
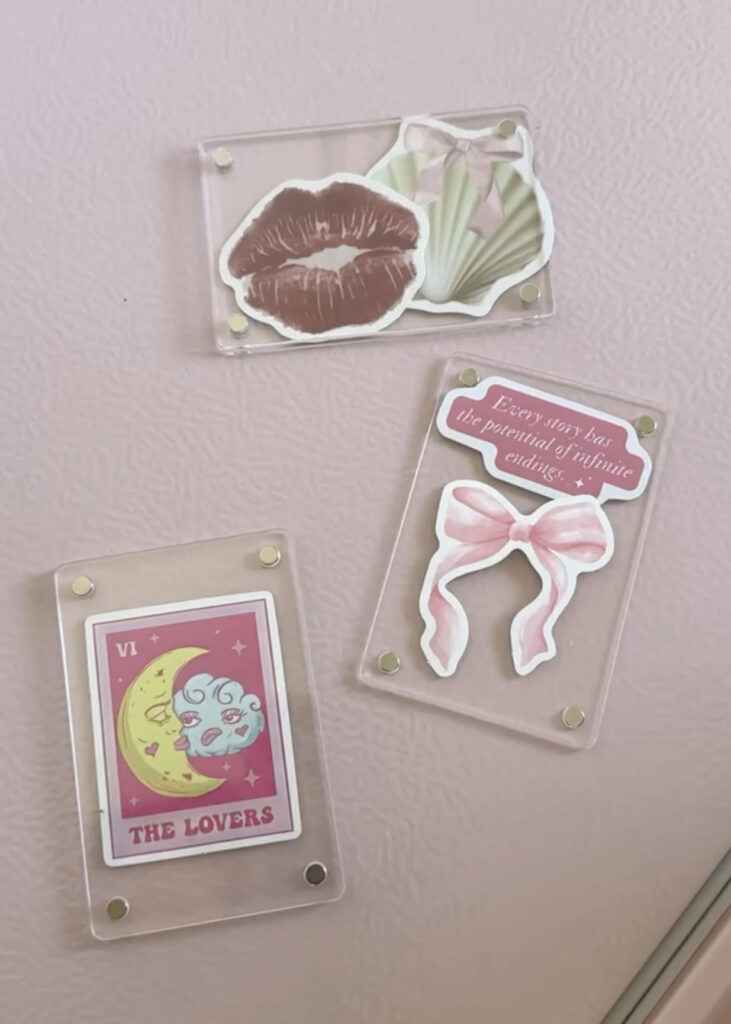
2. Sticker Collages
Using Polaroid photo frames, I layered stickers together to make collages, and they turned out so cute! You don’t need to peel the stickers to keep them in place so you can easily swap them out and reuse the stickers in the future!
What You Need:
- Stickers or small pictures
- Magnet frames
- Tiny embellishments such as dried flowers


How to Make DIY Sticker Collage Magnets
Step One:
Detach the front and back plates.
Step Two:
Play around with stickers, images or tiny embellishments into a layered collage. You don’t have to stick them down permanently, you can just use the front plate to hold it in place!
Step Two:
Decorate your fridge!
3. DIY Bow Magnets
This magnet is so easy to make because you probably already have ribbon! These bow magnets are so easy and fun to make for your coquette fridge.
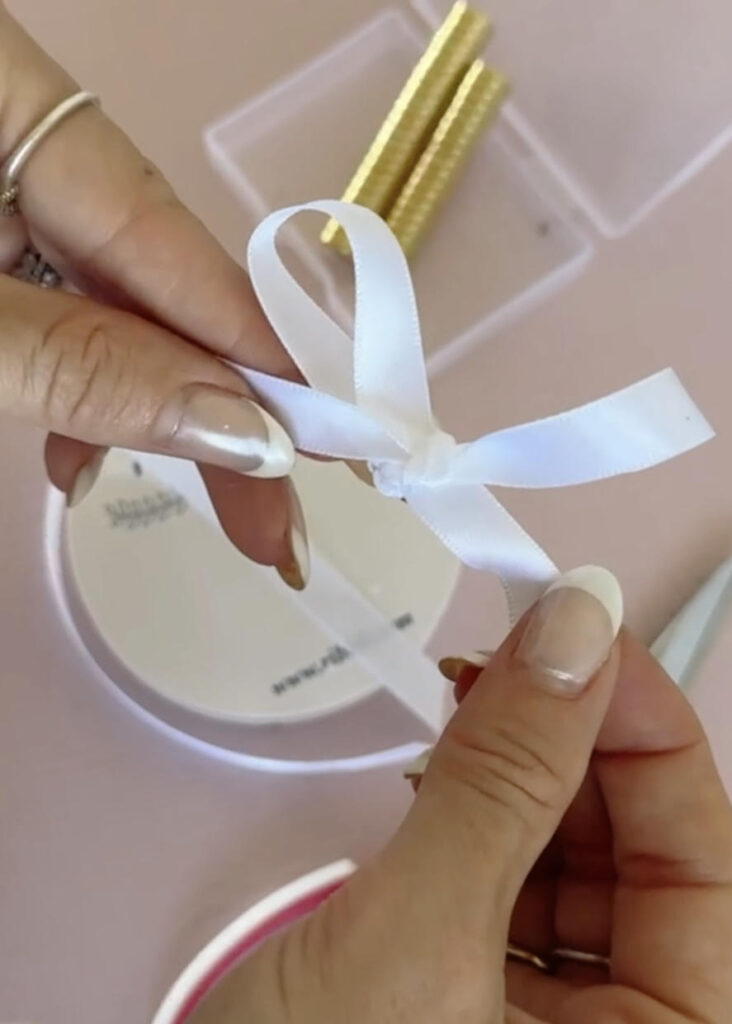
What You Need:
- Ribbon – 3/8 inch satin ribbon worked best for me
- Krazy glue
- Magnets


Step One:
Using 3/8 inch satin ribbon, tie one knot in the middle, and then form one loop on either side of the knot and knot the ribbon into a bow.
Step Two:
Use super glue to attach the bow to the little magnet.
Step Three:
Decorate your fridge! So easy and so cute!
4. Lego DIY Magnets
Similar to option 1, you can also make magnets out of Lego sets! The small sets can be so cute and fun, and there’s never a great place to put them after it’s completed. Attaching a magnet to the back of it makes it a perfect decoration for your fridge!
What You Need:


There are so many fun Lego sets and mini figures that you can make and use as cute fridge decor! One of the best parts about Lego bricks is that you can get creative and also build whatever you want. You can also use the “Brickit” app to scan a pile of Lego pieces and it’ll tell you what you can build – and how to do it!
Cute Lego collections to browse:
- Mini figures characters
- Mini figures lookalikes
- Botanicals
- Animals
- Food
- Seasonal items
- Artwork
How to Make DIY Lego Magnets
Step One:
Assemble Lego sets from the instructions included.
Or use the “Brickit” app and scan a pile of mismatched Lego pieces if you have some laying around! The app will give you options (option amount depends on how many pieces you have) and instructions.
Step Two:
Using
5. Air Dry Clay Magnets
There are endless possibilities of what you can make with air dry clay for your fridge! Animals, hobby items, shapes, letters, etc. You can also find tons of tutorials on YouTube and TikTok for whatever you want to create.


6. Antique Frame Magnets
Little antique looking frames for the fridge is also so chic! If you’re crafty enough, this is something you can make with air dry clay and mod podge.


You can also make cute picture collages using mod podge from the craft store and adding little frames, or using air dry clay – like I previously mentioned! I definitely want to try out a new idea soon so stay tuned to see what else I make.
More Fridge Decor

Amazon Fridge Decor:


Etsy Fridge Decor:


Watch me decorate my fridge:
More cute magnets and stickers from Etsy:


More:


Read more DIY posts here:
You might also like