


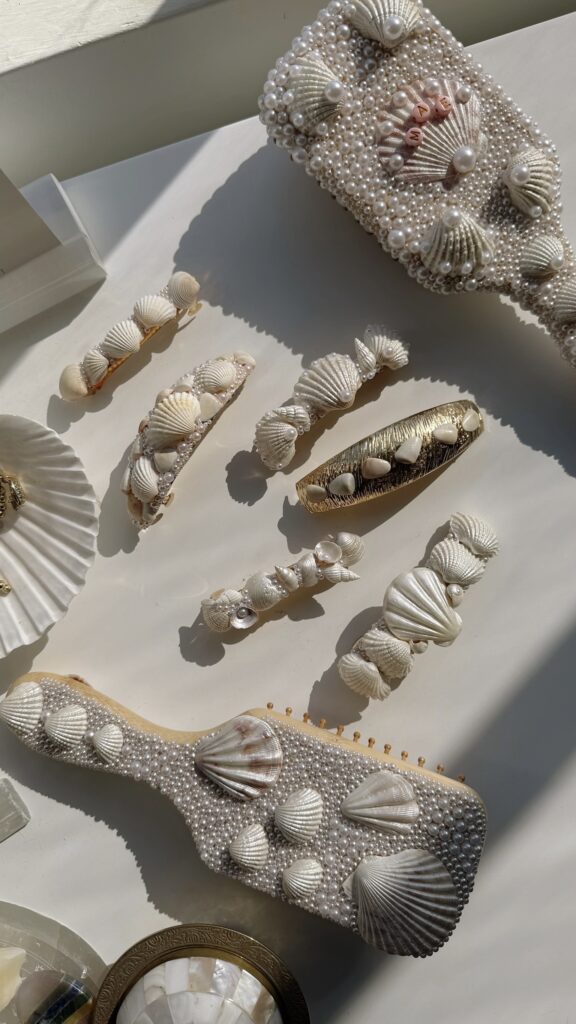
DIY Mermaid Seashell Hair Clips
Embrace your inner mermaid with this easy craft! I had so much fun making the mermaid-inspired seashell hair brushes and knew I wanted to create something else using seashells. Mermaid-themed accessories are so trendy lately, and I love the beachy aesthetic. This seashell hair clip tutorial is the perfect craft for summer.


Embrace your inner mermaid with this easy craft! This seashell hair clip tutorial is the perfect craft for summer. It’s a great idea for your next girls day too! I had so much fun making the mermaid-inspired seashell hair brushes and knew I wanted to create something else using seashells. Mermaid-themed accessories are so trendy lately, and I love the beachy aesthetic. The DIY mermaid hair clips are inexpensive and fun to make, especially with your friends! Today I’m sharing this easy craft tutorial so you can make them too!
How To Make DIY Mermaid Seashell Hair Clips
What You Need to Make Seashell Hair Clips
These mermaid hair accessories are so easy to make and only require a few items! If you’re doing this craft with friends, you can divide purchasing the supplies among the group for a truly inexpensive craft night.

Basic Supplies:
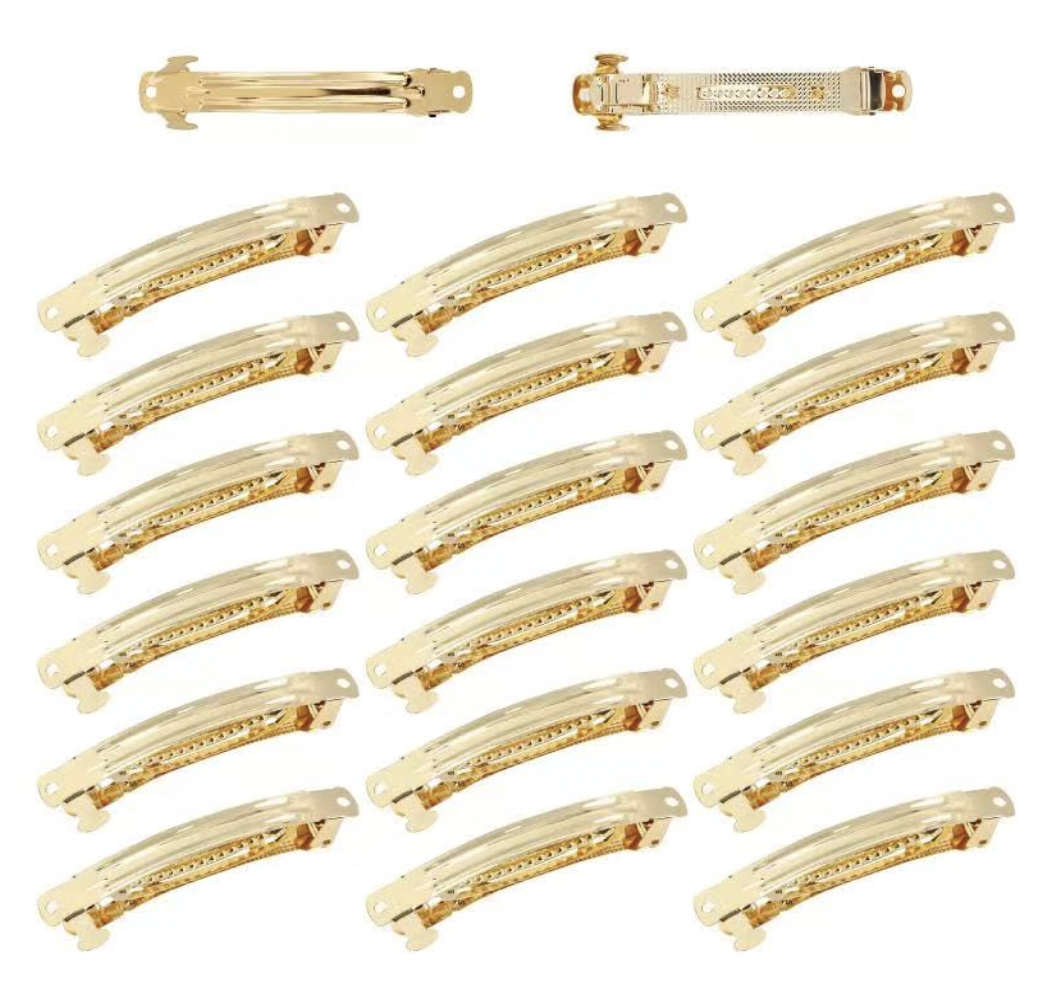
- Hair clips/barrettes – you can do bigger clips or smaller ones.
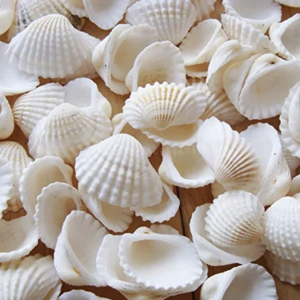
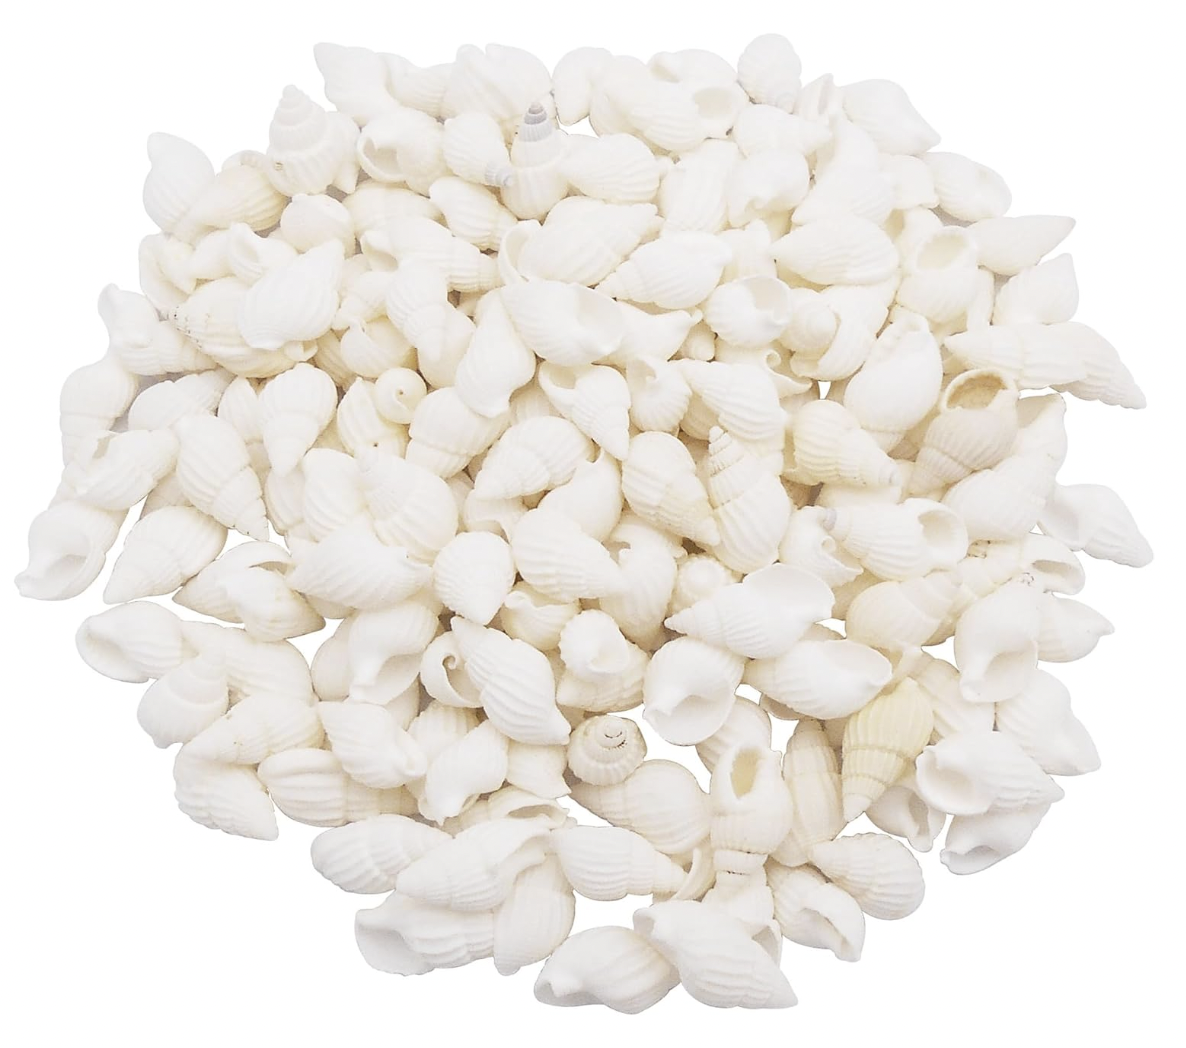
- Seashells – assorted sizes and colors
- B 7000 glue – extra hold glue
- Placemats – to protect your surfaces from potential glue drops
Other Ideas:
- Pearls – flat-backed are the easiest to attach
- Rhinestones – a colorful look would be fun too
- Self stick diamond art pens – if you’re adding pearls or other small details
- Paint – iridescent paint on the shells can give a pretty pearl effect (you’ll need a paint brush too!)
- Mermaid charms – another cute touch
- Letter beads – adding your name or initials is cute!
- Glitter – if done right, this can be so pretty
Shop Supplies:


Step-by-Step Tutorial
For my visual learners:
Step 1 – Plan Mermaid Design
Pick out your shells and gems that you want to attach to your hair clip.


Step 2 – Attach Shells to Hair Clip
Apply your B 7000 glue to a small portion on the hair clip and begin attaching shells – or apply the glue to your seashell and then add to hair clip.
Step 3 – Apply Iridescent Coat (optional)
You can apply an iridescent paint for a pearl finish if you’d like! It’s up to you which finish you prefer, natural or iridescent.


Step 4 – Add Finishing Touches
You can add more fun touches like pearls, glitter, rhinestones, beads, etc.
How to Use Diamond Art Pens And Wax:
Spread the glue onto a small section of the hair brush – it dries in a few minutes so you have time to work with it. Dip the hollow end of your pen into the wax (for this craft, I used the smallest option). Gently press the pen onto the top of the flat backed pearl, and then firmly press it onto the tacky area. The pearl should release automatically. However, if you accidentally got glue on the pen it may stick to the tool versus the art piece, so be sure to clean it every now and then.
Self-Stick:
Self stick pens are the best because they work exactly the same as a pen you have to dip into wax but the self stick pen tip is already wax so you there’s one less step!

And you’re done!
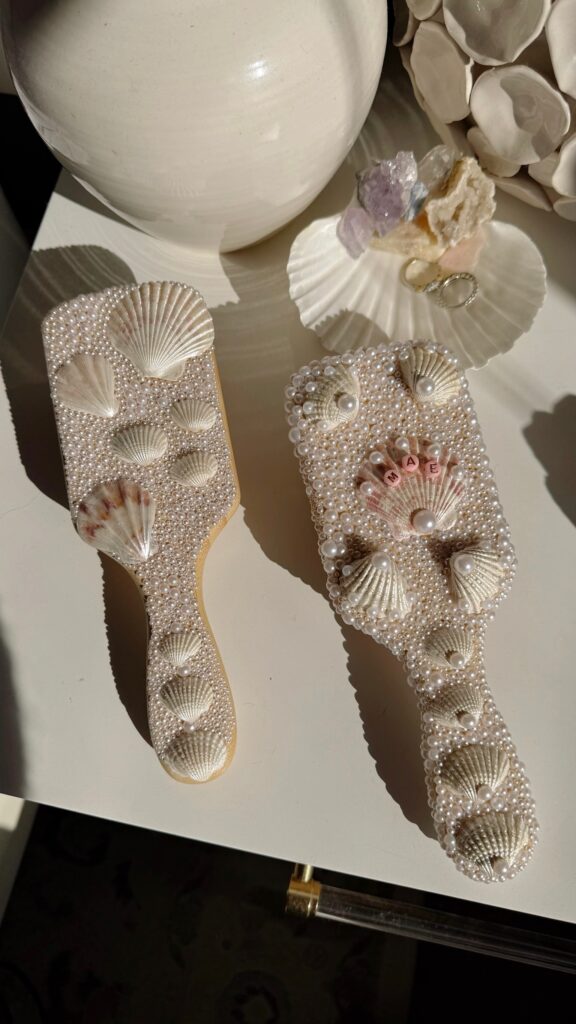
Here’s step by step instructions for one of my favorite crafts – DIY mermaid hair brushes! I got everything from Amazon and had so much fun doing this with my friends. They’re the perfect match for the DIY seashell hair clips!
Shop What I Used:


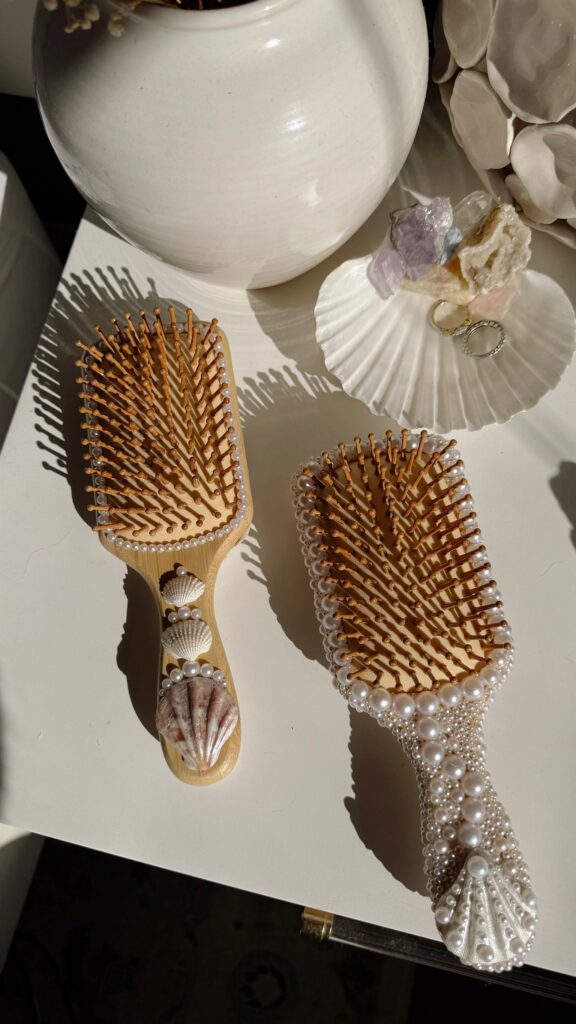
How to Make Mermaid-Inspired Hair Brushes
Step 1: Prepare Your Brush
Before getting started on this beachy hair brush decoration, you’ll want to make sure your actual brush is nice and clean.
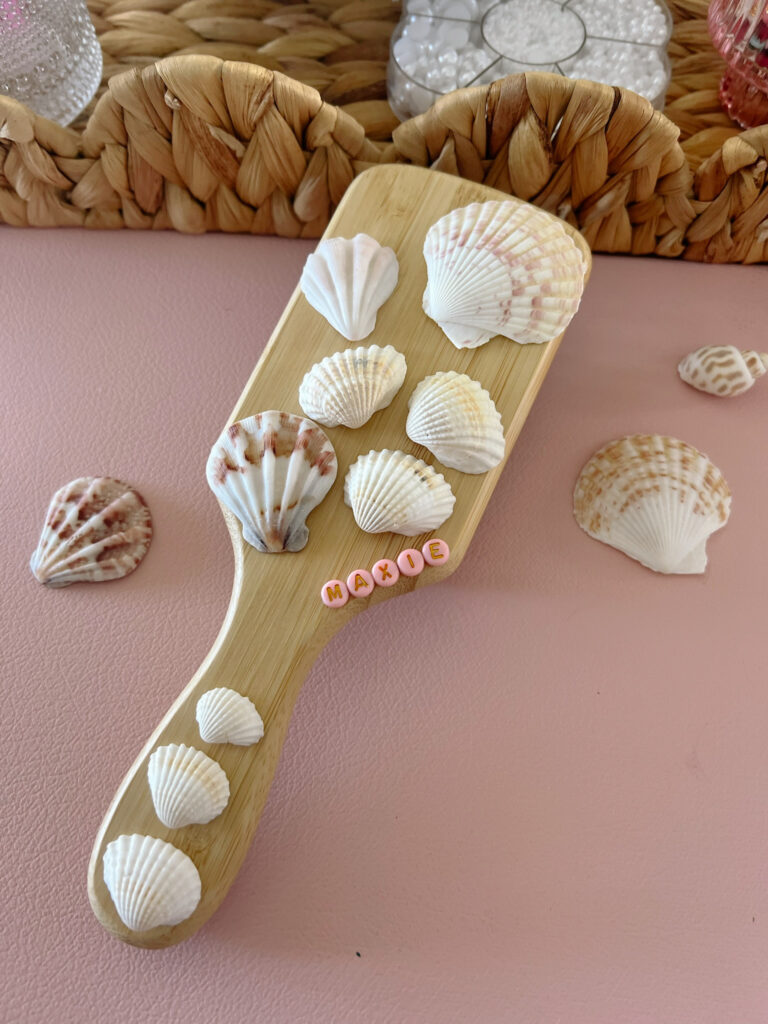
Step 2: Design the Mermaid Pattern
Next, plan your seashell hair brush decoration pattern. You can lay out the big seashells on the brush and begin visualizing your design before you glue them down and make it permanent.
Step 3: Attach the Seashells, Pearls, and Beads
Using B-7000 glue, attach the seashells first because they’re the biggest and you’ll want to work around them. Place the glue around the perimeter of the seashell and then place it onto the hairbrush. You can also glue around the edges of it once it’s placed as well. However, the glue will dry slightly visible so you’ll want to cover it with pearls.
Next, glue your pearls, beads, and other tiny items. The small pearls can be easier to attach using diamond art pens.


Pro Tip: How to Use Diamond Art Pens And Wax
Spread the glue onto a small section of the hair brush – it dries in a few minutes so you have time to work with it. Dip the hollow end of your pen into the wax (for this craft, I used the smallest option). Gently press the pen onto the top of the flat backed pearl, and then firmly press it onto the tacky area. The pearl should release automatically, however, if you accidentally got glue on the pen it may stick to the tool versus the art piece, so be sure to wipe it every now and then.
Step 4: Add a Pearl Top Coat
Using a fan brush and pearl white metallic acrylic paint, you can paint a thin layer onto the seashells and beads for a pearl finish. You can drop a tiny amount onto the seashell directly, or use a paint palette or plastic dish.

Step 5: Add a Securing Top Coat
A polyurethane top coat – painted on with a fan brush – will really secure the shells and pearls to the hair brush to ensure they won’t fall out when you use it. Your coating should be nice and thin – I somewhat stabbed the bristles in between the pearls to ensure they were secured.
Step 6: Repeat On The Front & Sides
Repeat the process of adding shells, pearls, glue, pearl coat, and secure coat along the sides and front of the brush until you’re happy with it!
You might also like