


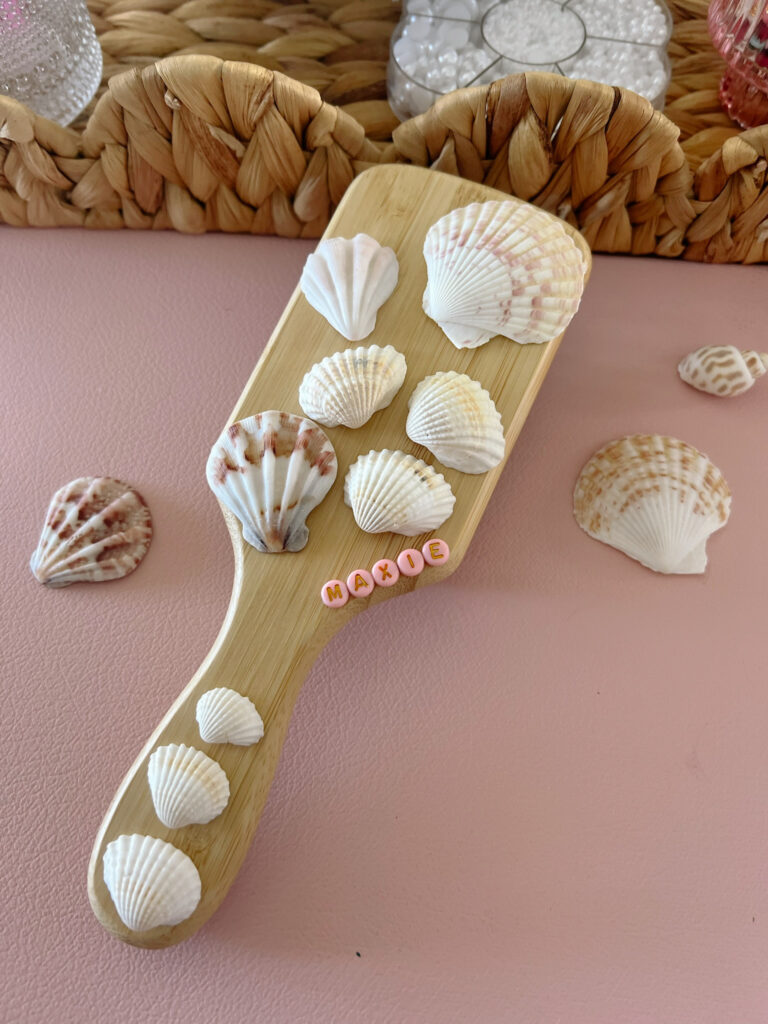
How To Create Mermaid-Inspired Hair Brushes
Learn how to decorate your hair brushes with a mermaid theme using seashells, pearls, and beads. This DIY tutorial will guide you through the process of making your own mermaid-inspired hairbrushes for a unique, ocean-inspired look.


I love finding girly and fun crafts to do with my friends and when I came across this mermaid craft idea on Pinterest, I was so excited! I love a mermaid aesthetic so my most recent girls night in was crafting mermaid-inspired hair brushes using seashells, pearls, beads and more! And I watched numerous tutorials and found all of the tools and supplies on Amazon. Decorating hair brushes with pearls and beads turned out so cute and it was such a fun and creative release with my girls. This craft definitely looked easier than it was, so I’ve put together a very detailed DIY mermaid brush tutorial for anyone who wants to create them at home.
How To Create Mermaid-Inspired Hair Brushes

Summer is coming up and I’m so excited! I love this time of year and wanted to find something beachy to do with my friends. This seashell hair brush decoration felt like the most fitting project to get us in the summery mood. I made my hair brush for myself when I did this mermaid activity with my friends, but you could always make this as a gift too – specifically for bridesmaid proposals or whatnot. Our hair brushes were perfect for a crafty girls night in, but if you need an activity for a birthday party, bachelorette party, etc. then you should consider giving this a go.
Materials Needed For Decorating Your Mermaid-Inspired Hair Brushes
I used inexpensive hair brushes from Amazon for this ocean-inspired DIY project but you can even use a nicer hair brush to really make it worth your while! The rest of my craft supplies and tools are from Amazon as well and I linked the exact items I used.


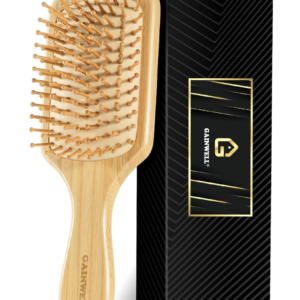
- Hair brushes – can use wooden or plastic, square or round
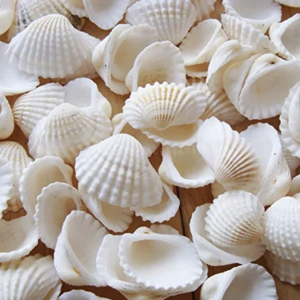
- Seashells – various shapes, sizes and colors
- Pearls – various sizes, flat-backed are easiest to glue
- Beads – I used colorful letters for adding our names
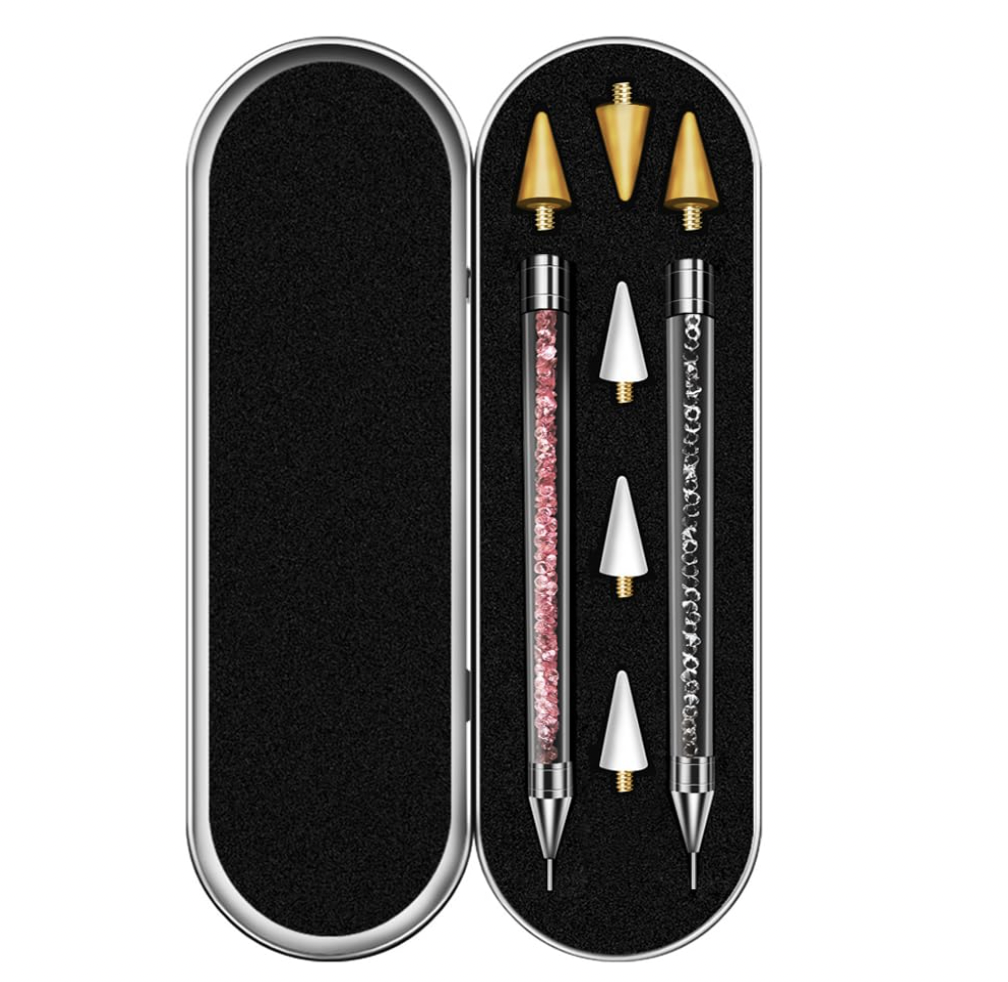
- Glue – E-7000 glue works the best for this craft
- Diamond art pens – for easily attaching the small pearls and beads (self stick is even better and don’t require wax)
- Wax – for your diamond art pens
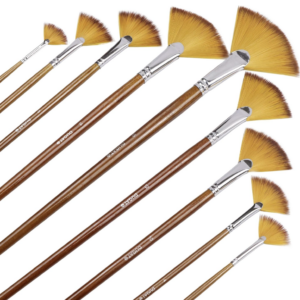
- Fan brushes – the perfect brush for applying the thin coatings
- Metallic paint – I used a white pearl acrylic paint for a pearl finish on the seashells
- Secure top coat – a thin layer of Polyurethane keeps everything fully secured to the hair brush
- Crafting tweezers – can also be helpful for placing gems but you can get away without using them
Shop:


Step-By-Step Guide To Decorating Your Hair Brush
For my visual learners:
Step 1: Prepare Your Brush
Before getting started on this beachy hair brush decoration, you’ll want to make sure your actual brush is nice and clean.
Step 2: Design the Mermaid Pattern
Next, you’ll want to plan your seashell hair brush decoration pattern. You can lay out the big seashells on the brush and begin visualizing your design before you glue them down and make it permanent.
Shop Decorations:

Step 3: Attach the Seashells, Pearls, and Beads
Using E-7000 glue, attach the seashells first because they’re the biggest and you’ll want to work around them. Place the glue around the perimeter of the seashell and then place it onto the hairbrush. You can also glue around the edges of it once it’s placed as well, however the glue will dry slightly visible so you’ll want to cover it with pearls.
*You need proper ventilation when using this glue to avoid nausea!
If you choose to glue pearls onto your seashells, paint your shells with the pearl top coat first!
Next, glue your pearls, beads, and other tiny items. The small pearls can be easier to attach using diamond art pens.


How to Use Diamond Art Pens And Wax:
Spread the glue onto a small section of the hair brush – it dries in a few minutes so you have a substantial time to work with. Dip the hollow end of your pen into the wax (for this craft, I used the smallest option). Gently press the pen onto the top of the flat backed pearl, and then firmly press it onto the tacky area. The pearl should release automatically, however, if you accidentally got glue on the pen it may stick to the tool versus the art piece, so be sure to wipe it every now and then.
Self-Stick:
Self stick pens are the best because they work exactly the same but no wax required!
Shop Tools:

Step 4: Add a Pearl Top Coat
Using a fan brush and pearl white metallic acrylic paint, you can paint a thin layer onto the seashells and beads for a pearl finish. You can drop a tiny amount onto the seashell directly, or use a paint palette or plastic dish.
Shop Tools:
Step 5: Add a Securing Top Coat
A polyurethane top coat – painted on with a fan brush – will really secure the shells and pearls to the hair brush to ensure they won’t fall out when you use it. Your coating should be nice and thin – I somewhat stabbed the bristles in between the pearls to ensure they were secured.
Shop Tools:
Step 6: Repeat On The Front & Sides
Repeat the process of adding shells, pearls, glue, pearl coat, and secure coat along the sides and front of the brush until you’re happy with it!
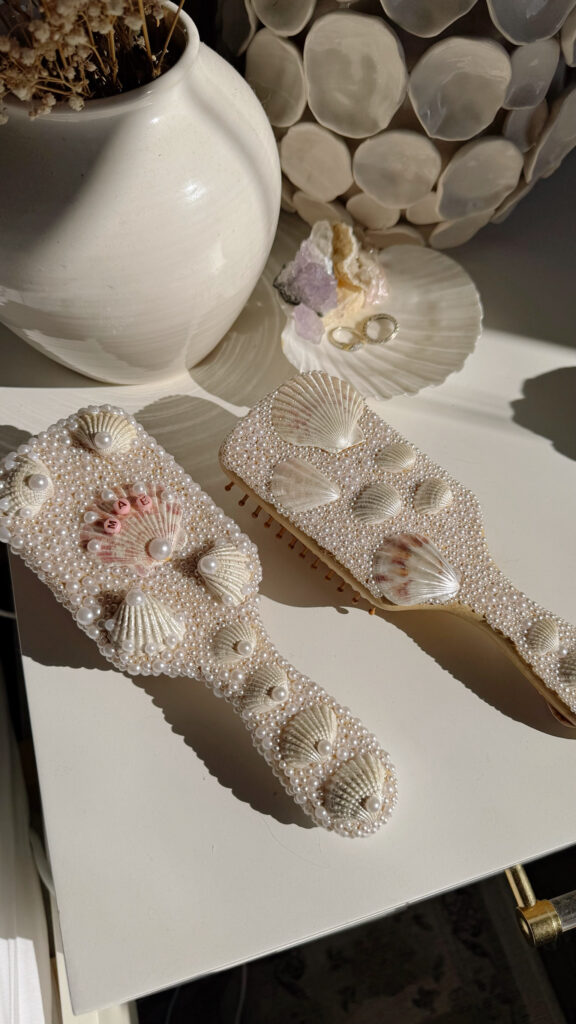
Our Hair Brushes:


My Crafting Setup

A cute crafting setup isn’t completely necessary, but when I planned this mermaid-inspired craft, I found the cutest seashell bowls to hold the decorative shells and set out some other crafting decor that I already had!
Tools:
Crafting Decor:


Additional Tips
There are so many potential ways for this mermaid aesthetic craft to look and endless things you can attach to it for an adorable look. You can always attach charms – such as seashells and starfishes. Another fun idea is colorful crystals, gem stones, as well as faux diamonds.
Shop More Decorations & Tools:


Show Off Your Mermaid-Inspired Hair Brush
Whether you’re making this beachy craft for a friend or for yourself, I hope you have so much fun recreating this at home. Share your completed work here in the comments or tag me on social media so I can see what you’ve made.
More Craft Ideas
There are so many fun and girly crafts to do this spring and summer! I love nothing more than hosting a girls night full of crafts, snacks, and girly fun.
Mermaid Seashell Hair Clips
Seashell Hair Clips
Step by step instructions for DIY seashell hair clips! I got everything from Amazon and had so much fun doing this with my friends.
Tutorial:

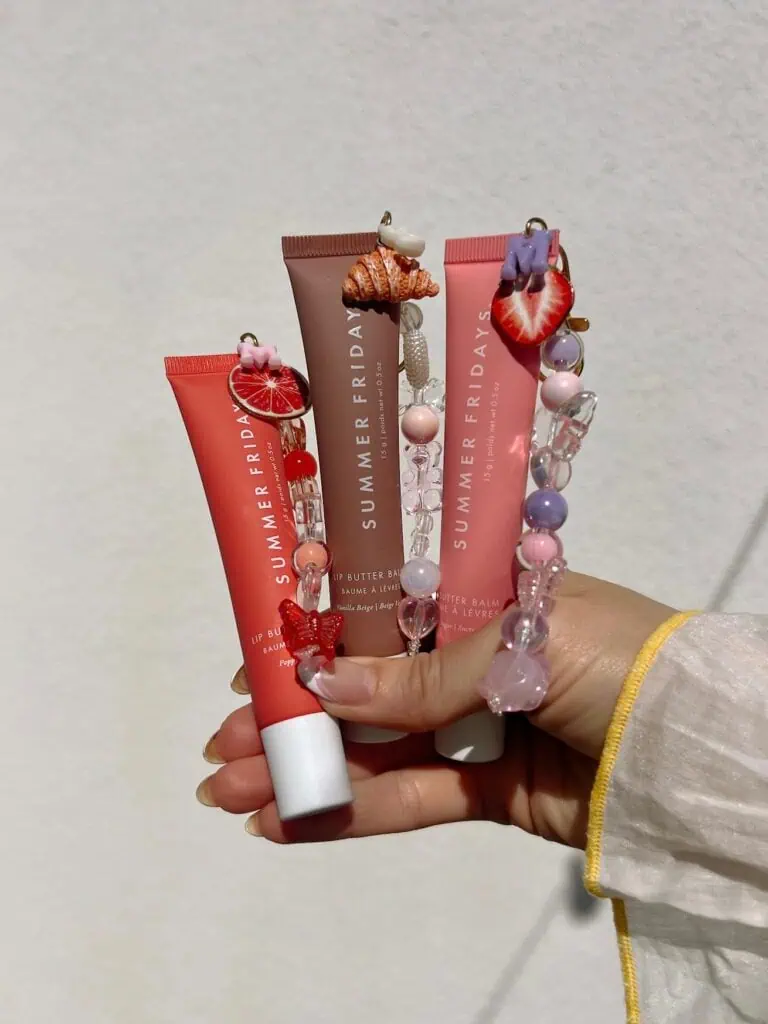
Lip Balm Keychains
Step by step instructions for DIY lip gloss keychains and everything you need to make them! I got most of my supplies from Amazon. They make for such a cute, thoughtful, and affordable gift idea! I had so much fun with this craft – it’s perfect for a girl’s night in.
Tutorial:
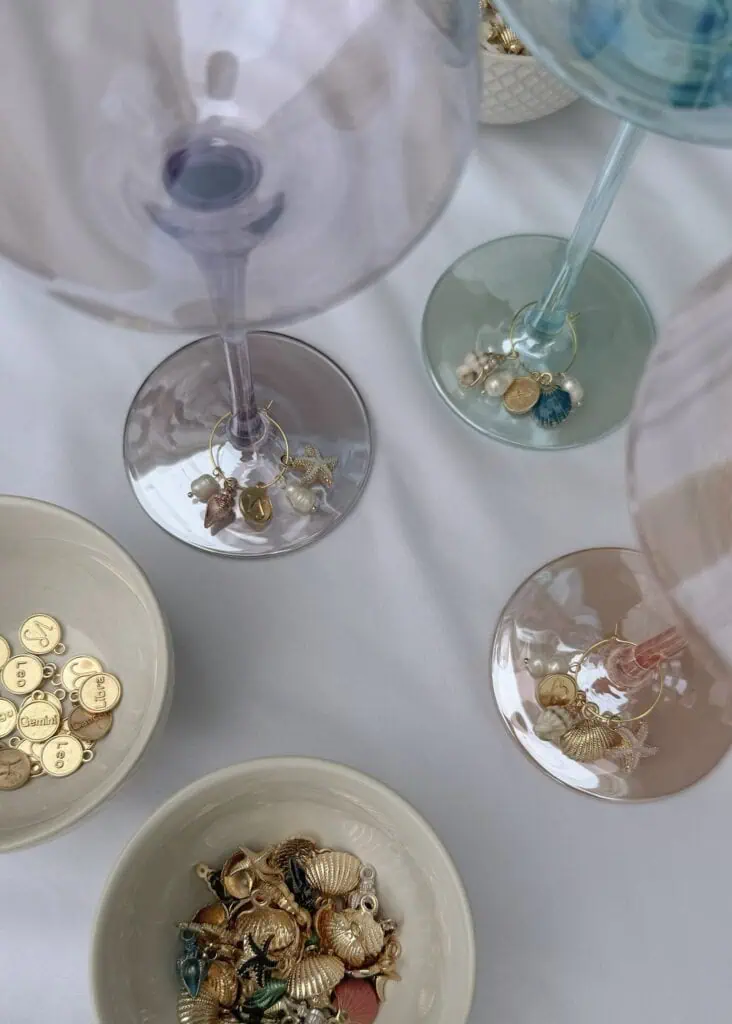
Wine Glass Charms
We got everything from Amazon, and it was the easiest craft yet! They turned out soo cute, and we were all able to make so many – so everybody could take their own sets home! I went for a zodiac/mermaid theme and couldn’t be happier with the end result.
Tutorial:
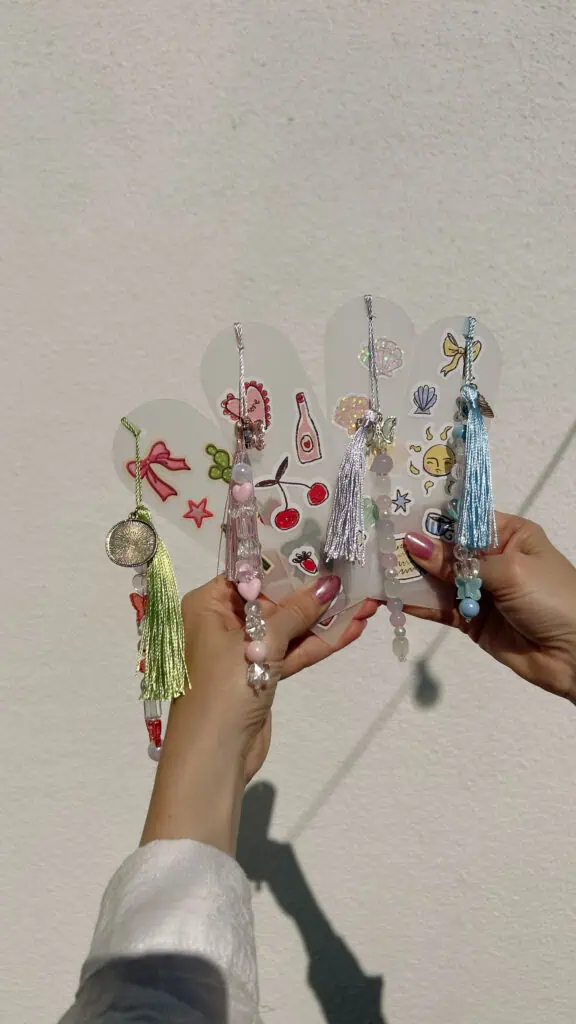
Cute Bookmarks
I made charm necklaces with my friends the other day and they turned out so cute! I found so many cute charm packs on Amazon. So it was actually a really affordable activity. I have so many leftover that I can use for other crafts (such as lip gloss keychains and wine markers).
Tutorial:
Charm Necklaces
made charm necklaces with my friends the other day and they turned out so cute! I found so many cute charm packs on Amazon. So it was actually a really affordable activity. I have so many leftover that I can use for other crafts.
Tutorial:

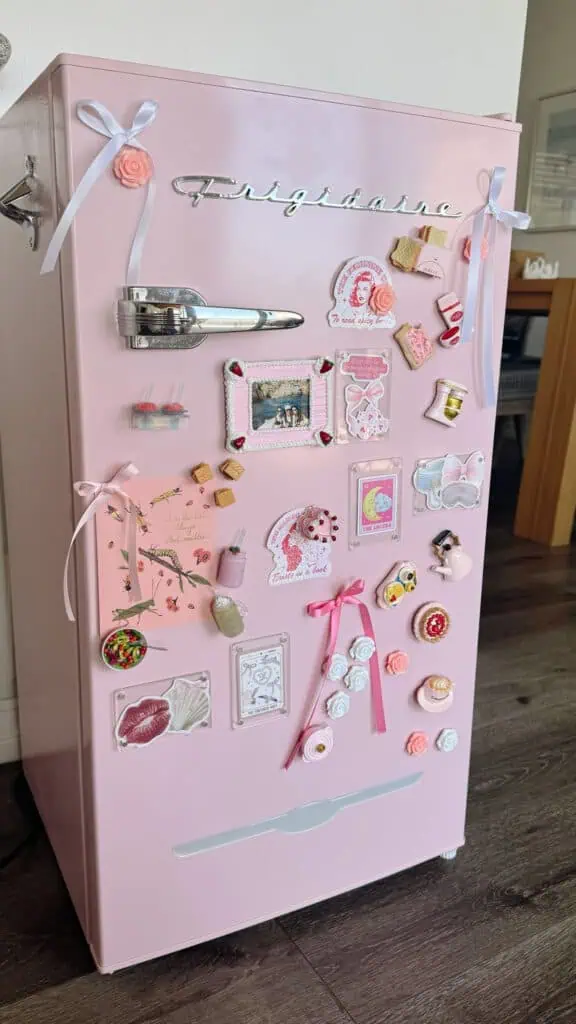
DIY Fridge Magnets
This DIY refrigerator magnet craft idea is perfect for an easy activity for a girls night in! The first step to a craft night is a cute setup! These placemats are my favorite for craft nights because they’re so easy to clean! The resin from this project wiped right off. These MiniVerse crafts are so much fun! I used the diner collection, but they have so many collections to to choose from!
Tutorial:
You might also like