


How to Make Chocolate Strawberry Clusters
Discover how to make chocolate strawberry clusters with this easy and delicious recipe. Perfect for quick homemade treats or a sweet gift. Simple, tasty, and satisfying!


Chocolate strawberry clusters have been calling my name for so long! I’m always on the lookout for easy dessert recipes and when I see a healthier dessert with fruit, I add it to the top of my list. I’ve been so eager to try these homemade treats and it turned out to be so fun – and most importantly – delicious! These sweets are perfect all year round, whether it’s Valentine’s Day, a party, or just a casual snack. They could even make for a sweet gift wrapped up in a cellophane bag! Today I’ll be sharing exactly how to make these fun and yummy chocolate strawberry clusters.
Why Chocolate Strawberry Clusters Are a Perfect Treat
Chocolate covered strawberries is one of my favorite desserts ever, and chocolate strawberry clusters are not only super easy, but absolutely delicious. You can make them using just two ingredients, sliced strawberries and melted chocolate. Or you can add more ingredients, such as bananas, peanut butter or salt. You can even use different types of chocolates. You can also add toppings at the end such as crushed nuts or sprinkles. This treat is truly customizable to your preferences – which is one of the best parts!
If you’re looking for a healthier dessert to enjoy, then you’ll love this recipe because it’s good for you and it’ll still cure your sweet craving! Strawberry and chocolate is the best combination because it’s so delicious. But did you know there are actual benefits to eating strawberries and chocolate? Strawberries contain antioxidants and vitamin C. Meanwhile, chocolate has more antioxidants and mood-boosting properties. The antioxidants found in chocolate and strawberries are wonderful for our cardiovascular healthy because they actually reduce your risk of cancer, heart disease and stroke. And if you like chocolate in general, then you’ll love this recipe due to its simplicity. Who doesn’t enjoy an easy chocolate recipe?


Ingredients for Chocolate Strawberry Clusters
There are only two mandatory ingredients for chocolate clusters – being chocolate and strawberries – but the rest is up to you! I think that sprinkles is a really fun way to make this treat festive as well.
You can use vegan chocolate, sugar-free chocolate, any nut butter, or yogurt as an alternative to coating the fruit as well!
Essential Ingredients
- Fresh strawberries
- Your choice of chocolate (dark, milk, or white)
Optional Add-ins and Toppings
- Peanut butter
- Salt
- Bananas
- Chopped nuts
- Sprinkles
- Orange or lemon zest
What I Used
- Strawberries
- White chocolate
- Dark chocolate
- Peanut butter
Using the best ingredients will always result in the best end-product, so it’s important to buy quality items for optimal taste.
What You Need to Make Chocolate Strawberry Clusters
Equipment:
- Parchment paper
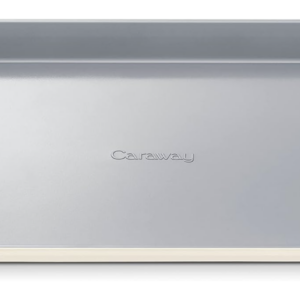
- Baking sheet
- Cookie sticks
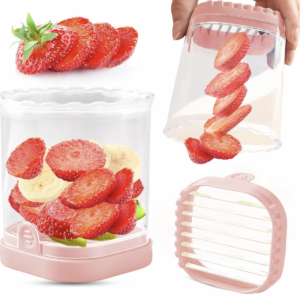
- Strawberry slicer (optional!)


How to Make Chocolate Strawberry Clusters: Step-by-Step Instructions
This easy chocolate strawberry recipe only requires a few steps, and today I’m going to take you through a very detailed guide on how to make chocolate strawberry clusters.

Step 1 – Preheat the Oven
Preheat the oven to it’s lowest temperature, my oven goes to 170 F degrees.
Prepare baking sheet by placing parchment paper on it.
Step 2 – Prepare Your Strawberries
Wash your strawberries by soaking them in a solution of cold water and a small amount of baking soda or vinegar. Then rinse them thoroughly with cold water, and pat them dry to ensure the chocolate will stick.
Cut them into your preferred size. Using this fruit chopping tool makes it easier and faster to get the perfect size cut every time.


Step 3 – Melt the Chocolate
Line your baking sheet with 4-6 chocolate bars and place in the oven for about 5-7 minutes.
You can use any chocolate flavor but I used half dark and half white because it makes for a very pretty end product when you swirl them together.
Any chocolate brand works but using the same brand for all of the bars will melt the best due to being the same size.
Step 4 – Swirl the Chocolate
Once the chocolate is melted enough, take the chocolate out of the oven and swirl it together using a cookie stick.
This step is really only necessary if you did different chocolate flavors (such as white and dark). But make sure you don’t over-mix the two colors because it’ll just become one.

Step 5 – Add Your Strawberries
Add lots of strawberries to your chocolate before it begins to harden.
I try to fill the entire area with strawberries and then press then down slightly to avoid them falling out later on. I leave a little space between the strawberries to show the chocolate!
Step 6 – Add Peanut Butter
Place a spoonful or two of peanut butter in a ziplock bag & cut a small corner off (a smaller hole makes a thinner drizzle).
Drizzle the peanut butter across the chocolate sheet.
Freeze for 20 minutes (or until peanut butter hardens).
Step 7 – Cut into Squares
Remove the baking sheet from the freezer. Lift the chocolate fruit bark out of the baking sheet by lifting the edges of the parchment paper. Place it on the cutting board, parchment paper facing down.
Cut into squares – size is up to your preference.
Tips for Perfect Chocolate Strawberry Clusters
You can’t go wrong with this recipe, but just remember that the ingredients itself make for perfect chocolate strawberry clusters!
- You can also do this process in a reverse method. You’ll start by melting chocolate in a bowl in the microwave. Lay out strawberries on parchment paper in whatever formation you like, and spoon the melted chocolate onto them and spread around.
- If you’re melting chocolate in a bowl, you’ll want to add coconut oil for a better consistency.
- A drizzle finish makes for a really aesthetic finish, but if you’d rather spread it on you can too! Sprinkles and nuts can also be added for a more visually appealing look.
How to Store Chocolate Strawberry Clusters
Proper Storage Methods
Storing chocolate strawberry clusters is really easy! I store them in an airtight container in the freezer so the peanut butter remains hardened. You can do the fridge if it’s just chocolate and strawberries, however, the freezer is preferred.
How Long Do They Last?
In the fridge, these chocolate treats should last 4-5 days. But much longer in the freezer! You can always make a few batches and store in the freezer since it lasts so much longer.
Creative Variations of Chocolate Strawberry Clusters

Fruit Bark
You can also make chocolate fruit in bark form! I used pomegranate seeds because they’re one of my favorites. However, strawberries, raspberries, bananas would be delicious. Once it hardens, you could even spread a peanut butter layer, and freeze again.
Christmas Chocolate Bark
This is a great Christmas recipe because you can use whatever ingredients you’d like! Any chocolate, any toppings, any candy. The more festive the better!


Valentine’s Day Bark
The Valentine’s version is just as fun as the Christmas one. I used pink vanilla melts and white chocolate for this, but again, it’s customizable!
When to Serve Chocolate Strawberry Clusters
Perfect for Special Occasions
Serving chocolate strawberry clusters doesn’t require a special occasion but if you do have an event coming up, they are such an easy treat. They’re perfect for celebrations such as birthdays, holidays (especially Valentine’s Day!), or romantic date nights. Strawberry chocolates is a classic romantic treat and this is a really easy way to recreate that flavor.
Ideal for Gifting
These chocolate strawberry clusters are so delicious and make such a wonderful gift for your friends and family!
I made Valentine’s Day bark for my friends for Galentine’s and they looked so cute in these cellophane bags with bows!
Shop bags & bows:


Great for Parties
I love serving chocolate strawberry clusters at parties! They’re so easy to make and last a while in the freezer so you can always prep them a few days in advance of hosting. If you’ve hosted a party before, then you know how much work it takes – especially day of. So being able to prep some of the food in advance is such a life saver.
Printable Recipes

Chocolate Strawberry Clusters
Equipment
- baking sheet
- Parchment paper
- Cookie sticks
Ingredients
- Strawberries
- White chocolate
- Dark chocolate
- Peanut butter
Instructions
- Preheat the oven to it’s lowest temperature, my oven goes to 170 F degrees.
- Prepare baking sheet by placing parchment paper on it.
- Wash your strawberries by soaking them in a solution of cold water and a small amount of baking soda or vinegar. Then rinse them thoroughly with cold water, and pat them dry to ensure the chocolate will stick.
- Cut them into your preferred size. Using a fruit chopping tool makes it easier and faster.
- Line your baking sheet with 4-6 chocolate bars and place in the oven for about 5-7 minutes.
- You can use any chocolate flavor but I used half dark and half white because it makes for a very pretty end product when you swirl them together.
- Any chocolate brand works but using the same brand for all of the bars will melt the best due to being the same size.
- Once the chocolate is melted enough, take the chocolate out of the oven and swirl it together.
- This step is really only necessary if you did different chocolate flavors (such as white and dark). But make sure you don’t over-mix the two colors because it’ll just become one.
- Add lots of strawberries to your chocolate before it begins to harden.
- I try to fill the entire area with strawberries and then press then down slightly to avoid them falling out later on. I leave a little space between the strawberries to show the chocolate!
- Place a spoonful or two of peanut butter in a ziplock bag & cut a small corner off (a smaller hole makes a thinner drizzle).
- Drizzle the peanut butter across the chocolate sheet.
- Freeze for 20 minutes (or until peanut butter hardens).
- Remove the baking sheet from the freezer. Lift the chocolate fruit bark out of the baking sheet by lifting the edges of the parchment paper. Place it on the cutting board, parchment paper facing down.
- Cut into squares – size is up to your preference.
Notes
Essential Ingredients
- Fresh strawberries
- Your choice of chocolate (dark, milk, or white)
Optional Add-ins and Toppings
- Peanut butter
- Salt
- Bananas
- Chopped nuts
- Sprinkles
- Orange or lemon zest
Proper Storage Methods
Storing chocolate strawberry clusters is really easy! I store them in an airtight container in the freezer so the peanut butter remains hardened. You can do the fridge if it’s just chocolate and strawberries, however, the freezer is preferred.How Long Do They Last?
In the fridge, these chocolate treats should last 4-5 days. But much longer in the freezer! You can always make a few batches and store in the freezer since it lasts so much longer.
Fruit Bark
Equipment
- Cookie sheet/rimmed baking sheet
- Parchment paper/wax paper
- Cookie sticks or straws for swirling
Ingredients
- 2 milk chocolate bars
- 2 white chocolate bars
- 1 pomegranate or 1 pomegranate cup
Instructions
- Pre-heat oven to 170 F degrees and put parchment paper on a baking sheet.
- Lay chocolate bars flat. Bake for 5-8 minutes depending on the thickness of the bar (the same brand of chocolate used throughout works the best!)
- Swirl the chocolate bars together with a cookie stick until you can no longer see any of the original lines from the bars.
- Gently press the fruit into the chocolate to avoid them falling out when you cut the bark.
- Place the sheet into the fridge for at least 2 hours.
- Cut into squares and store in the refrigerator.
Notes

Christmas Bark
Equipment
- cookie sheet
- Parchment paper
- Straws or sticks for swirling
Ingredients
- 2 white chocolate bars
- 2 dark chocolate bars
- 2 milk chocolate bars
- toppings of your choice
Instructions
- Preheat the oven to 120 degrees.
- Line a cookie sheet with parchment paper and place 6 chocolate bars in a flat, even layer.
- Bake for 8-10 minutes on the center rack of the oven.
- Swirl the chocolate bars together with a cookie stick until you can no longer see any of the original lines from the bars.
- Decorate the bark with whatever toppings you'd like.
- If you're in a hurry, you can freeze the bark for 30 minutes or refrigerate for an hour. Letting it harden at room temperature will prevent condensation.
- Break the bark into pieces & enjoy!
Notes

Valentine’s Day Candy Bark Recipe
Ingredients
- White chocolate
- Pink candy melts
- M&M’s Valentine’s Day mix
- Mini pretzels
- Sprinkles
Instructions
- Pre-heat the oven to the lowest temperature it will go – around 120-170 F. Place wax paper on a baking sheet.
- Place chocolate bars on the prepared sheet. Bake for about 5 minutes.
- Melt pink candy melts separately in a bowl in the microwave for 30 second intervals, stirring in between. Plop the pink evenly onto the melted white chocolate.
- Using a cookie stick, swirl the chocolates together.
- Sprinkle the chocolate with M&M’s and mini pretzels (or whatever toppings you’ve chosen).
- Lightly toss sprinkles over the toppings and then allow the chocolate to harden at room temperature for a couple of hours – or overnight.
- Gently remove the chocolate from the pan by lifting the wax paper edges. Place on a cutting board and cut into whatever sized square you like.
- If you’re giving these out as gifts, I recommend using cellophane bags and twist tie bows to make it special!
Notes
You might also like