


How to Make Miniature Books
My reading space is my happiest place! The process required a lot of trial and error, but we finally mastered the perfect way to create mini books. I’ve decided to create this guide on how to make mini books – including the free template I created!


My reading space is my happiest place! I love to change up the decor on my rotating bookshelf, and when I saw miniature books on Pinterest, I thought it’d be the perfect decoration on my shelf. There’s so many fun ways to display miniature versions of your favorite books in your reading space! The process required a lot of trial and error, but we finally mastered the perfect way to create mini books. I’ve decided to create this guide on how to make mini books – including the free template I created!
How to Make Miniature Books
What Is A Miniature Book
Miniature books are simply homemade mini versions of your favorite books! They’re so cute to display in a shadow box, mini bookshelf, a jar, etc. If you have a cozy reading corner, then this is the perfect craft for you and your space. Whether you make them with a book club or your book loving besties, this hobby is so relaxing and fun to do.

What You Need to Make Mini Books
- Mini book template – you can use the miniature book template I made on Canva for free!
- Sticker paper – be sure to print your books on the brighter side of the sheet
- Access to a printer – if you don’t have a printer, you can take your sticker paper to a nearby printing center (I went to UPS!).
- Blank mini books – this size from Amazon works perfectly with the template I created
- A place to display them (optional) – a shadow box (and glue), a mini bookshelf, a TBR jar, etc.
Shop Materials I Used:


How To Make A Mini Book
For My Visual Learners:
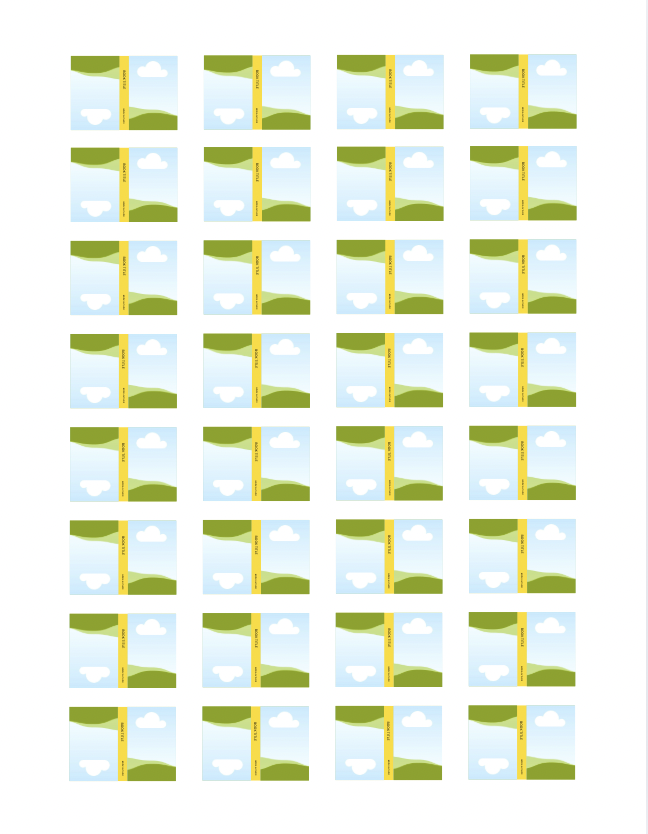
Step 1: Access A Mini Book Template
I started to create each book manually but it was so time consuming and difficult to perfectly match them up in size, so I created a template using Canva! This insured that each book was the same size and more uniform looking!
I’ve made the template public so you can use it for free! I would like to preface that it may not perfect as it’s my first time making a shareable template!!
I’ve also seen people create book covers by searching the book title with the phrase “front and back cover”. You can copy and paste the images that way in a Canva document and line them all up.
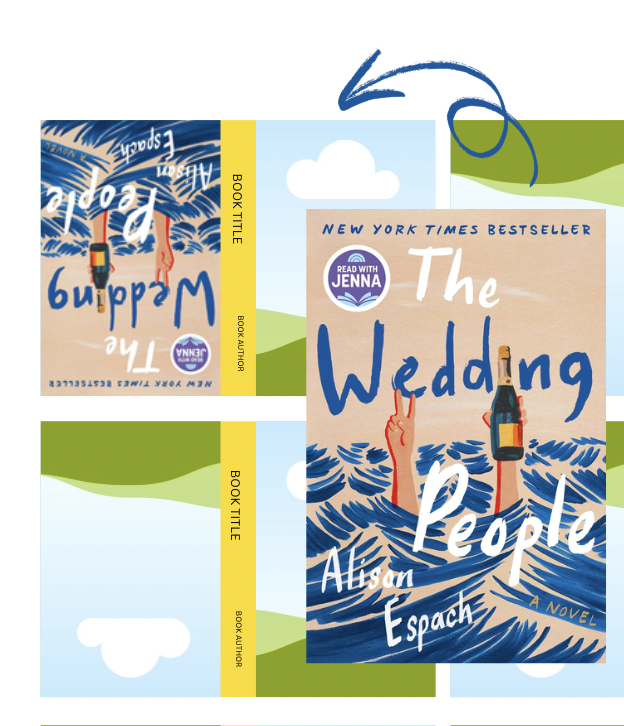
Step 2: Add Book Covers
The fastest way to do this part, is to use your Good Reads, Amazon, or Google to find the book cover image. Select copy image – there’s no need to download all of the covers and fill up your storage – and then select Ctrl+V on Windows or Cmd+V on macOS.
Simply drag your image to the front cover to see it populate the gallery frame. Paste the image again, and drag it to the back cover of the same book (it will automatically rotate the image).
You can do your favorite books, your entire library, your to-be-read

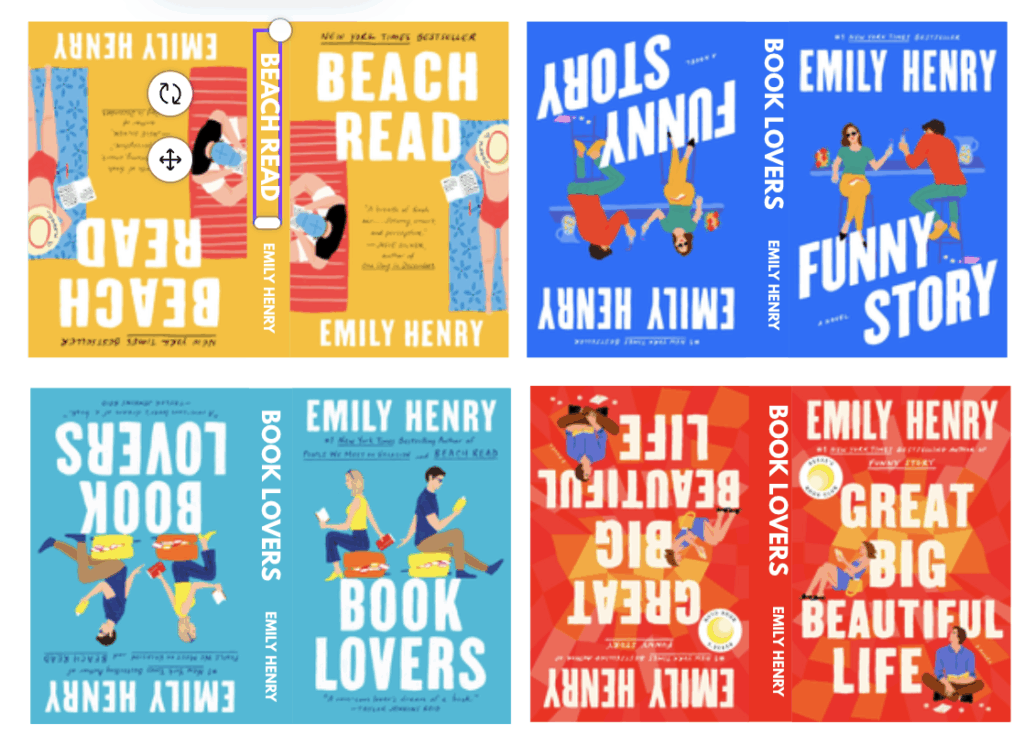
Step 3: Edit Spine Text
Type the book title and author into the designated text boxes. Next, browse fonts that best match the book, or search the font style of the book to find the exact – Canva may have it!
I like to do the text before the spine color so that I can make sure the title and author are perfectly aligned in the middle. Once you add the color it can be harder to tell.
Step 4: Adjust Spine Colors
It is finally time to match the spine colors to the covers! With the text and background, Canva allows you to use a dropper tool to select the exact shade from the cover.


Step 5: Repeat For All Of Your Books
It can also be faster to do all of your books at once – for example, I did all of the covers first, and then added all of the text, and then changed all of fonts, and then the colors at very the end.
Pro Tip:
When you create series – or different books from the sam author – you can make them perfectly uniform by typing one title and author text, adjusting to one font, and then copy and pasting onto the other books. Once they’re all matched up, tweak the titles and colors.

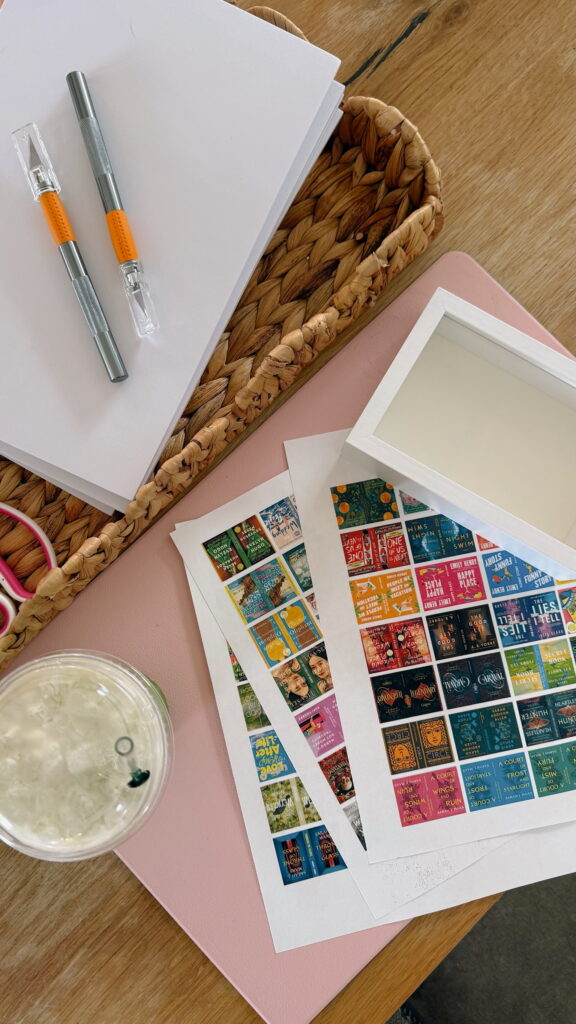
Step 6: Print Mini Books
Save your file as a PDF and then print onto 8.5 x 11 paper. I used sticker paper from Amazon to make this process even easier!
Step 7: Cut Out Your Books
I used a paper cutter for this step to get quick, perfect lines. As I mentioned earlier, this is my first time creating a template so the alignment may not be perfect. So carefully cut across vertically with the paper cutter until you have all of your strips, then separate and cut the scraps off with scissors.


Step 8: Attach Book Strips
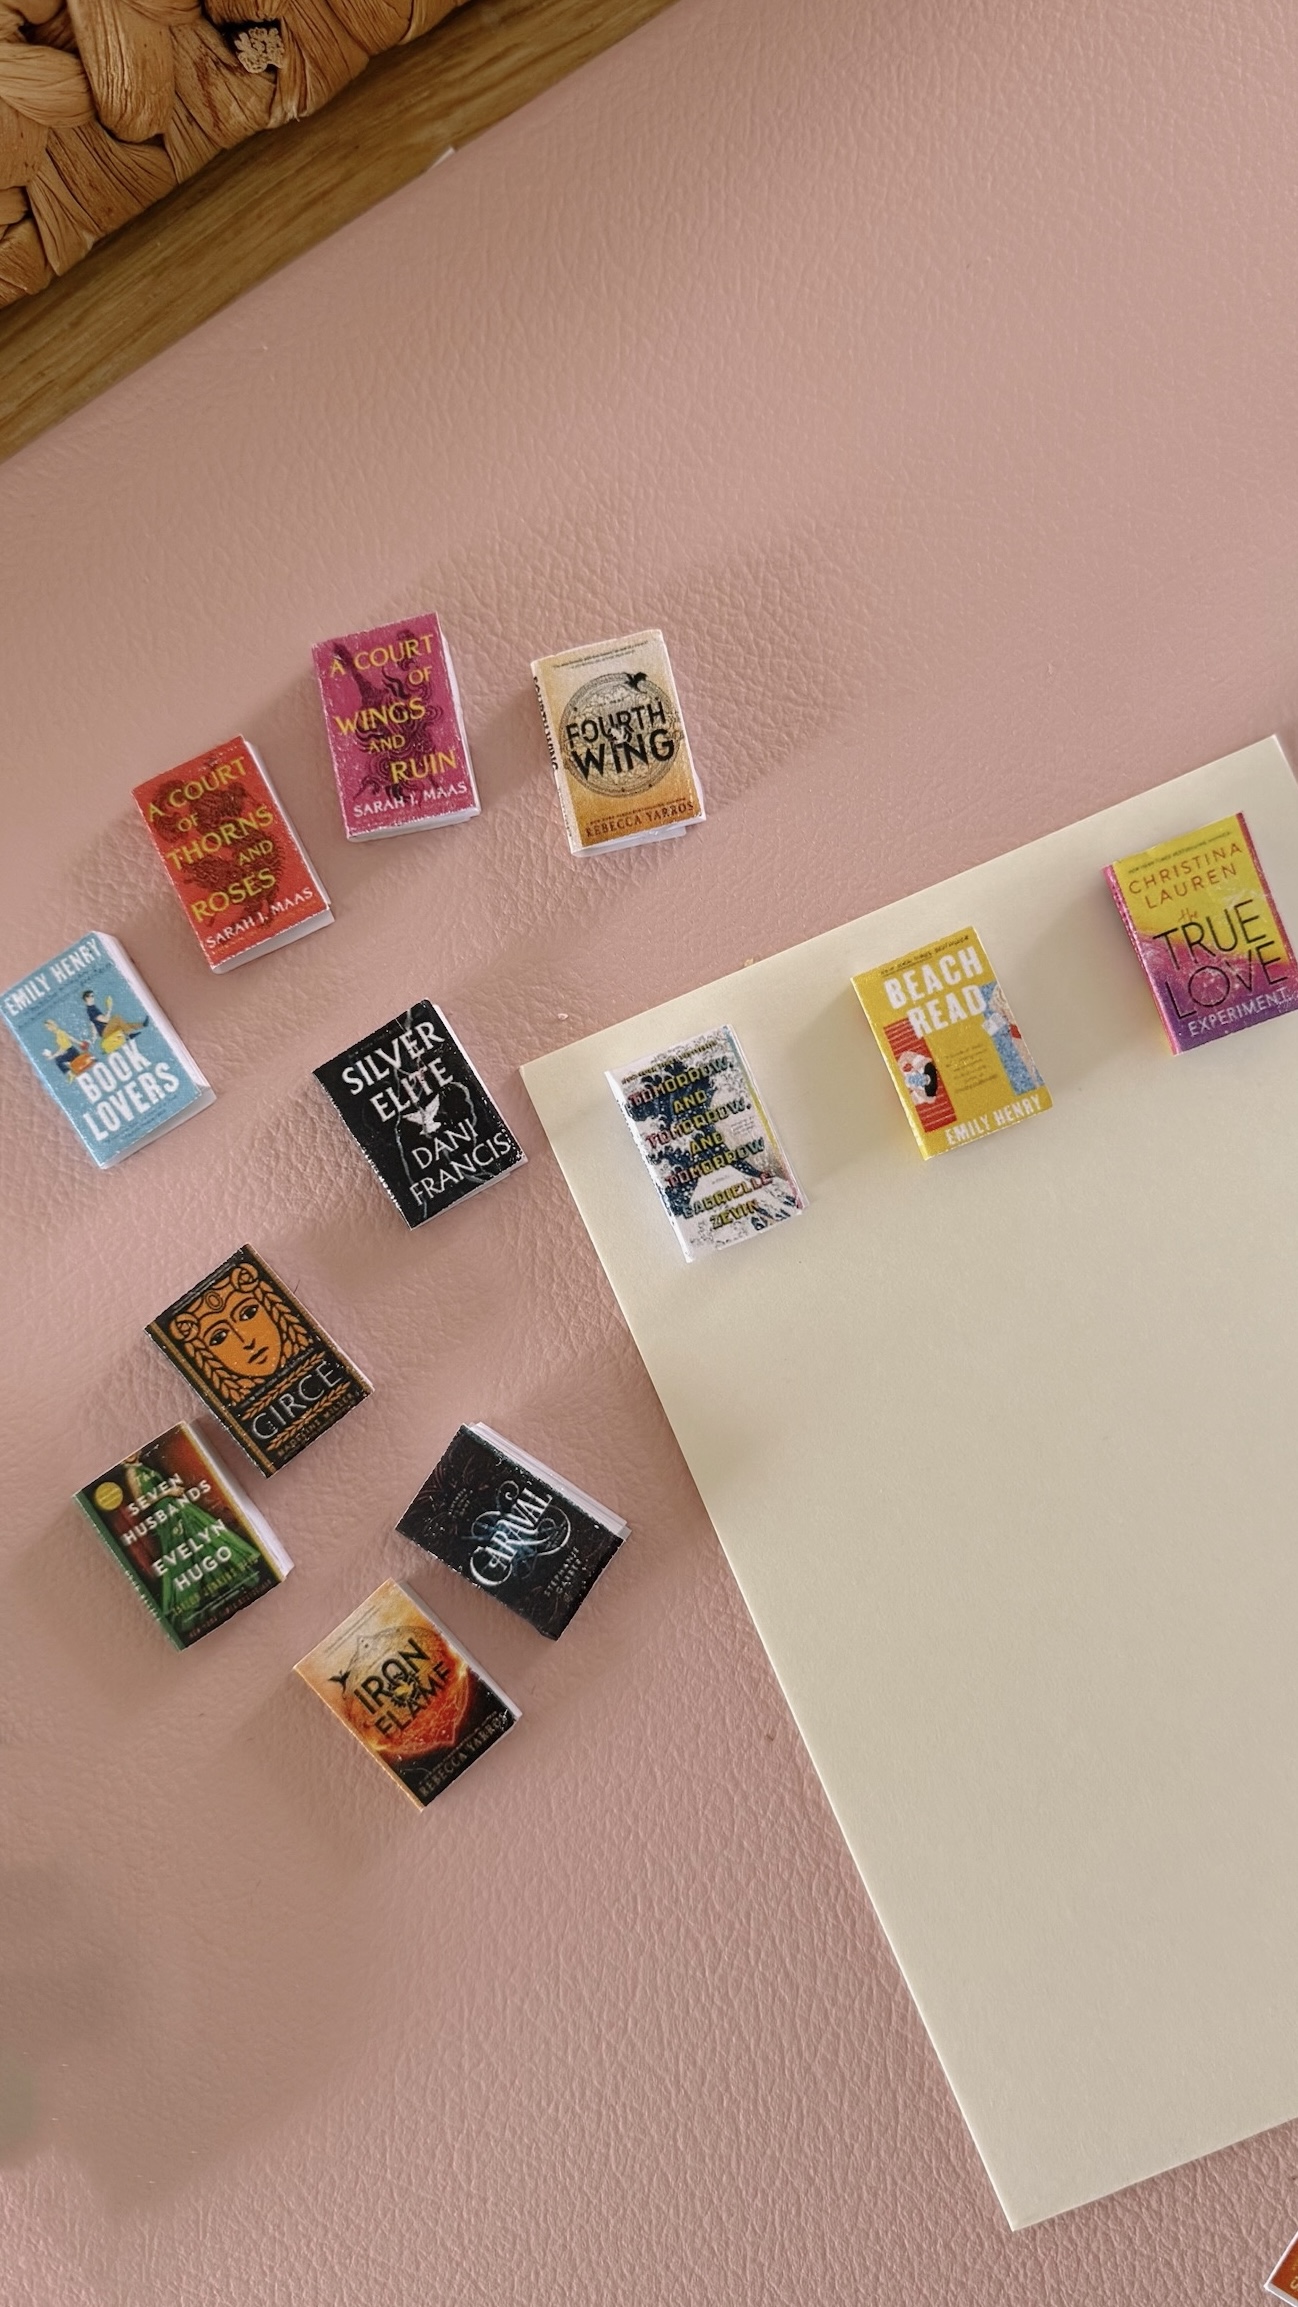
Peel the sticker backing off of one sheet and line up the spine of the blank mini book, then gently press down and flatten the sticker onto all sides.
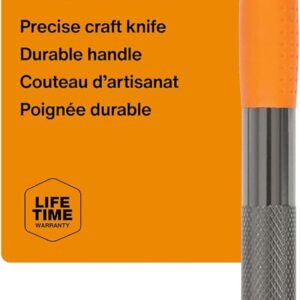
A precise craft knife can make peeling the sticker a little easier if you have long nails like me!
And You’re Done!
You should now have a bunch of cute miniature books. There’s so many fun ways to display them!

How To Display Mini Books
There are so many fun things to do with your miniature books! I did a shadow box while my friend did a bookshelf, and they both looked so cute on my full size bookshelf. If you have a reading corner, this is the perfect addition.
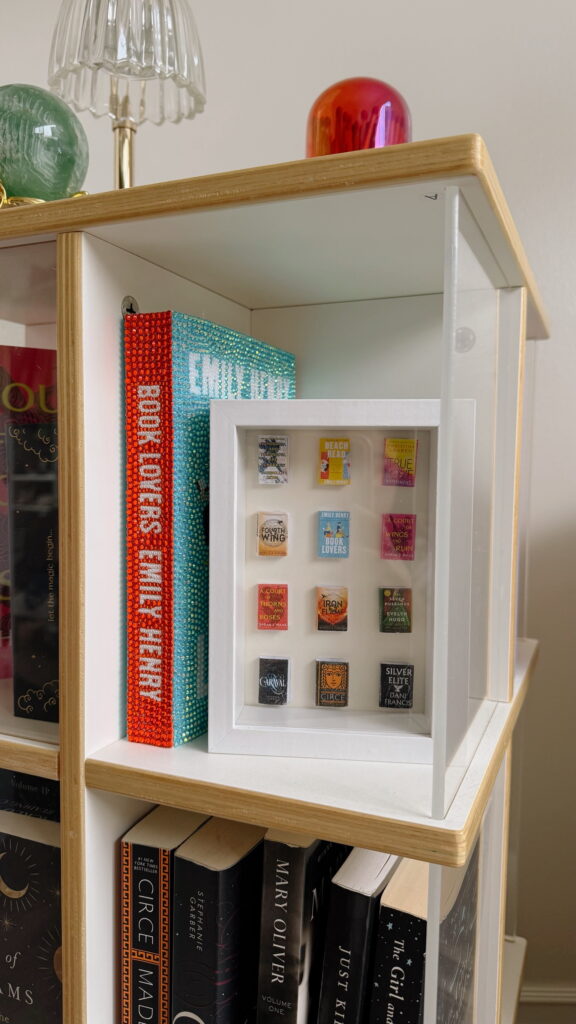
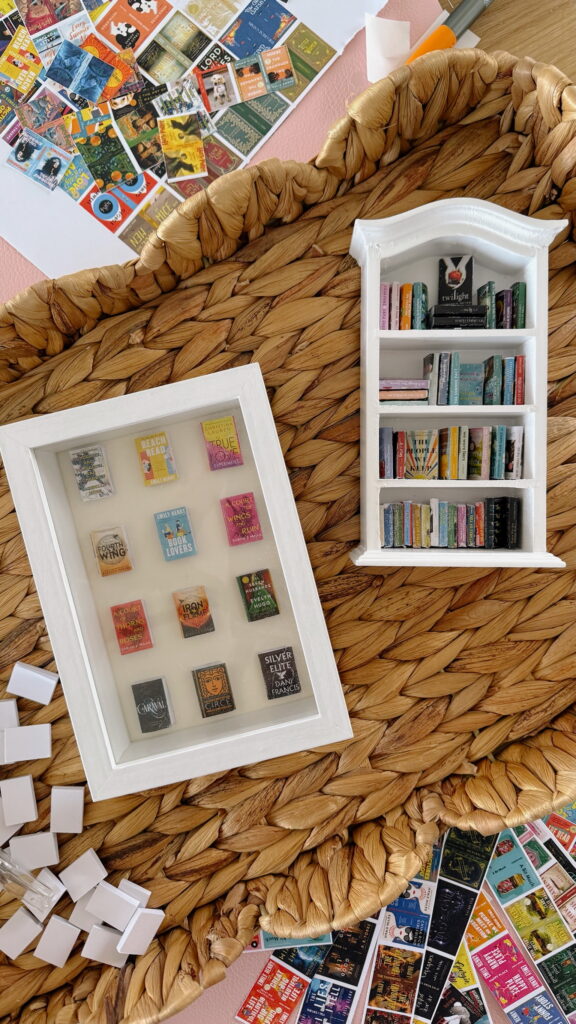
1. In A Shadow Box
Glue the pages together by brushing glue onto the opposite side of the spine (where the open pages are). I recommend doing this step before attaching the book sticker so that you don’t damage the cover, but it’s okay if it’s too late! Then, use the same glue to attach them on the shadow box sheet. You can use a ruler to line them up perfectly.
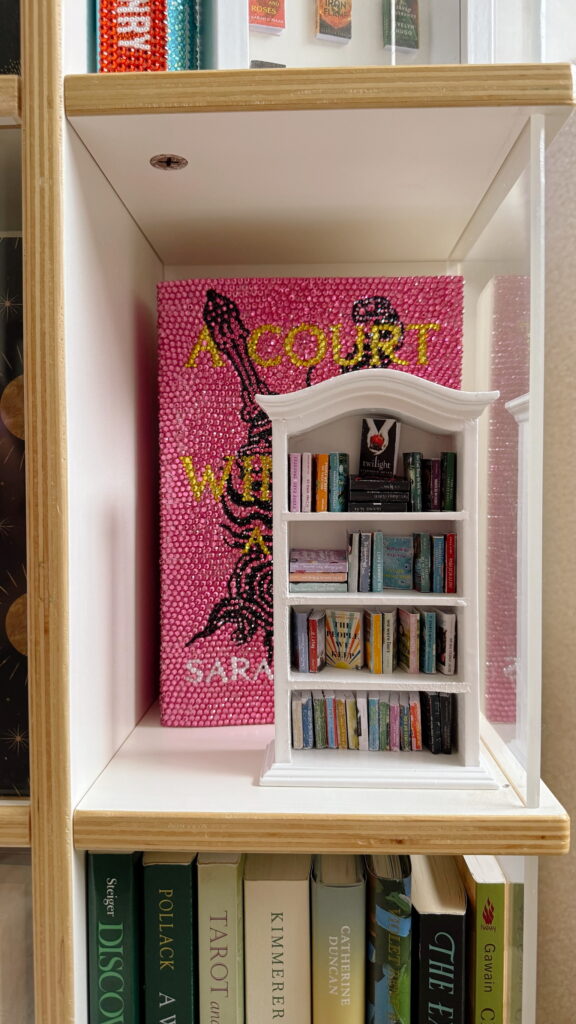
2. In A Mini Bookshelf
You can place them into fun categories on a mini bookshelf! You can glue them into place, but if you don’t glue them, you’ll have the freedom to add more over time/reorganize!
3. TBR Jar
Decorate a jar and fill it with your mini books!
More Craft Ideas

How To Make Lip Gloss Keychains
Step by step instructions for how to make lip gloss keychains and everything you need to make them! I got most of my supplies from Amazon. They make for such a cute, thoughtful, and affordable gift idea! I had so much fun with this craft – it’s perfect for a girl’s night in.
More Detailed Tutorial:
Watch Me Make Them:
Summer Reading Bookmarks
I’ve made bookmarks a few times, and they always turn out so fun and cute! If you’re a book lover and avid reader like me, this project is especially perfect! I think it’d be so cute to do at your next book club or girls night.
More Detailed Tutorial:
Watch Me Make Them:

You might also like