


Organizing Craft Supplies
Crafting is one of my favorite ways to spend my time. Whether I’m scrapbooking alone or bedazzling hair brushes with my friends, it’s such a

Crafting is one of my favorite ways to spend my time. Whether I’m scrapbooking alone or bedazzling hair brushes with my friends, it’s such a great way to be creative and productive. Crafting does come with plenty of supplies, however, and it can become cluttered quite quickly. Organizing craft supplies can be a challenge because the items come in all shapes and sizes. So today I’m sharing a guide on how to effectively and efficiently organize craft supplies at home.
What Are The Benefits Of Organizing Craft Supplies
Keeping your craft supplies organized can have a ton of benefits! Here are just a few reasons why you should:
- Easily access supplies for a craft day or project
- Inspires you to create a new project when you see what you have
- Keeps the rest of your home organized
- Helps you avoid losing supplies, especially small things
- Reminds you what supplies you have so you don’t accidentally order again
How To Organize Craft Supplies
Step 1: Designate An Area
Whether you’re using a craft cart, a craft cabinet, a bookshelf, etc., it’s important to have a designated space for your craft supplies so they stay organized!
Mine + More Ideas:


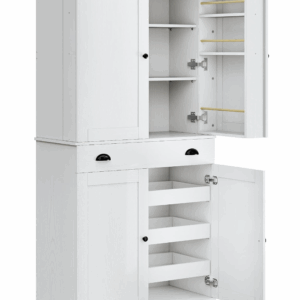
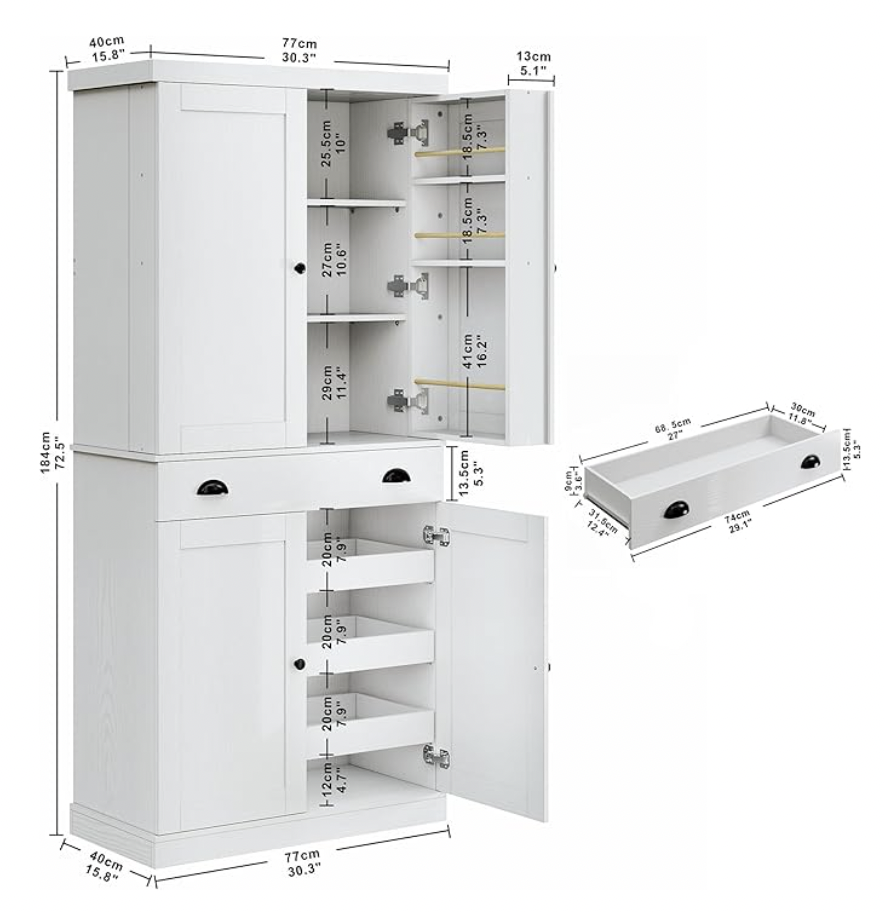
After researching all of my options, I decided to purchase a storage cabinet from Amazon that I knew would fit everything perfectly. My office is also my crafting space, so I knew it’d be perfect in there.
Step 2: Measure The Space
Measure the space in your craft room or use the product’s listed dimensions. Your craft supply will be a lot more organized if you utilize bins and organizers versus throwing everything into drawers.
Step 4: Plan Organization Project
Some people may prefer to go straight into organizing, but this step is really helpful if you’re adding bins or have a lot of things to organize. I try to plan my organization projects in advance but it’s usually a process of trial and error. Often, I end up with a couple leftover bins but they’re easy to return – or use in another unorganized area.
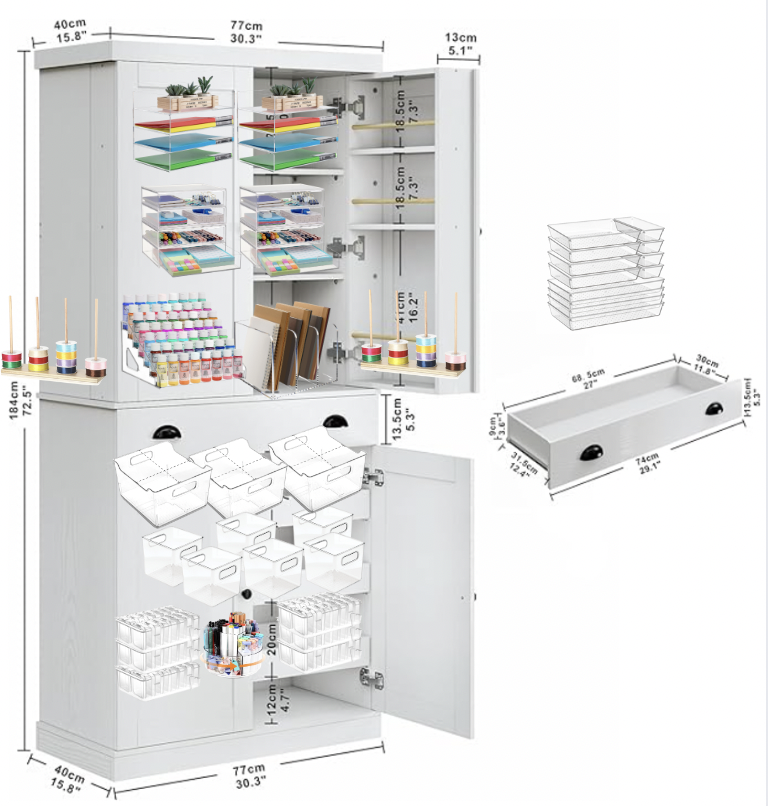
For this project, I made a rough plan using Canva! I thought all of the supplies I would need to organize and then found organizers online that would fit everything. Not everything fit exactly how I envisioned but this still helped me a lot!
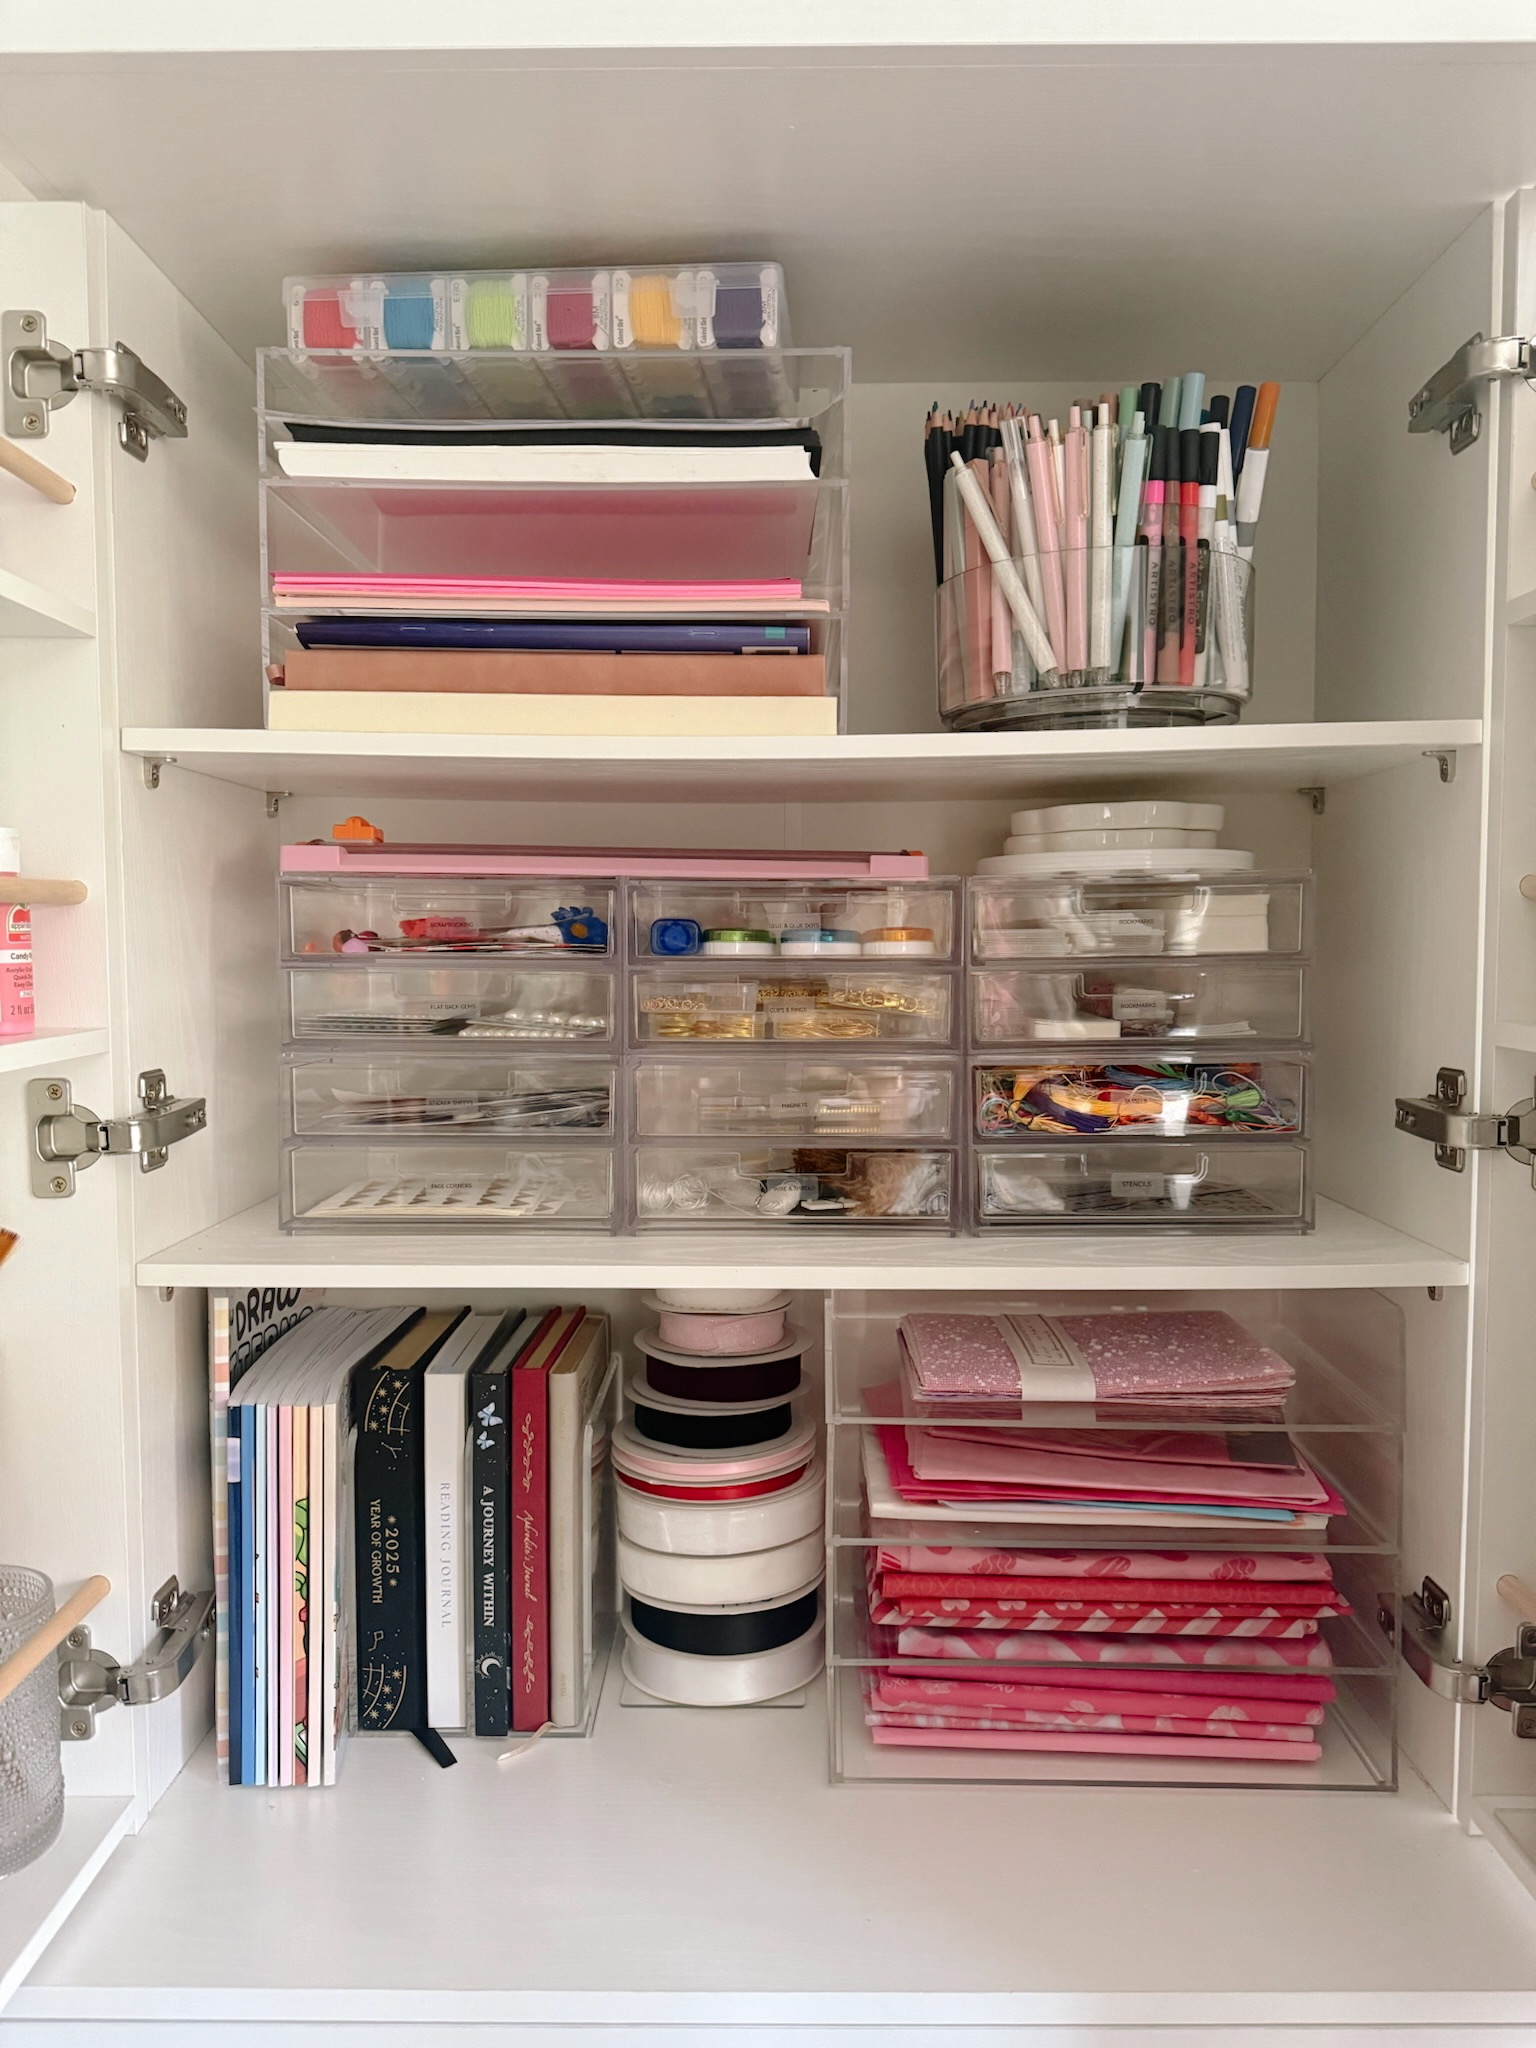
Step 5: Add Organizers and Bins
Giving everything a place is so important because your art supplies can stay a lot more organized! I bought my organizers from Amazon because they have any shape and size you need.
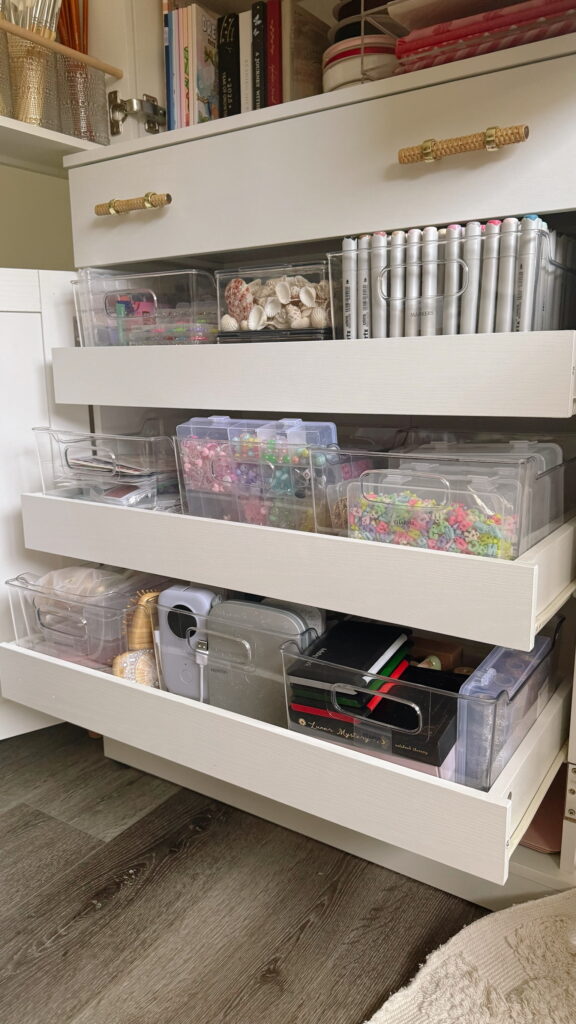
Once you have the bins and storage you need, fill up your main cabinet or cart. It’s almost like a game of Tetris but it’s so satisfying when the bins are all in.
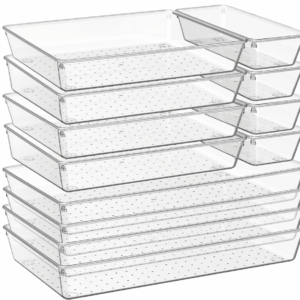
The Bins I Used:


Step 6: Organize Supplies
Once the bins are all fitted, begin organizing your supplies. I put the most used items at easy reach and the less used items higher up. I changed my mind so many times during this process but eventually it all worked!


See how I used the organizers below!
Step 7: Label
Using a label maker, I added labels to each section of my art supply. I think this is especially great if you’re sharing your craft supplies with kids, for example. I used transparent labels so that they didn’t cover up the contents too much! I used a bigger B21 label maker for the larger bins and then a small D11 label maker for the smaller areas. Labeling small containers of gems can also come in super handy so you know what size and colors you’re reaching for exactly.


Shop Label Making Supplies:


Step 8: Change the Hardware
This step is optional, but I chose to change the knobs and handles on my craft cabinet just to make it feel more like me! When I was looking through cabinets, this one wasn’t my favorite looks wise, but the interior of it was exactly what I needed for craft supplies. So I decided to purchase it and change the hardware. I tried so many pulls and none were the right measurement, so I eventually went with adjustable handles and I wish I did it sooner! I also ordered and tried a few knob options, but the gold seashells matched the rattan pulls perfectly. Now when I see my craft cabinet, it makes me so excited – not to mention it matches the rest of my home and office so much better.
Shop the Hardware:


What Are The Best Craft Supplies Organizers
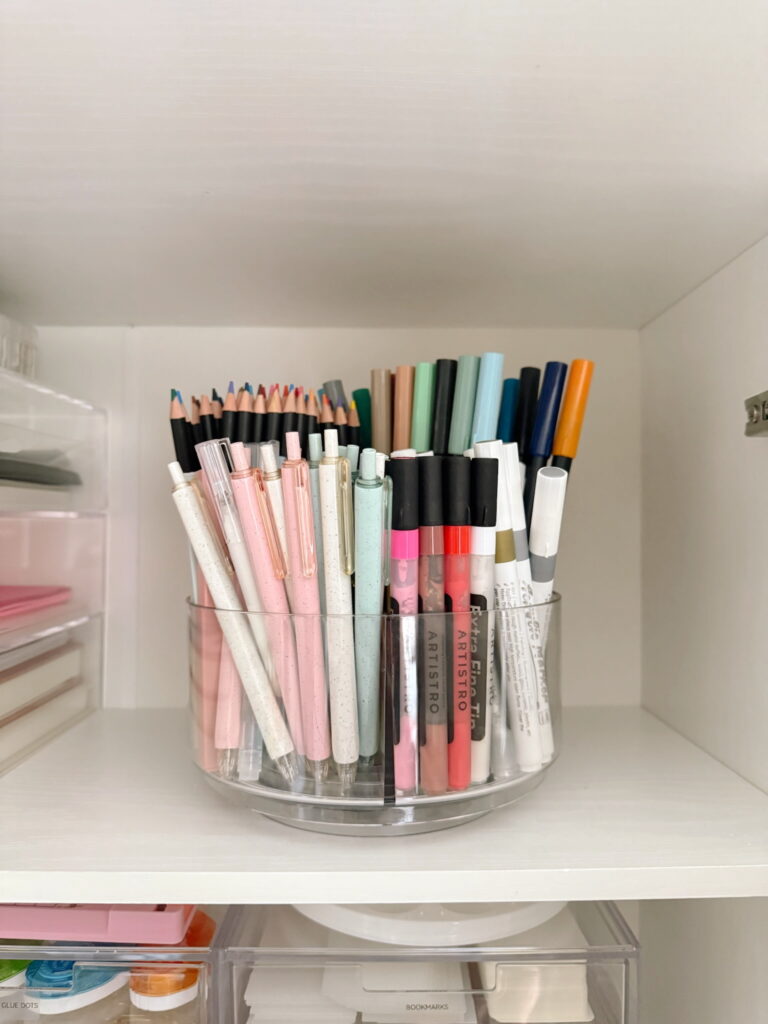
Turntable Supplies Holder
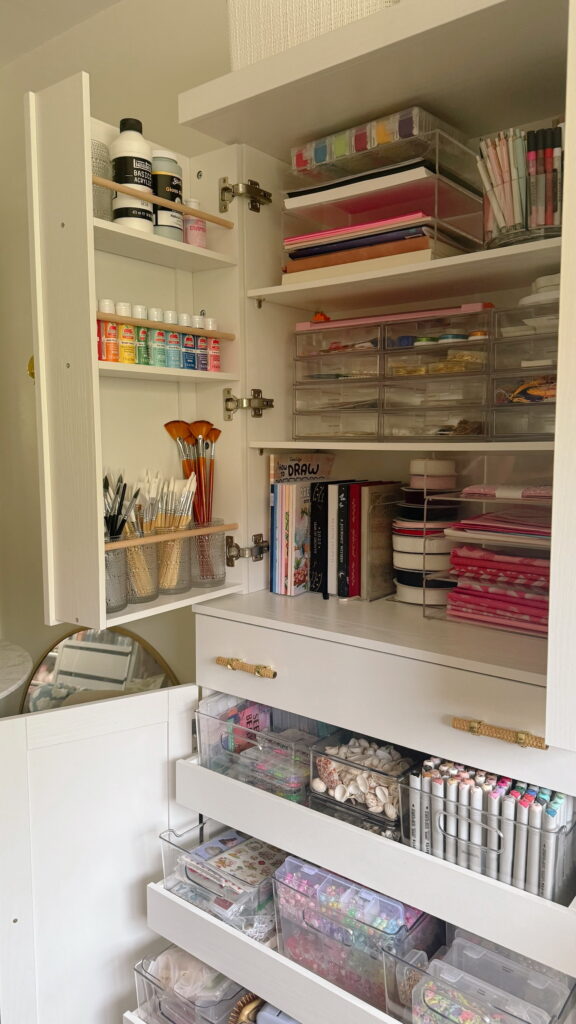
I love this turntable holder for supplies like paint brushes, pens, scissors, etc. The turntable feature makes it so easy to access. I store colored pencils, acrylic paint pens, felt pens, ballpoint pens, and highlighters.
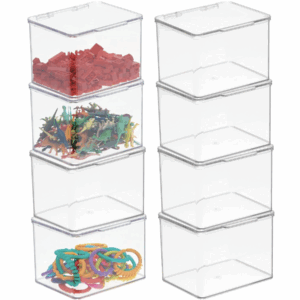
Storage Bins
I added storage bins to the pullout drawers in my crafting cabinet so that all of my materials had a specific home. As I mentioned earlier, this really helps to keep your crafting space organized.
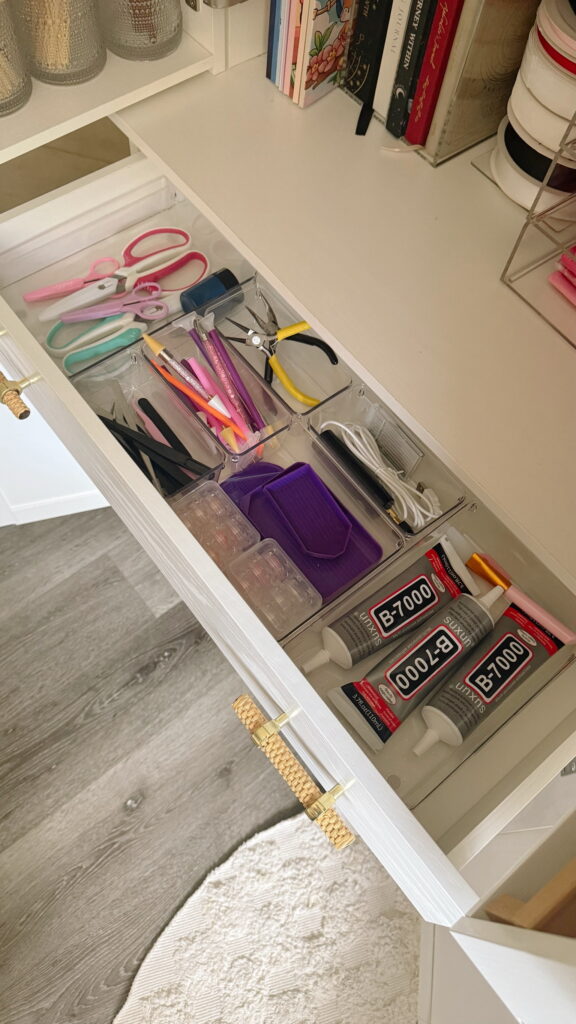
Drawer Organizers
If your craft area has a lot of drawers, some organizers for the drawer itself can make such a difference.
Drawers
Countertop drawers come in so handy for organizing small items such as stickers, pens, paperclips etc.
Magazine Holders
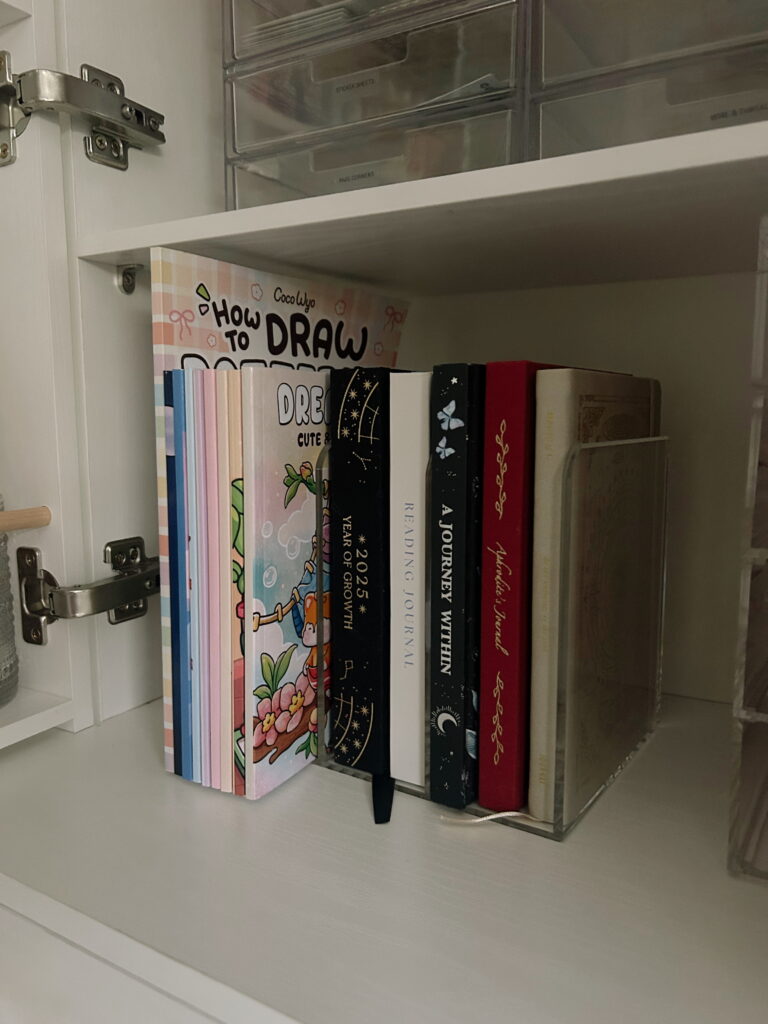
I love these acrylic holders – typically meant for magazines – to store my coloring books, notebooks, etc.
Stackable Paper Trays
These trays are so great for storing scrapbooking paper. I have so many fun colors and prints and this storage rack makes it so easy to see all of my options.


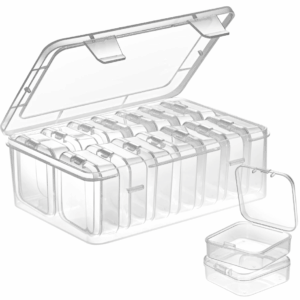
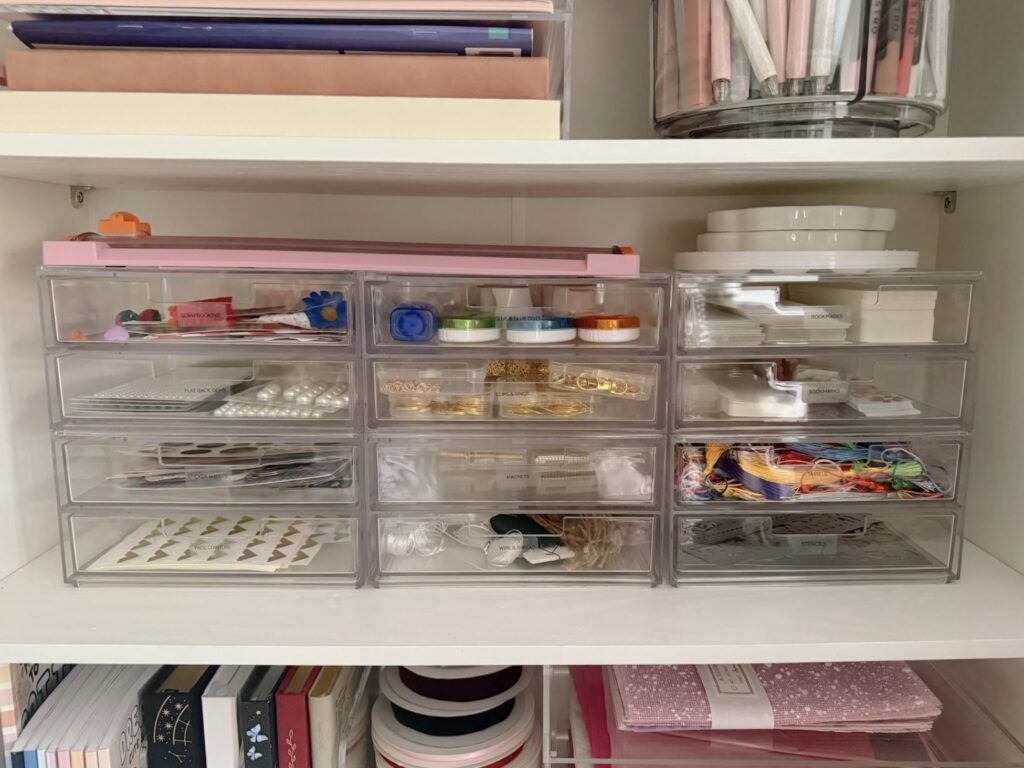
Bead & Charm Trays
There’s a few options for organizing charms, beads, and gems. A drawer system works, but I like that this option has removable cases for each section so that you can grab just the ones you want. These little organizer boxes are great for charms, gems, beads, etc. I used the bigger box option for charms and the smaller box option for rhinestones. Sometimes, I also like to use these individual boxes for small items and the bigger box for a separate thing! I used a few sizes for my overall project because I also used them to store small items such as magnets, jump rings, etc.
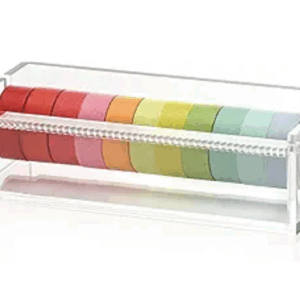
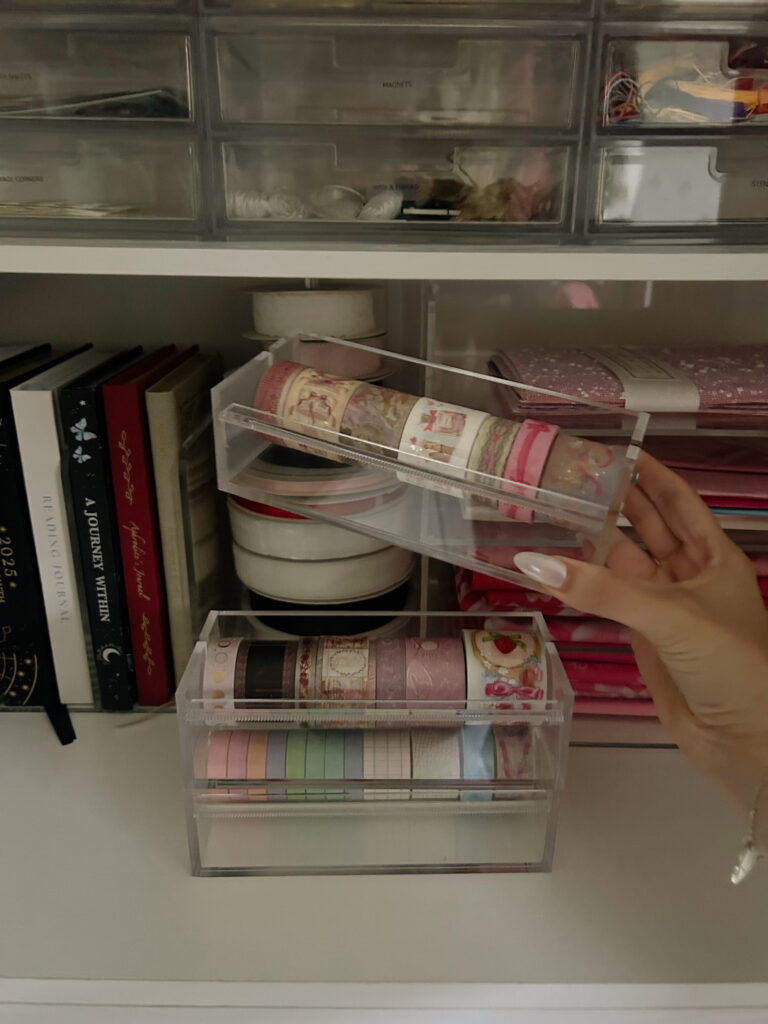
Washi Tape Holder
These tape dispensers are a great size to keep several washi tapes on a stick. You can also stack them if you have a lot! I ordered 3 and it fit my washi tapes perfectly.
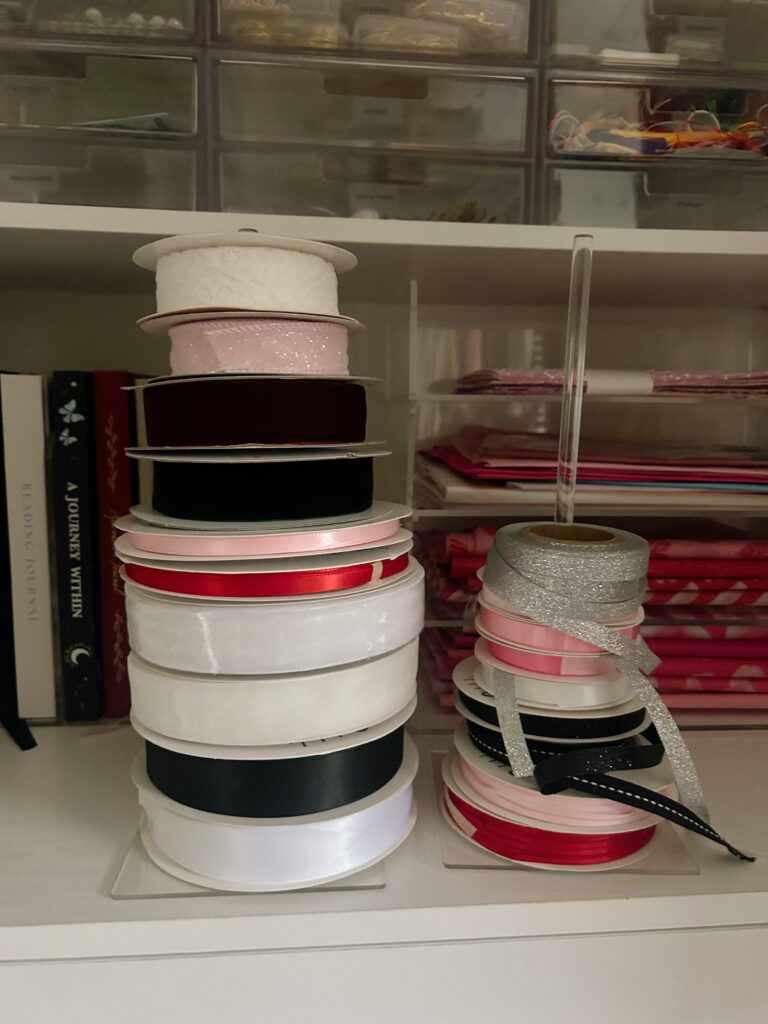
Donut Stands
These acrylic stands are meant for donuts or bagels at a party, however, I thought they’d be perfect for ribbon! I keep the more full stand on one of the main shelves, and then the smaller stand in the door.
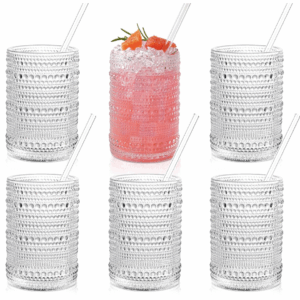
Cups
I used this hobnail drinking glass set for holding my paint brushes in the cabinet door! My brushes are so quite long so the door provided the perfect height for them to stand without being crushed. I also store an empty one on the top shelf by my large paints, and then I use it as my “water cup” when I’m painting. You can use open jars, glasses, or whatever cups you’d like!

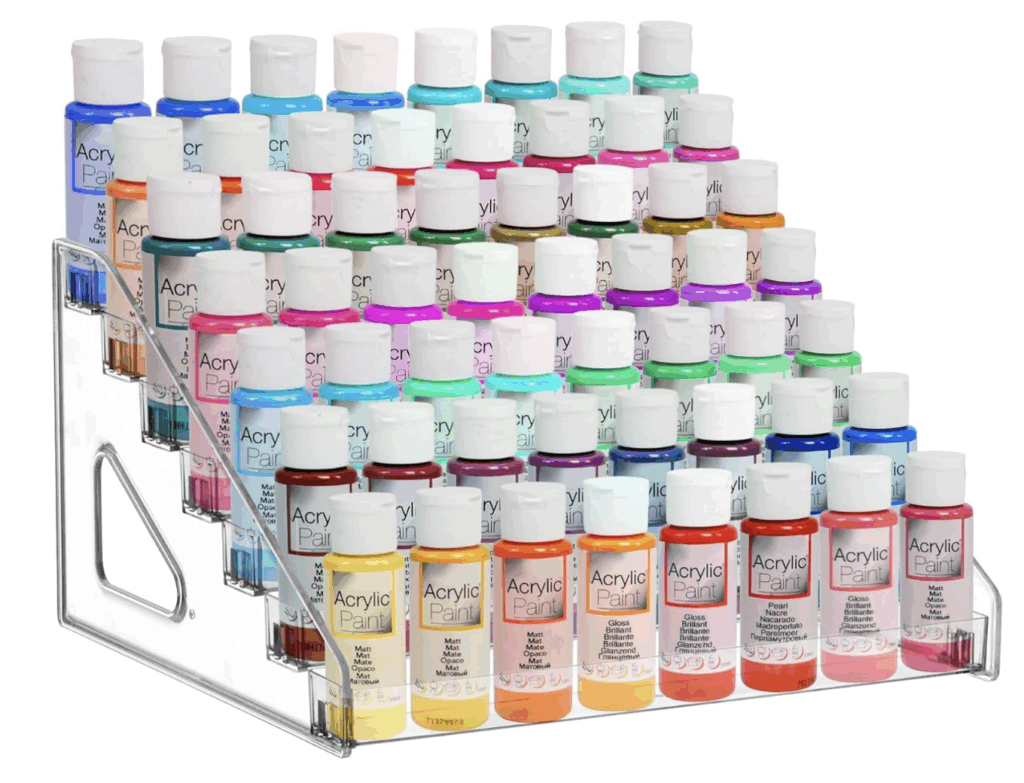
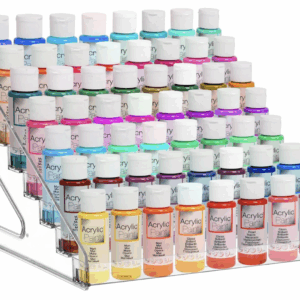
Acrylic Display Rack
For my space, it made sense to organize the paints in the door instead! I did the colorful paints in rainbow order in the left door and then the neutral paints in the right door.
A display rack also works perfectly for displaying paints – and looks so aesthetic while doing so. If the paints are color coordinated, it looks even cuter.
Craft Ideas
I’ve done so many fun crafts with my friends over the years, and so often I find myself repurposing the supplies for other crafts! This new system is going to help me find stuff so much easier – I can’t wait to use my newly organized craft space.
Mermaid-Inspired Hair Brushes
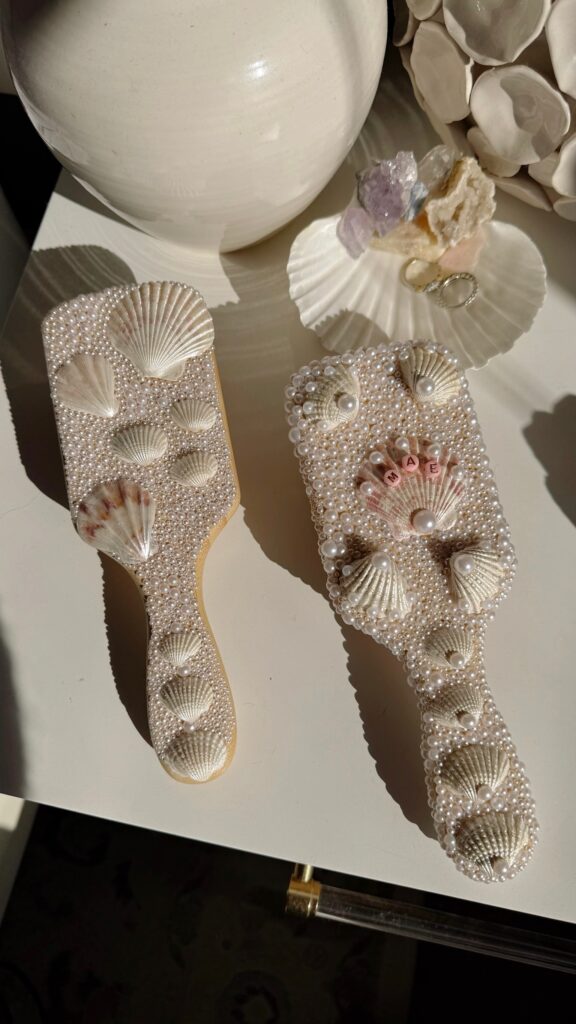
Step by step instructions for DIY mermaid hair brushes! I got everything from Amazon and had so much fun doing this with my friends.
More Detailed Tutorial:
Watch Me Make Them:
DIY Book Bedazzling
I love how this craft not only encourages reading but it also boosts creativity! It makes my favorite books look so fun and different from the rest, they look so adorable on display on my bookshelf. I’ve made this step-by-step DIY guide on how to bedazzle a book so you can easily recreate this craft on your own.
More Detailed Tutorial:
Watch Me Make Them:

Lip Balm Keychains

Step by step instructions for how to make lip gloss keychains and everything you need to make them! I got most of my supplies from Amazon. They make for such a cute, thoughtful, and affordable gift idea! I had so much fun with this craft – it’s perfect for a girl’s night in.
More Detailed Tutorial:
Watch Me Make Them:
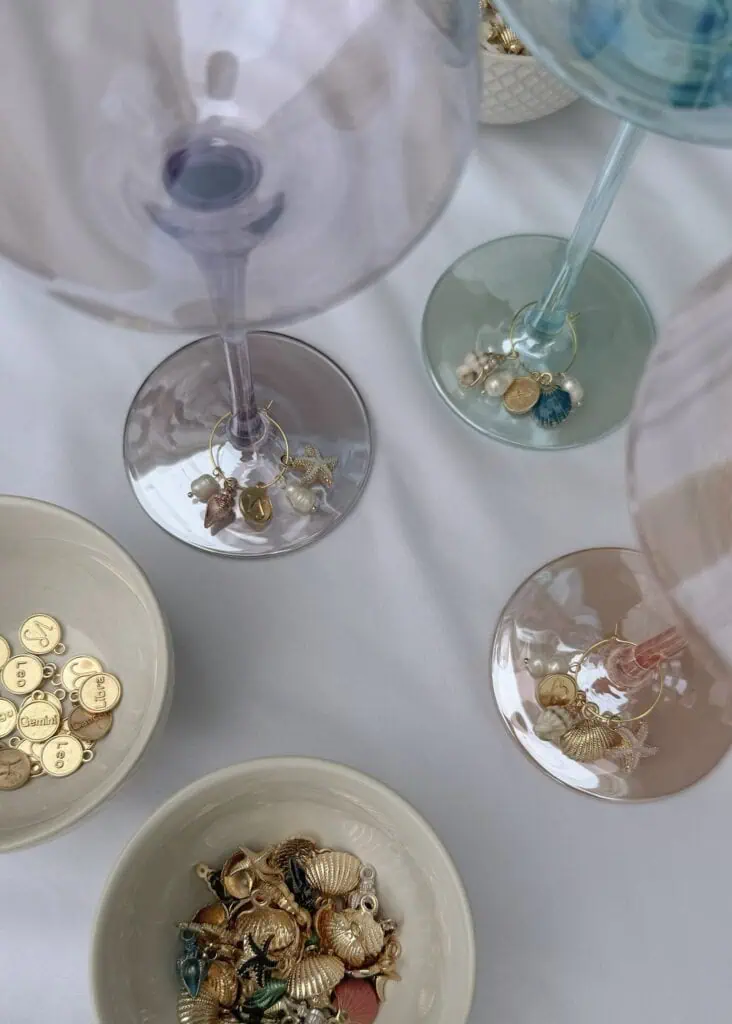
Wine Glass Charms
We got everything from Amazon, and it was the easiest craft yet! They turned out soo cute, and we were all able to make so many – so everybody could take their own sets home! I went for a zodiac/mermaid theme and couldn’t be happier with the end result.
More Detailed Tutorial:
Watch Me Make Them:
Cute Bookmarks

I’ve made bookmarks a few times, and they always turn out so fun and cute! If you’re a book lover and avid reader like me, this project is especially perfect! I think it’d be so cute to do at your next book club or girls night.
More Detailed Tutorial:
Watch Me Make Them:
You might also like