


Craft Ideas for Adults
Is there anything cozier than a girl’s night in with fun crafts? I had so many fun craft nights with my last summer and it has become such a fun tradition! We’ve been keeping the craft nights going all throughout the fall season and I can’t wait to see what we come up with for the holiday season.
Is there anything cozier than a girl’s night in with fun crafts? I had so many fun craft nights with my friends last summer and it has become such a fun tradition! We’ve been keeping the craft nights going all throughout the fall season, and I can’t wait to see what we come up with for the holidays.
Scroll to see everything we’ve made so far and be sure to follow along on Instagram to see what we create next!
Craft Ideas At A Glance


Craft Ideas for Adults
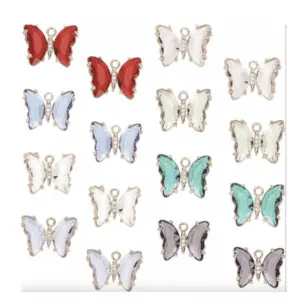
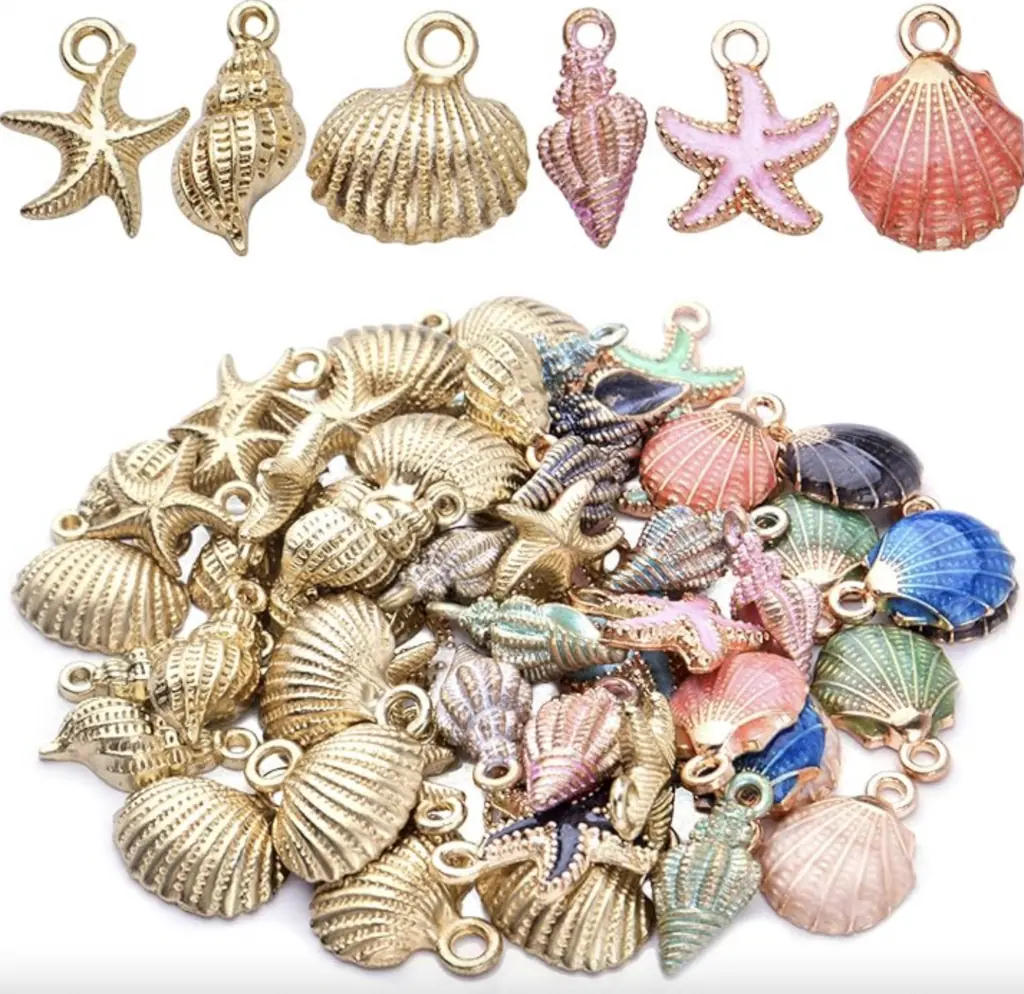
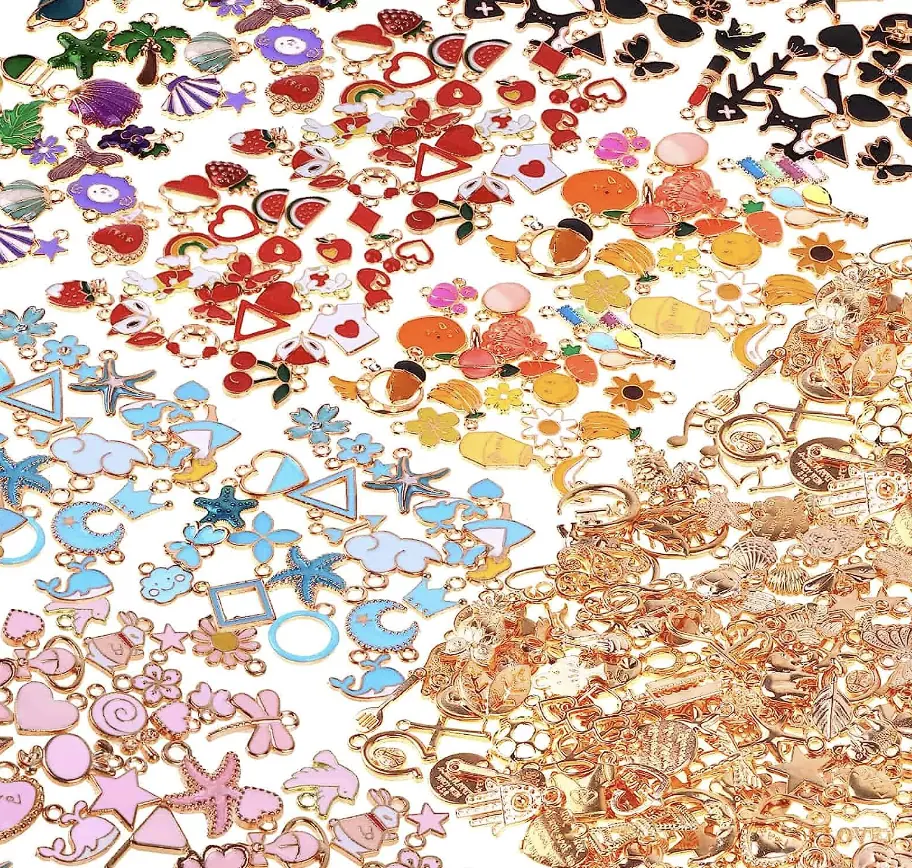
DIY Bag Charms

Bag charms are an adorable way to personalize and accessorize your purse or bag! They look so adorable on a handbag, a tote bag, a beach bag, or even a small duffle bag! You can even interchange and display a variety at once.
More Detailed Tutorial:
Watch Me Make Them:
Shop What I Used:
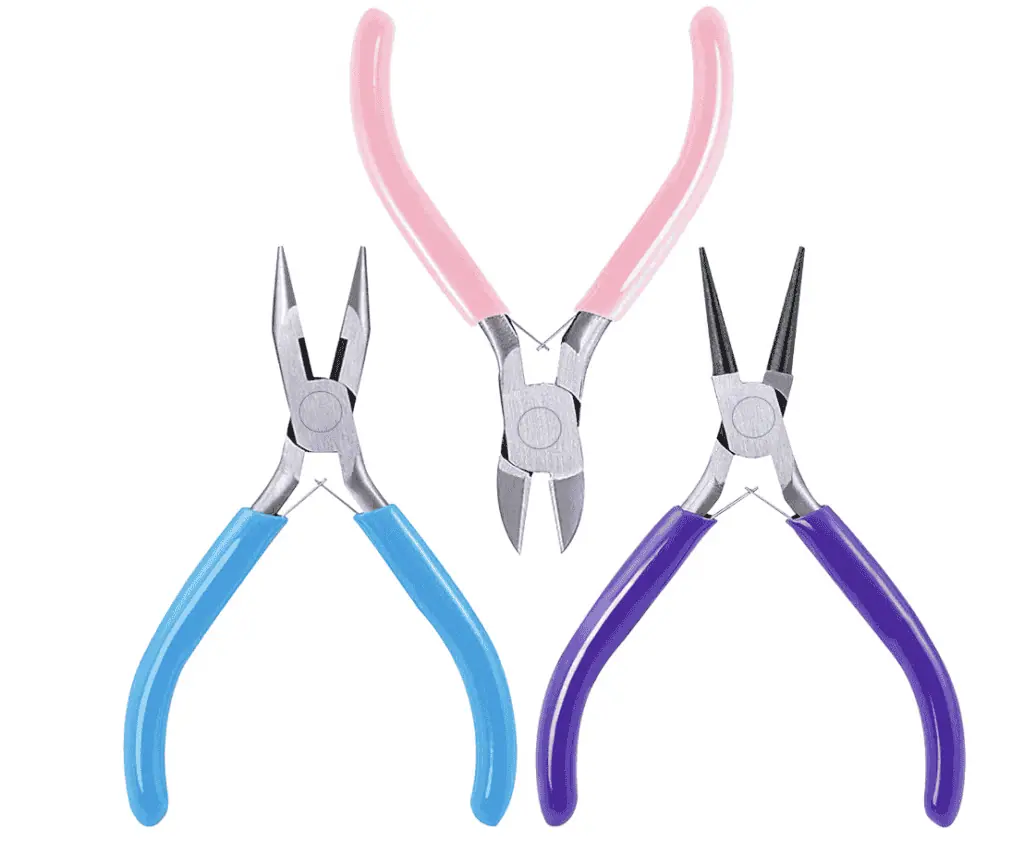

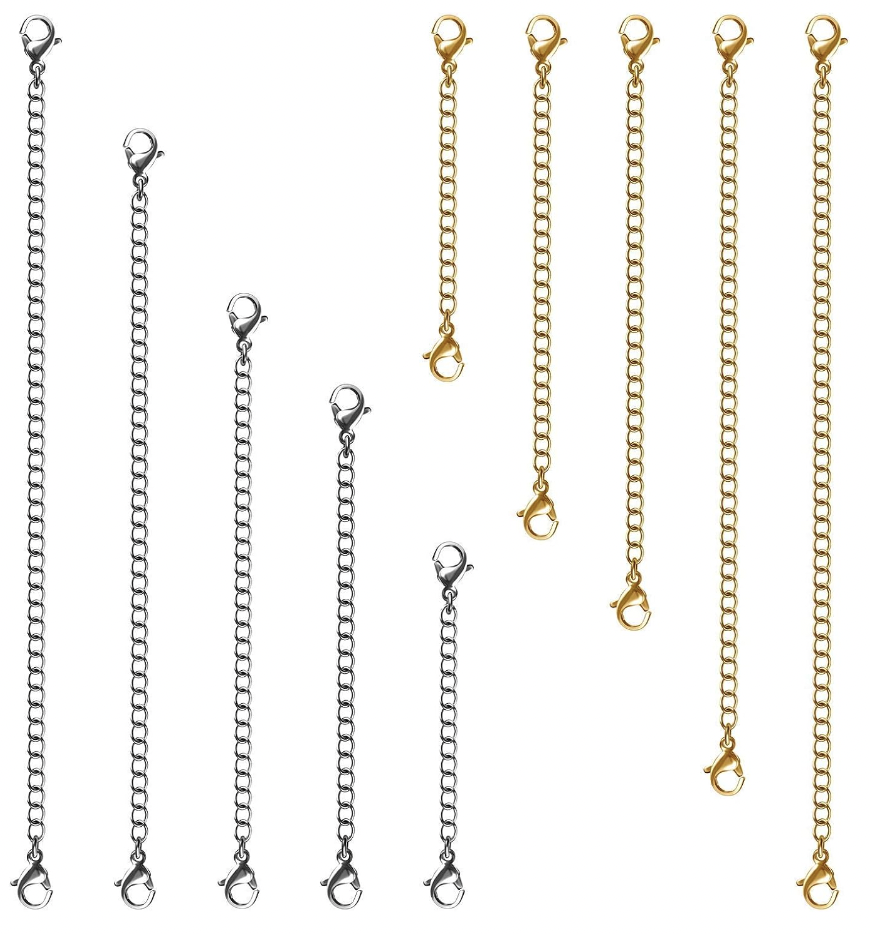

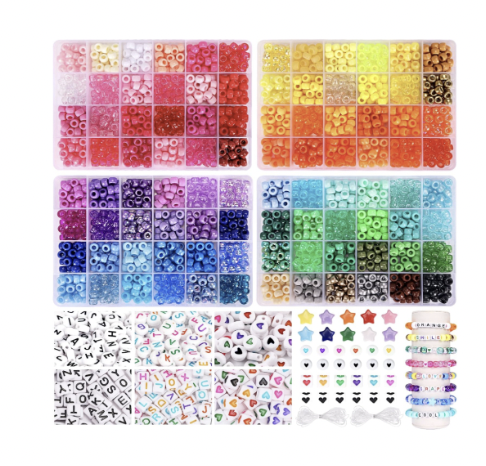
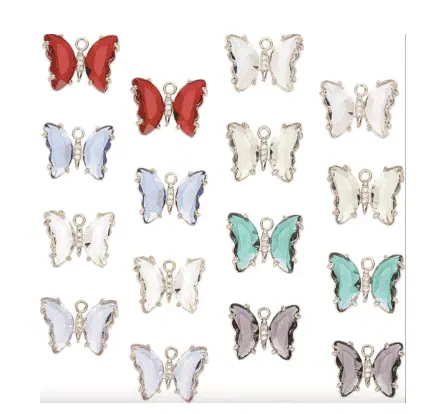
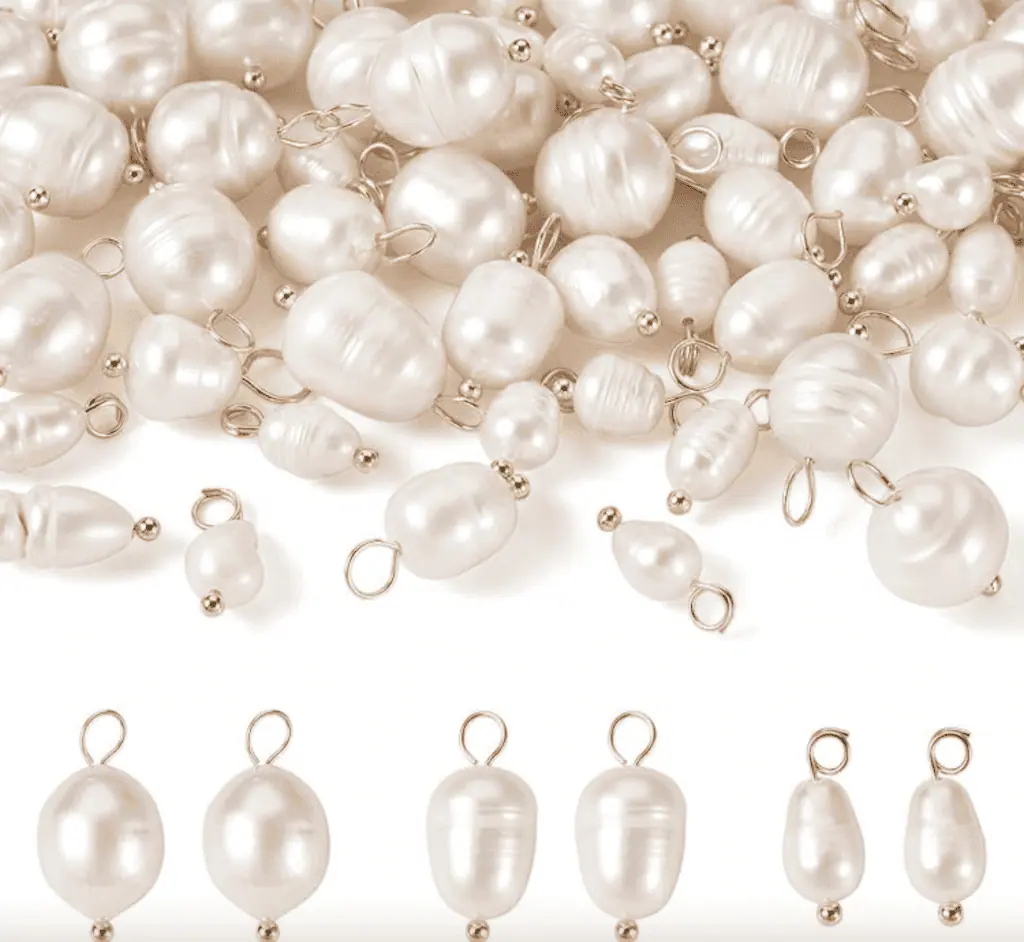
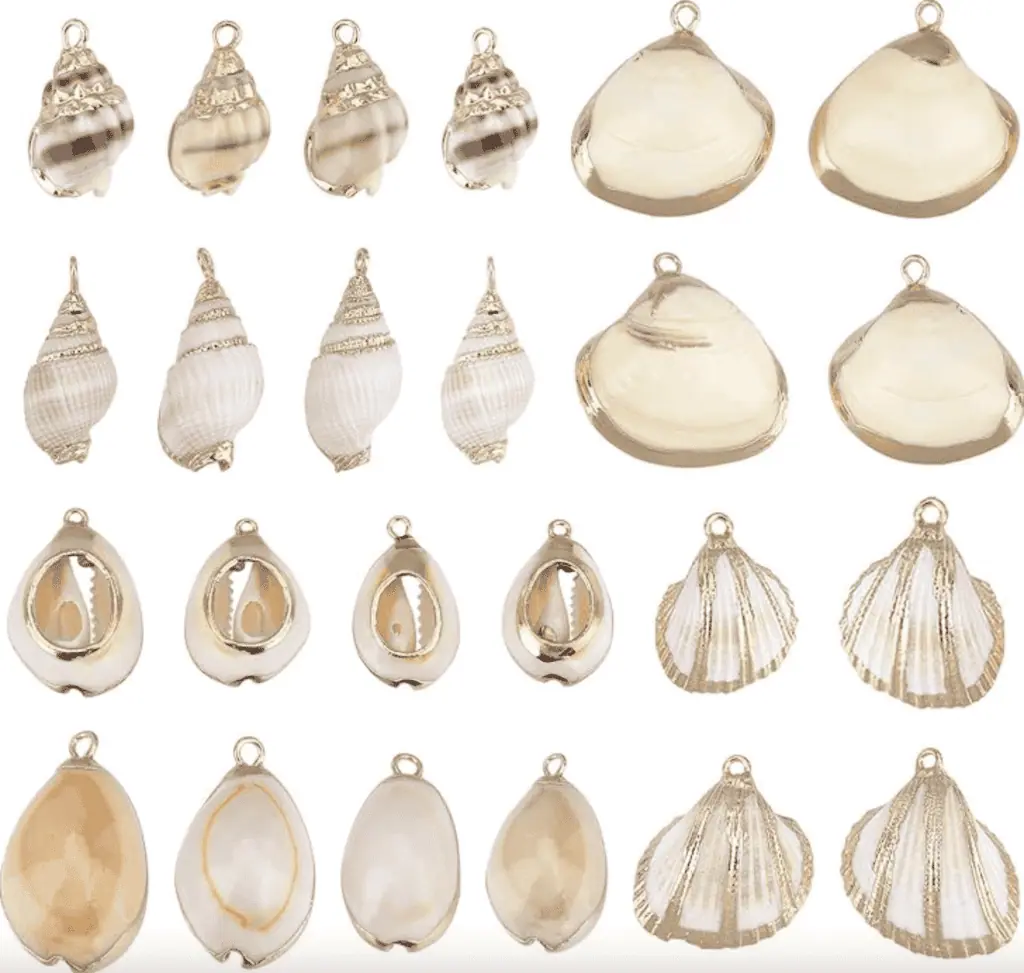
Cute Beads + Charms:


Beaded Bag Charms Method #1
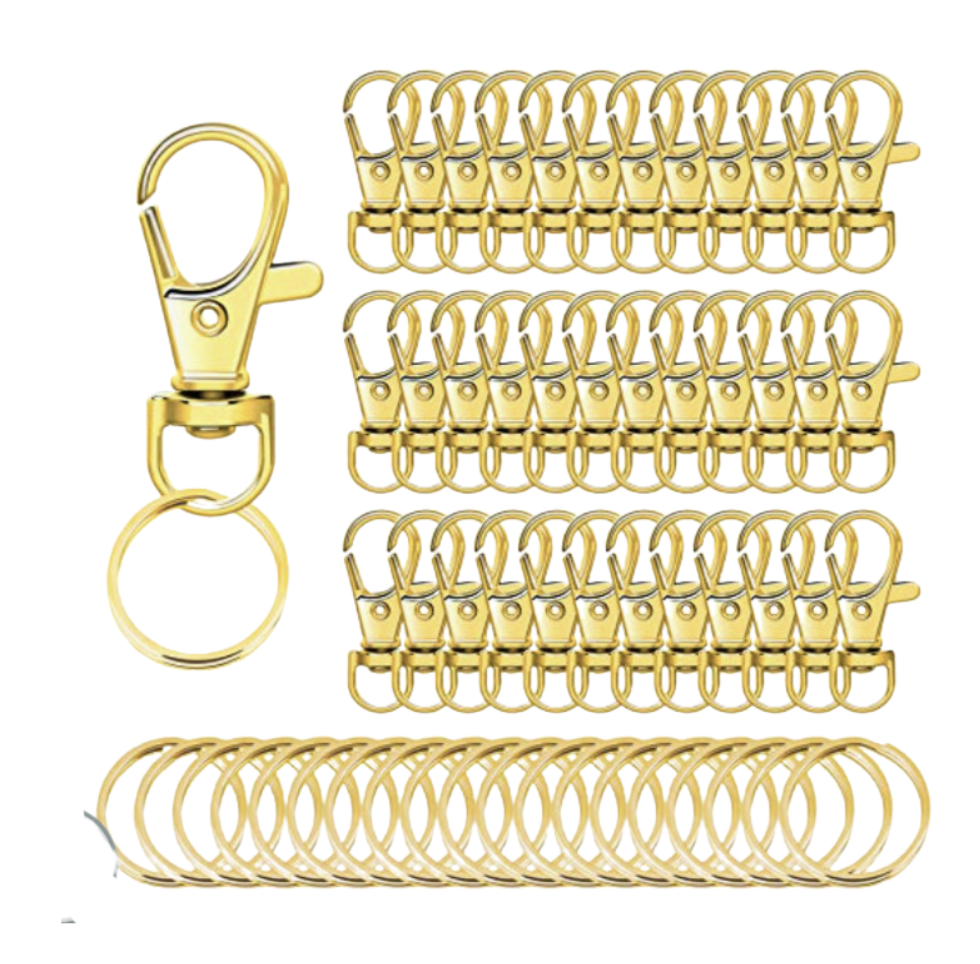
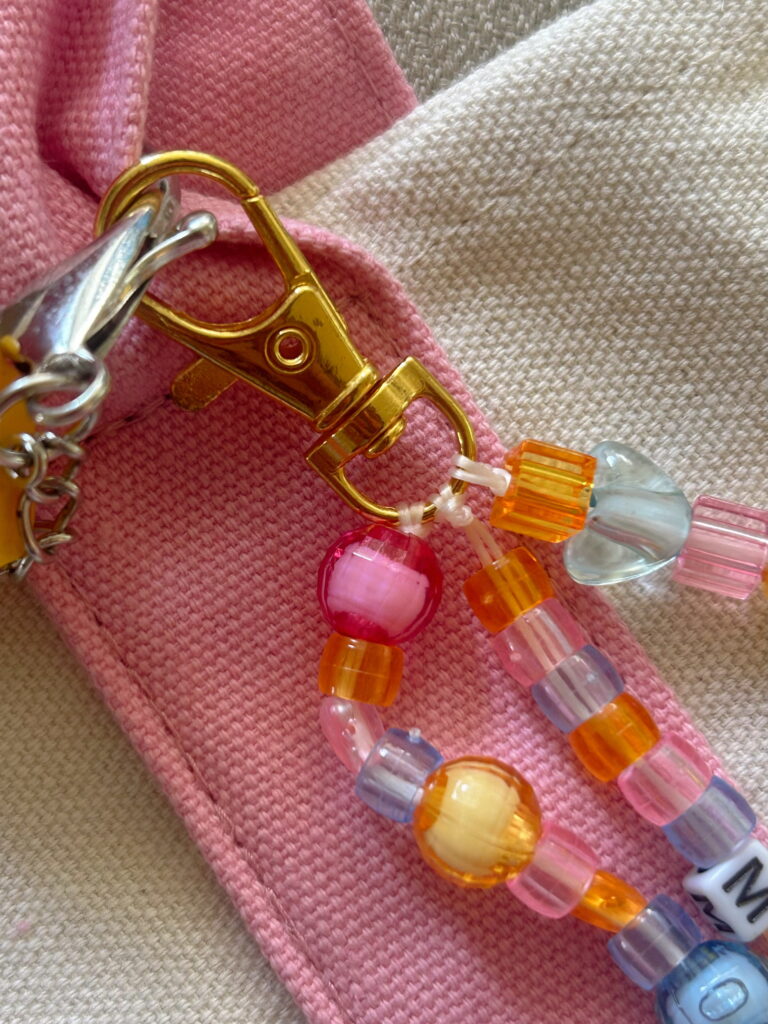
Step 1 – Tie String to a Jump Ring or Clip Hook
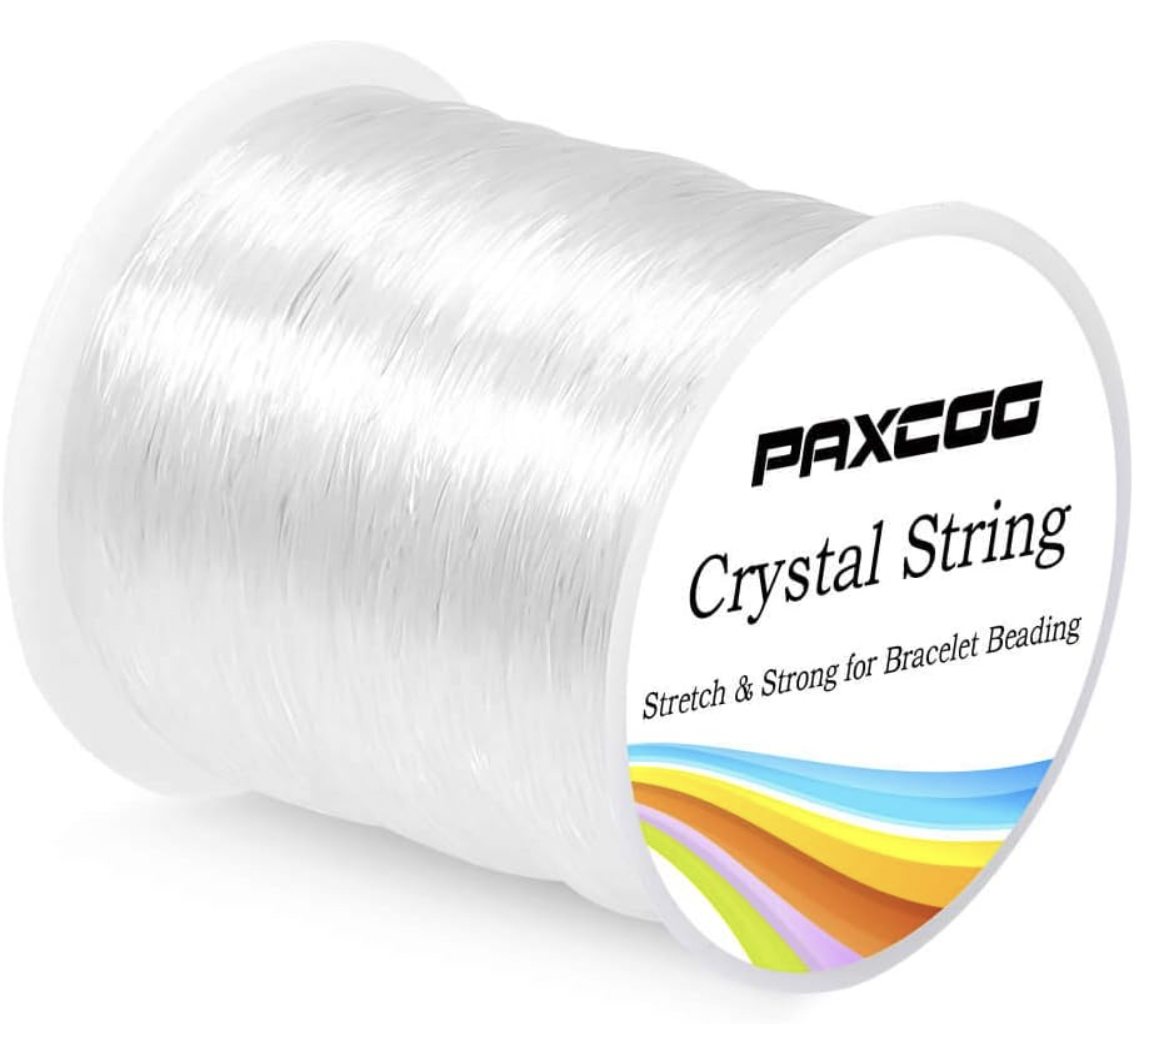
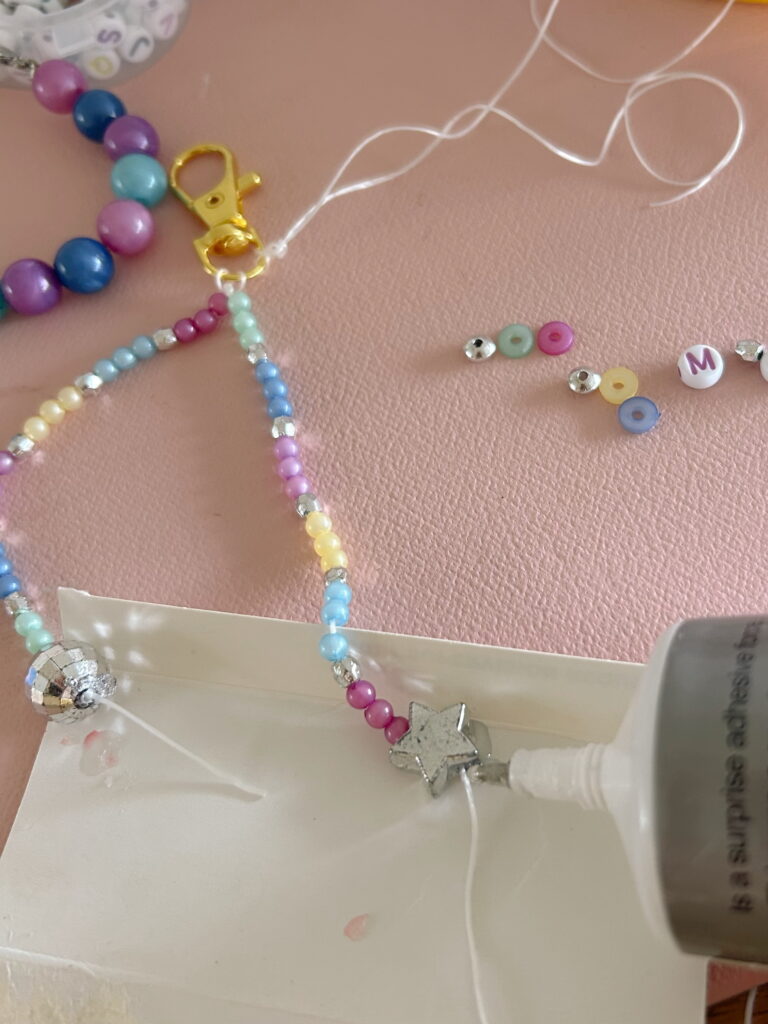
To start your beaded chain, you’ll want to begin your first strand by tying an elastic thread (around .8mm) around the base of your hook clip – or if you tie the strand to its own jump ring then you can customize your bag charms in the future! Tie a knot by folding the elastic thread in half, and threading the string through the hole of the ring or hook, and then thread the open ends of the string through the looped end of the string. Pull tight so it’s closed around the ring. Repeat the process once more so its double knotted. Leave an excess amount of string to tie off at the end.

Step 2 – Thread the Beads
I like to first pick out my beads and the order it will go in before I thread any because the pattern might change as you gather cute beads. Once you’re ready, thread your beads through both strings. If you want to use really small beads or seed beads, you can thread them only one of the strings through.
Pro tip:
You can make your strands as long as you’d like but you may want to compare your bag to the strand just to picture what length suits your purse or tote bag. I think it looks best if each finished strand is different lengths.
Step 3 – Tie Off the Strand
Using the same knot method from step 1, tie the end of the elastic thread several times so that the knot is bigger than the last bead’s hole. If the bead opening is quite large or you’ve cut the string too short, an easy fix is gluing the end closed with either hot glue or B-7000 glue. Cut the excess.
You can even tie the end of the string to a charm ring as well to end the strand.

Step 4 – Repeat Steps 1-3
Repeat the previous steps until you have as many strands as you’d like! Don’t be afraid to get creative and add whatever embellishments come to your mind. I even added a pre-existing bag charm to one of my beaded chains – if you look closely.
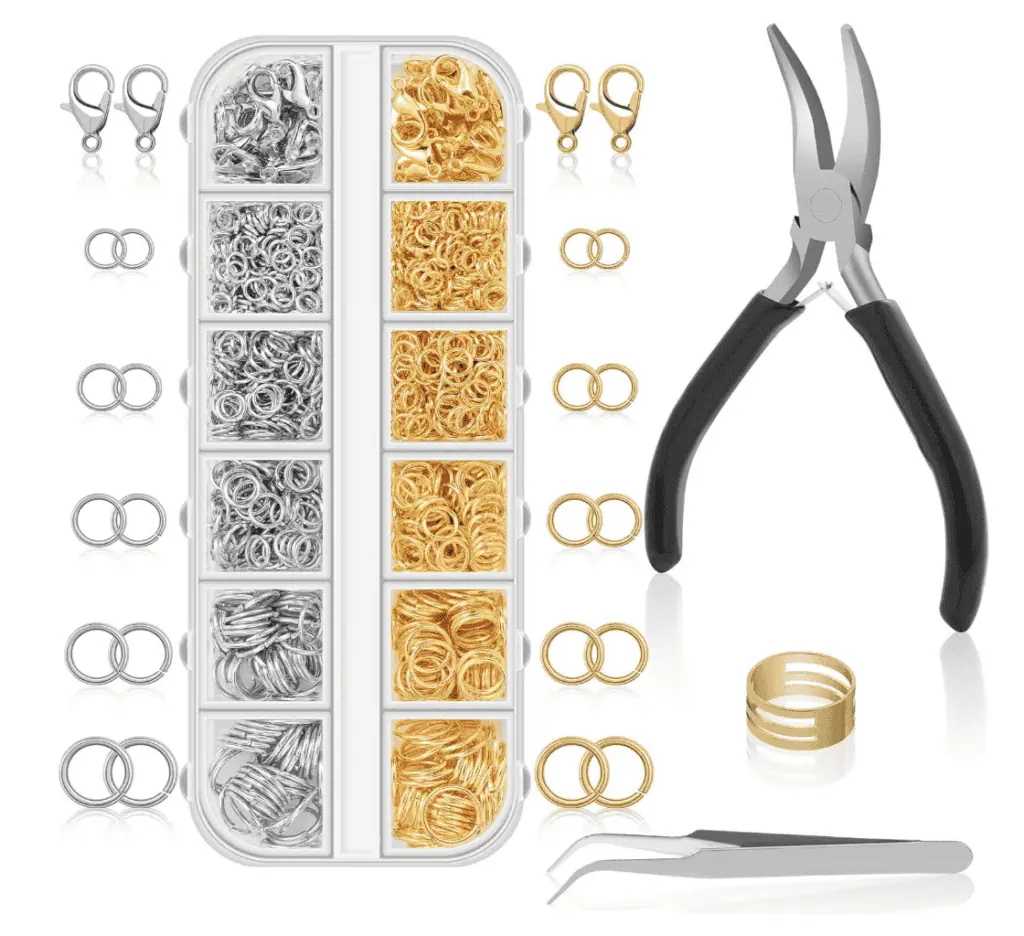
If you attached the beaded strings to a jump ring, now is the time to attach the jump rings to the base of your hook clip using pliers.
Charm & Chain Bag Charms Method #2
Step 1 – Create Chain
You can start with a pre-made bag charm chain, a bracelet chain, a jewelry extender chain, etc. Using pliers and jump rings, make your strand the desired length and attach to your hook clip (or use the one that’s attached if applicable). Attach your jump rings and hooks by prying them open with pliers and then hooking it onto the chain, and then you can close the ring with the pliers once more.
Pro tip:
You can make your strands as long as you’d like but you may want to compare your bag to the strand just to picture what length suits your purse or tote bag. I think it looks best if each finished strand is different lengths.
Step 2 – Add Charms
Add charms of all sizes and shapes. You can follow whatever color scheme or theme you’d like! Attach your charms to a jump ring and then hook it onto the chain and close it. It’s best to separate them slightly and evenly on the chain. Be sure to add a couple larger ones so that your bag chain really pops!
Step 3 – Repeat Steps 1-2
Repeat steps 1-2 until you have as many strands as desired! Be sure they’re all attached to the main hook clip and you’re ready to go.
OR you can make it how I did in this picture. You can attach both hooks to one side of your purse, or if you make the chain long enough, you can attach each clip to each side of your purse and display it across the front of bag instead!
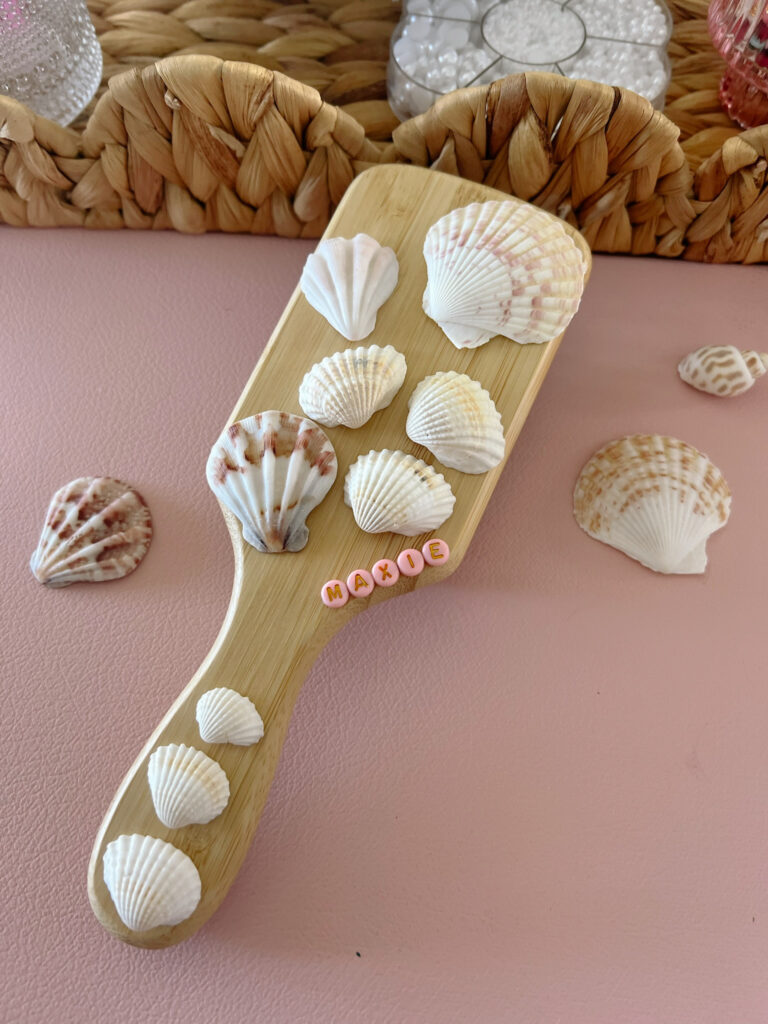
Mermaid Seashell Hair Clips

Step by step instructions for DIY seashell hair clips! I got everything from Amazon and had so much fun doing this with my friends.
More Detailed Tutorial:
Watch Me Make Them:
Shop What I Used:


How to Make Mermaid-Inspired Hair Clips
Step 1 – Plan Mermaid Design
Pick out your shells and gems that you want to attach to your hair clip.
Step 2 – Attach Shells to Hair Clip
Apply your B 7000 glue to a small portion on the hair clip and begin attaching shells – or apply the glue to your seashell and then add to hair clip.


Step 3 – Apply Iridescent Coat (optional)
You can apply an iridescent paint for a pearl finish if you’d like! It’s up to you which finish you prefer, natural or iridescent.
Step 4 – Add Finishing Touches
You can add more fun touches like pearls, glitter, rhinestones, beads, etc.

How to Use Diamond Art Pens And Wax:
Spread the glue onto a small section of the hair brush – it dries in a few minutes so you have time to work with it. Dip the hollow end of your pen into the wax (for this craft, I used the smallest option). Gently press the pen onto the top of the flat backed pearl, and then firmly press it onto the tacky area. The pearl should release automatically. However, if you accidentally got glue on the pen it may stick to the tool versus the art piece, so be sure to clean it every now and then.
Self-Stick:
Self stick pens are the best because they work exactly the same as a pen you have to dip into wax but the self stick pen tip is already wax so you there’s one less step!
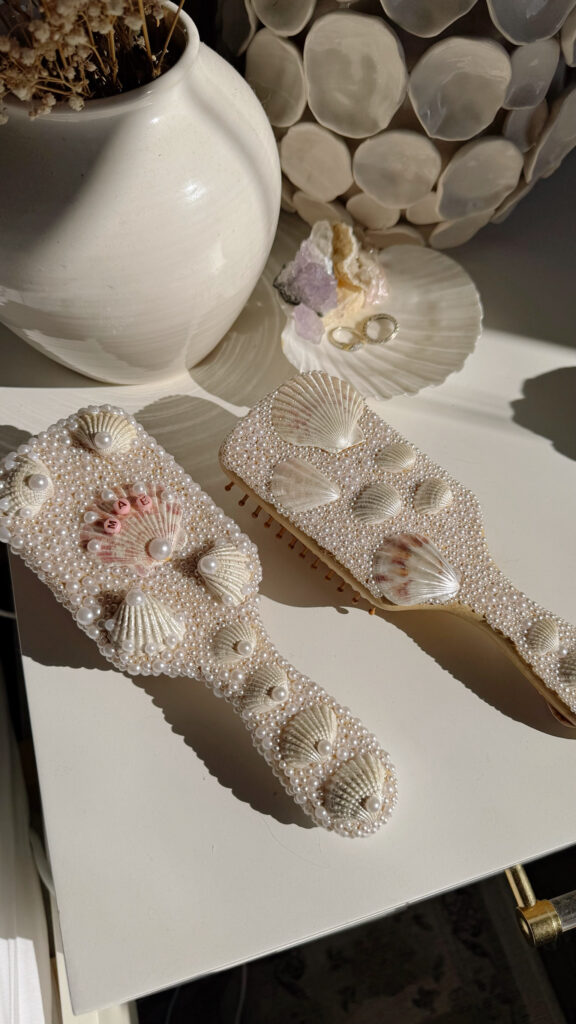
Mermaid-Inspired Hair Brushes
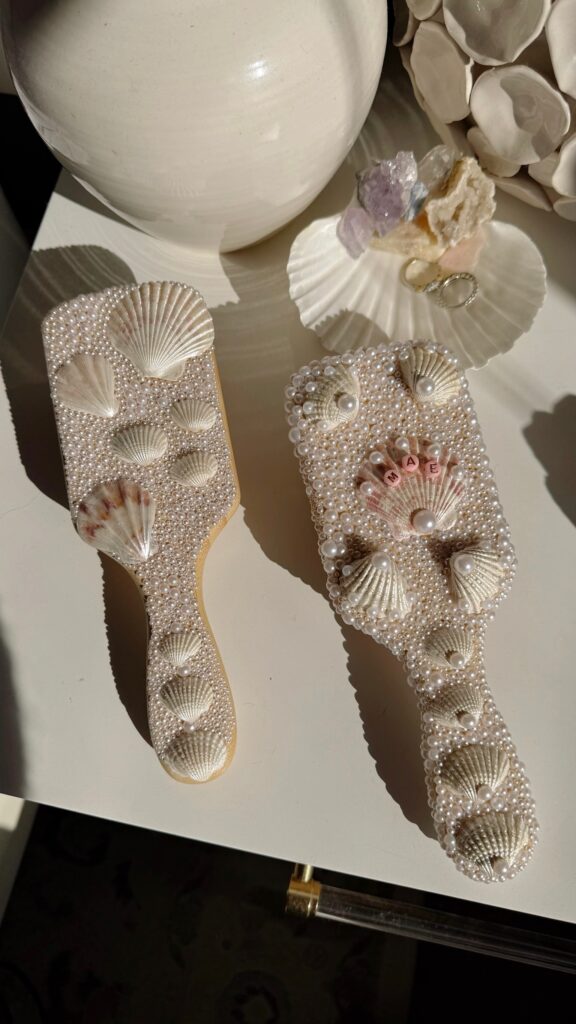
Step by step instructions for DIY mermaid hair brushes! I got everything from Amazon and had so much fun doing this with my friends.
More Detailed Tutorial:
Watch Me Make Them:
Shop What I Used:


How to Make Mermaid-Inspired Hair Brushes
Step 1: Prepare Your Brush
Before getting started on this beachy hair brush decoration, you’ll want to make sure your actual brush is nice and clean.
Step 2: Design the Mermaid Pattern
Next, plan your seashell hair brush decoration pattern. You can lay out the big seashells on the brush and begin visualizing your design before you glue them down and make it permanent.
Step 3: Attach the Seashells, Pearls, and Beads
Using E-7000 glue, attach the seashells first because they’re the biggest and you’ll want to work around them. Place the glue around the perimeter of the seashell and then place it onto the hairbrush. You can also glue around the edges of the seashell once it’s placed, however the glue will dry slightly visible so you’ll want to cover it with pearls.
If you choose to glue pearls onto your seashells, paint your shells with the pearl top coat first, if using!
Next, glue your pearls, beads, and other tiny items. The small pearls can be easier to attach using diamond art pens.


Pro Tip: How to Use Diamond Art Pens And Wax
Spread the glue onto a small section of the hair brush – it dries in a few minutes so you have time to work with it. Dip the hollow end of your pen into the wax (for this craft, I used the smallest option). Gently press the pen onto the top of the flat backed pearl, and then firmly press it onto the tacky area. The pearl should release automatically. However, if you accidentally got glue on the pen it may stick to the tool versus the art piece, so be sure to wipe the pen occassionally.
Step 4: Add a Pearl Top Coat
Using a fan brush and pearl white metallic acrylic paint, paint a thin layer onto the seashells for a pearl finish. You can drop a tiny amount onto the seashell directly, or use a paint palette or plastic dish.

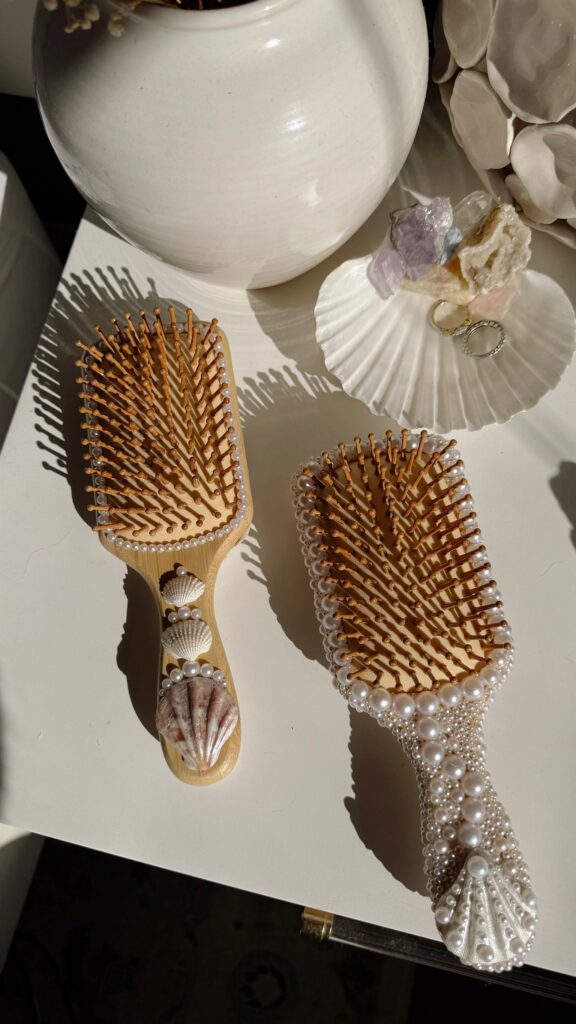
Step 5: Add a Securing Top Coat
A polyurethane top coat – painted on with a fan brush – will really secure the shells and pearls to the hair brush to ensure they won’t fall out when you use it. Your coating should be nice and thin – Get the bristles in between the pearls to ensure they are secured.
Step 6: Repeat On The Front & Sides
Repeat the process of adding shells, pearls, glue, pearl coat, and secure coat along the sides and front of the brush!
DIY Book Bedazzling

I love how this craft not only encourages reading but it also boosts creativity! It makes my favorite books look so fun and different from the rest, they look so adorable on display on my bookshelf. I’ve made this step-by-step DIY guide on how to bedazzle a book so you can easily recreate this craft on your own.
More Detailed Tutorial:
Shop What I Used:


How to Make Mermaid-Inspired Hair Brushes
Step 1: Pick Your Favorite Book
Pick your book and find all of your colored gems! As mentioned before, you want flat-backed rhinestones of various sizes. For this craft you’ll specifically need 3 mm, 2 mm, and 1-1.5 mm for the really small gaps. Amazon has so many different colored gems so you’ll be sure to find the exact color you want! Be sure to order the same color from the same brand when buying multiple sizes to ensure the color is consistent.
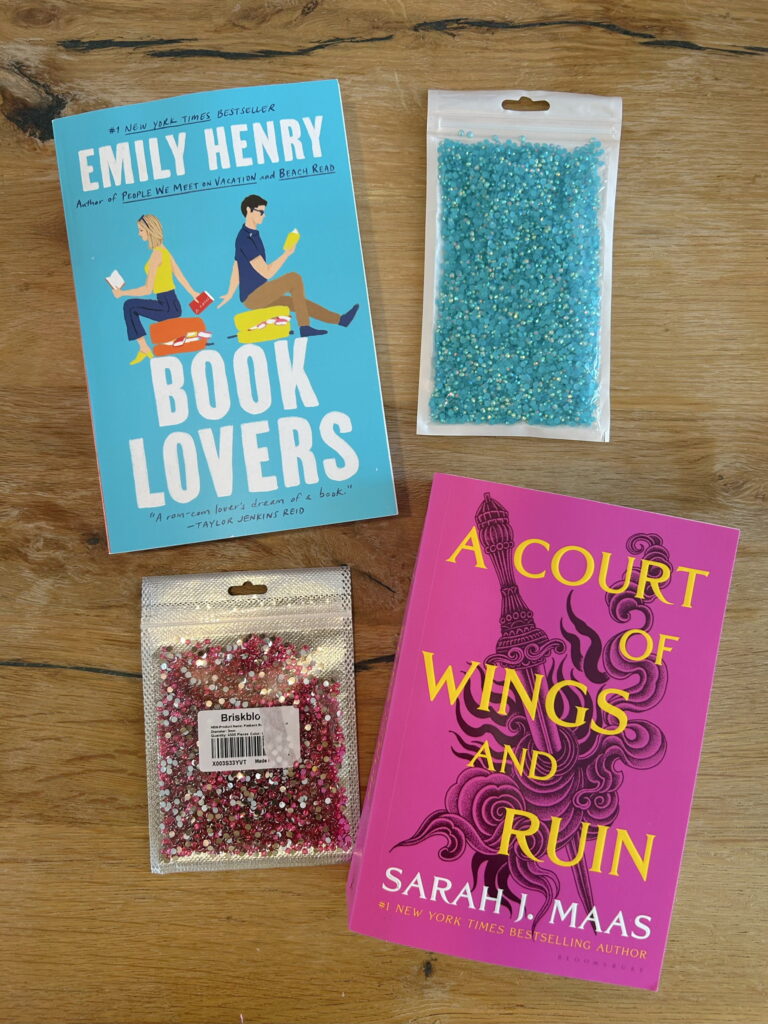
Based on what I read online, you can bedazzle paperback or hard cover books, however, paperback is preferred because the actual colorful design is the most fun part to bedazzle – in my opinion! A hard cover book has a removable paper cover with the colorful design and it typically is covering a pretty plain cover. So if you want some freedom to bedazzle any design of your choice, a hard cover could be for you!
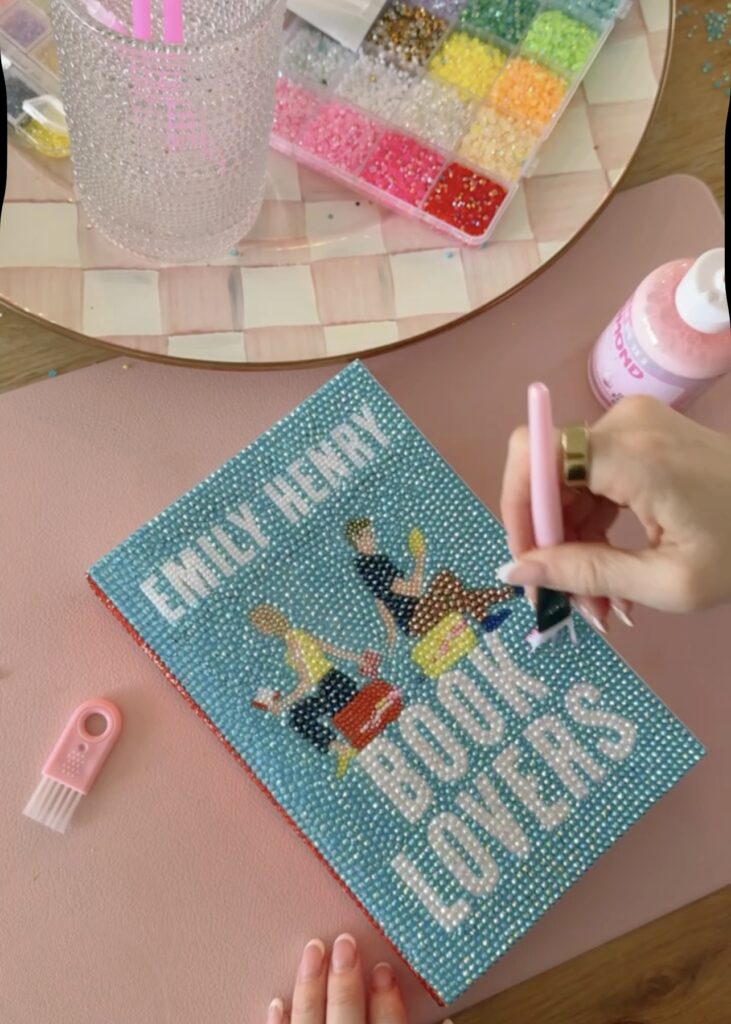
Step 2: Plan Your Design
Decide what you want to bedazzle before you get to work! There’s a lot of inspo pics on Pinterest if you want to see all of the possible options. You don’t have to bedazzle the whole book – so don’t be alarmed. You can do just the title, the main artwork, your own design incorporated with their’s etc.

Step 3: Bedazzle By Layers
Spread the glue onto a small section of the book – it dries in a few minutes so you have a substantial time to work with – and start bedazzling the image or text! In order to keep the integrity of the shapes, I recommend starting with the top layer and moving to the next layer, and so on.
For example, start with the title and author because it’s the most forefront object, and then the artwork, and then fill the background!
How to Use Diamond Art Pens And Wax:
Once you’ve spread glue onto the book, you can use self stick pens (they work so well!!!) or you can use the classic art pens that come with gem trays. You’ll want to dip the hollow end of your pen into the wax and gently press the pen onto the top of the gem, and then firmly press it onto the tacky area of your book The gem should release automatically, however, if you accidentally got glue on the pen it may stick to the tool versus the art piece, so be sure to wipe it every now and then.
Step 4: Fill the Background
You should start by lining the whole perimeter, then around the edges of the design and words. Then fill in the empty spaces.
If you wish to do the spine, I found it best to lean the back of the book on a surface with the spine titled towards you. I just used my water bottle to prop the book against and it worked well!
Pro Tip:
The gem tray kit really comes in handy to bedazzle the background quicker.


Step 5: Fill in the Spine
If you wish to do the spine, I found it best to lean the back of the book on a surface with the spine titled towards you. I just used my water bottle to prop the book against and it worked well! You can choose to bedazzle just the title, author as well, or one solid color.
Step 6: Add Your Finishing Top Coat
A clear coat of diamond art sealer will keep everything attached and secured so you can cherish your bedazzled book forever!
And Done!
Watch Me Make Them:
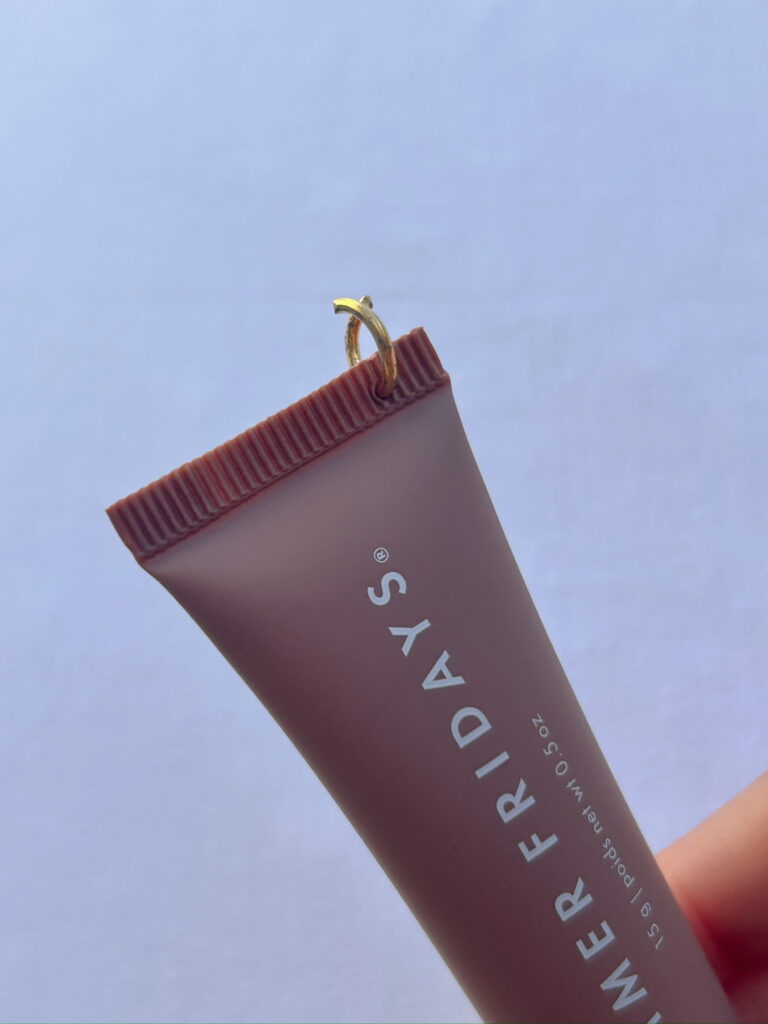
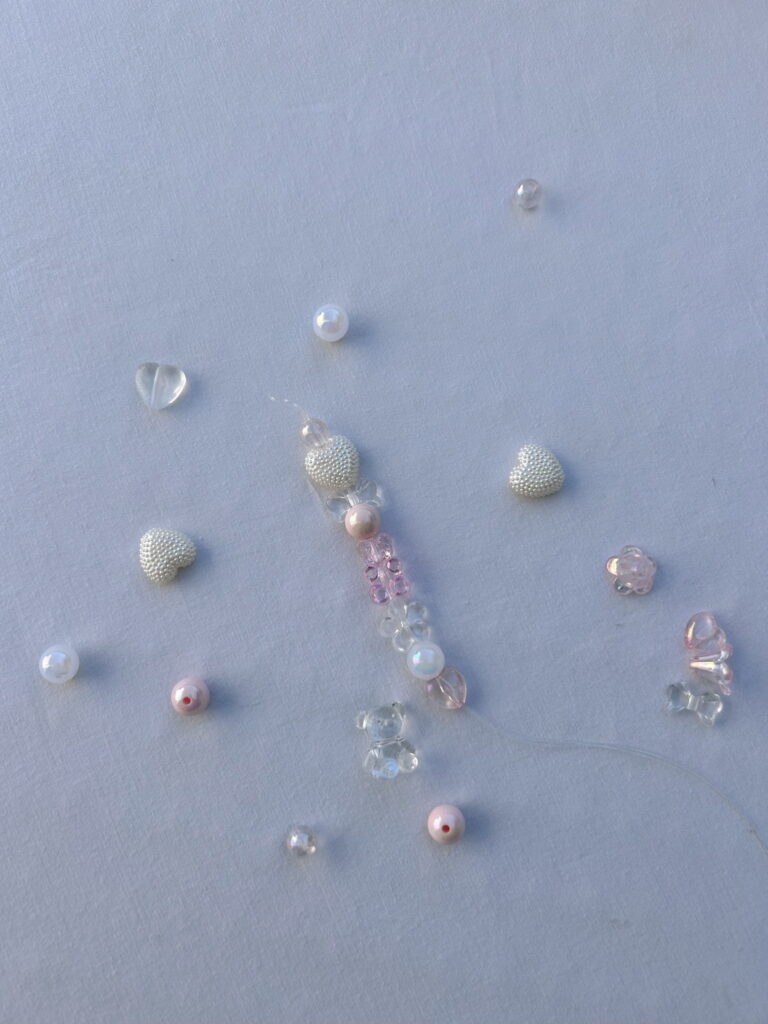
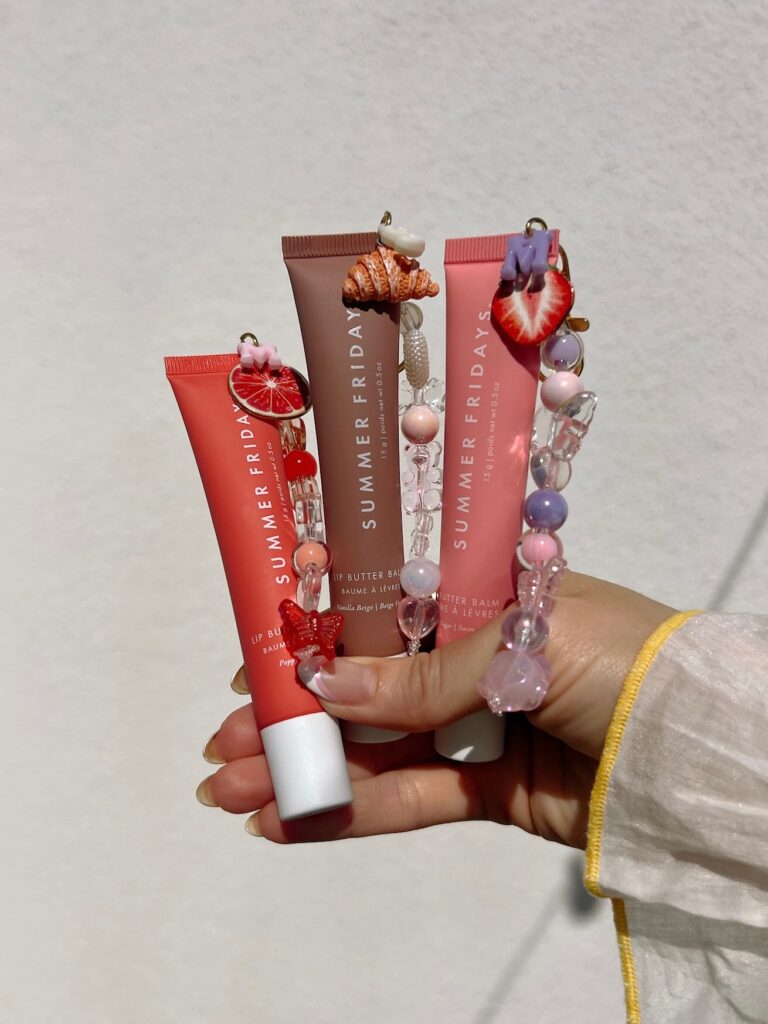
Lip Balm Keychains

Step by step instructions for DIY lip gloss keychains and everything you need to make them! I got most of my supplies from Amazon. They make for such a cute, thoughtful, and affordable gift idea! I had so much fun with this craft – it’s perfect for a girl’s night in.
More Detailed Tutorial:
Watch Me Make Them:
Shop What I Used:


How to Make Lip Balm Keychains
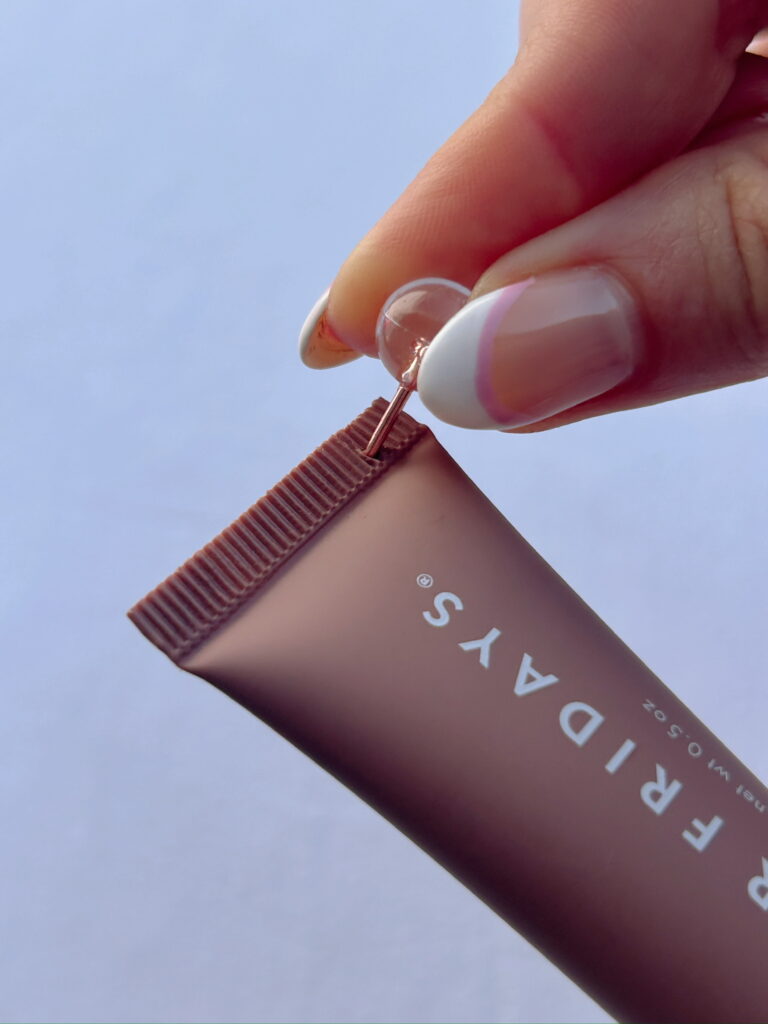
Step 1: Create a Small Hole
Insert a hole in the top right corner of the lip balm or gloss – through the thick plastic part. I used a thumb tack but you can also get a tool from Amazon for a more precise hole. Make sure the hole isn’t too close to any of the edges – or else you risk it ripping through. You also don’t want the hole to be too far from the edges because the ring will have a hard time closing. I think it looks cutest on the right corner of the lip balm but anywhere works!
Step 2: Insert the Ring
Insert the ring into the hole – a 10mm ring is ideal. If it’s too small, you won’t have enough room to add the charms. I got a pack of keychain hooks from Amazon (which I’ll use later), however, the ring was quite large in comparison to the lip balm. So I used 10 mm rings from a different ring pack on Amazon and the attached the snap hooks later. You’ll need pliers to open and close the ring. Mine came with the ring pack, however you can also buy them separately.
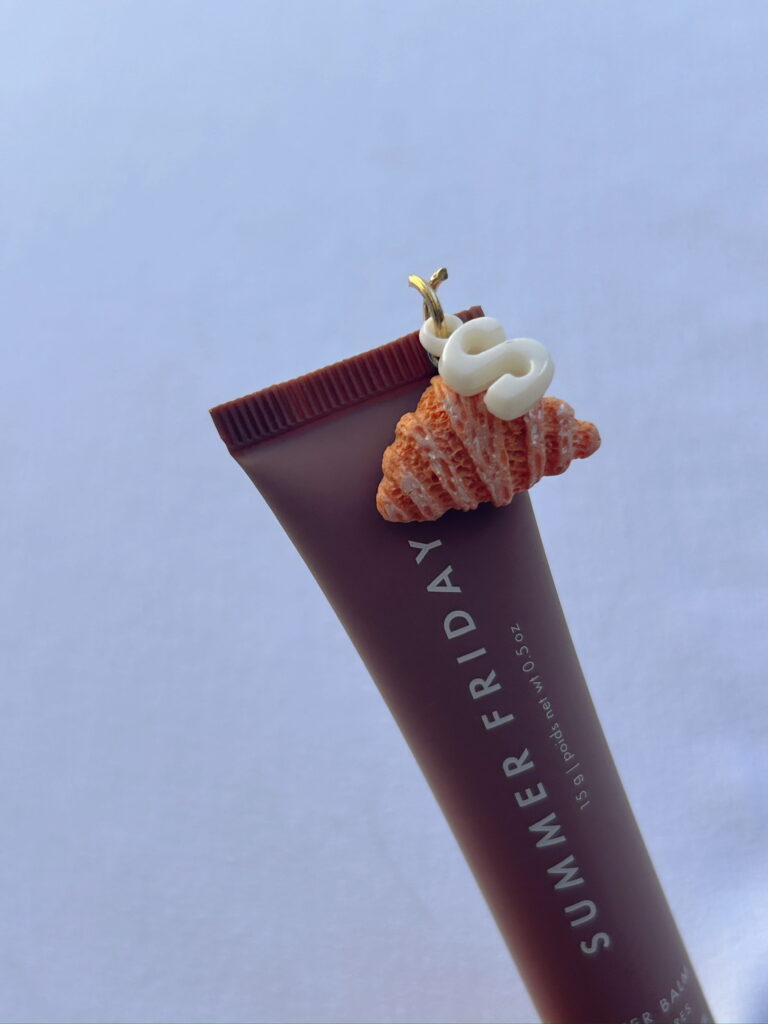
Step 3: Add the Charms
The best part! You can add charms in whatever way you’d like – the options are truly endless! I started with one large charm to set the theme. I also attached the first initial to my friend’s name. Then I made two of mine as gifts, but they’re so fun that I couldn’t help but make one for myself too! I placed the two charms in front of the lipgloss so they stand out. Set the lip balm aside for the next step.
Step 4: Make the Beaded Chain
For this part, you want to start with an elastic thread. I used .8mm elastic but other materials or sizes work too. When cutting the string be sure to leave a lot of excess, otherwise it can be really hard to tie the knots at the end. Next, make a slipknot (this TikTok tutorial by user Knits and Bits was super helpful if you don’t know how to tie a slip knot) and adjust it to pinky width. Then, tie 2 knots using both ends of the thread, gathering them around the slipknot. Next, you’re going to add the beads through both strings. Keep in mind, you don’t want it to be longer than the actual lip balm. Depending on size, I used 8-9 beads for the Summer Fridays lip balm. Once the beaded chains are completed, knot the end twice again using both strings, making sure the knot is bigger than the bead directly next to it and they won’t fall off. The elastic came with one of the bead boxes I used but you can buy them separately too!
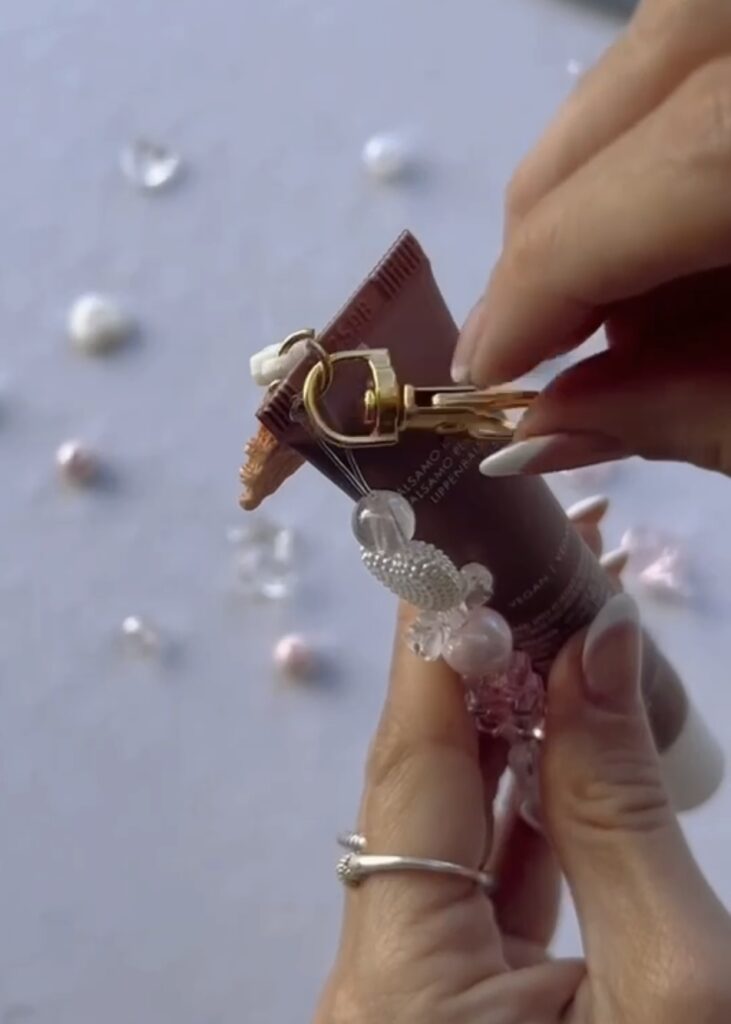
Step 5: Attach Chain & Hook
I attached the chain and hook onto the back of the lip balm ring but you can add them in any order you’d like! These hooks from Amazon were the perfect size for the lip balm.
Step 6: Close the Ring
Using your pliers, close the ring and now you have a finished lip balm keychain. The best part of this project is that you can reuse the keychain and just add a hole to each new lip gloss! I hope you have as much fun with these as I did!
Wine Glass Charms
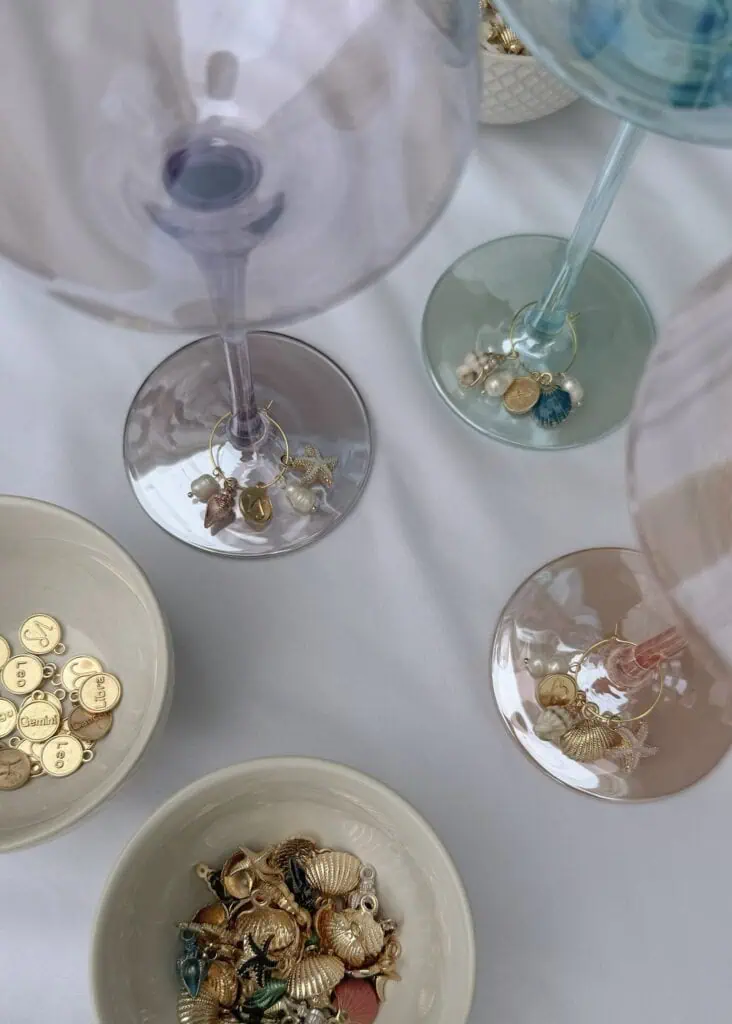
We got everything from Amazon, and it was the easiest craft yet! They turned out soo cute, and we were all able to make so many – so everybody could take their own sets home! I went for a zodiac/mermaid theme and couldn’t be happier with the end result.
More Detailed Tutorial:
Watch Me Make Them:
Shop What I Used:


How to Make Wine Glass Charms
Step 1: Pick a Theme
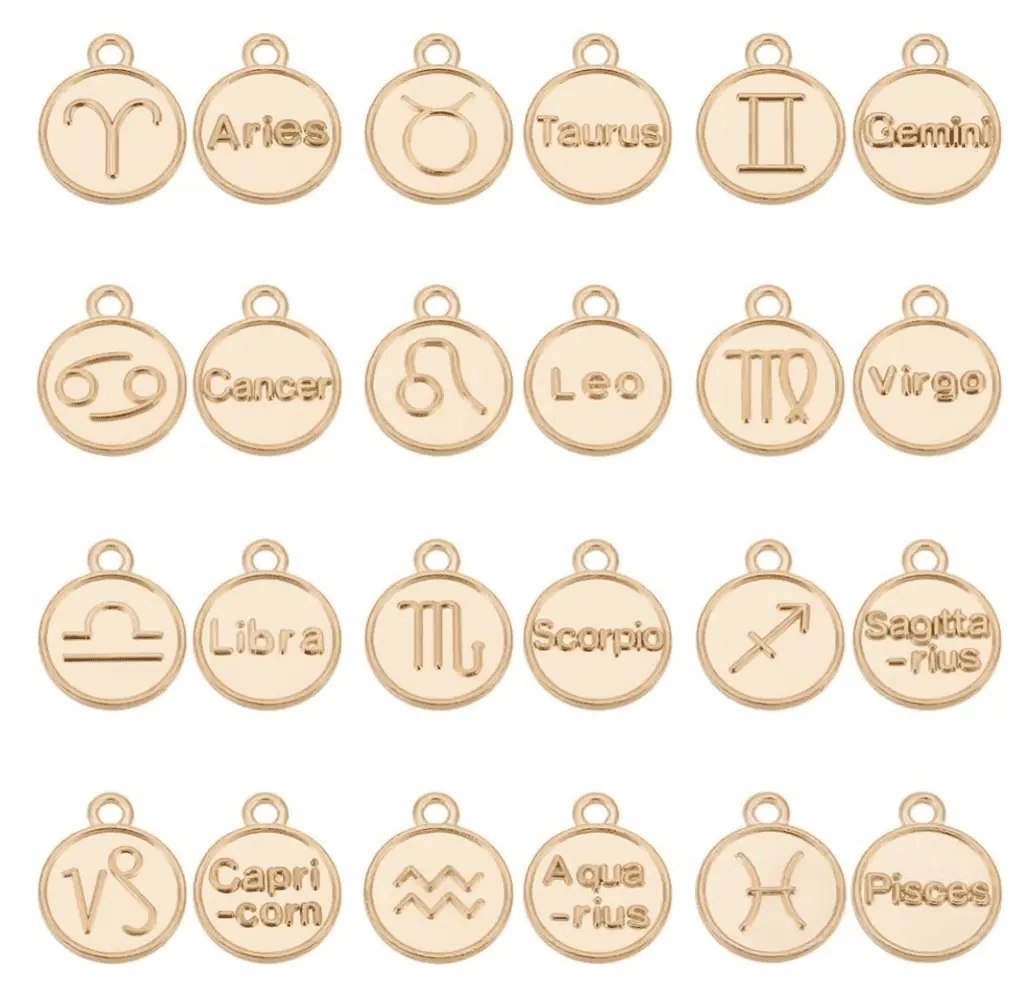
I’m totally leaning into the mermaid aesthetic this summer so it only felt right that my summery set of wine charms have a mermaid/ocean theme! I also decided to incorporate zodiac symbols and made them with all of my friends and family in mind so they can use them when they’re at my house!
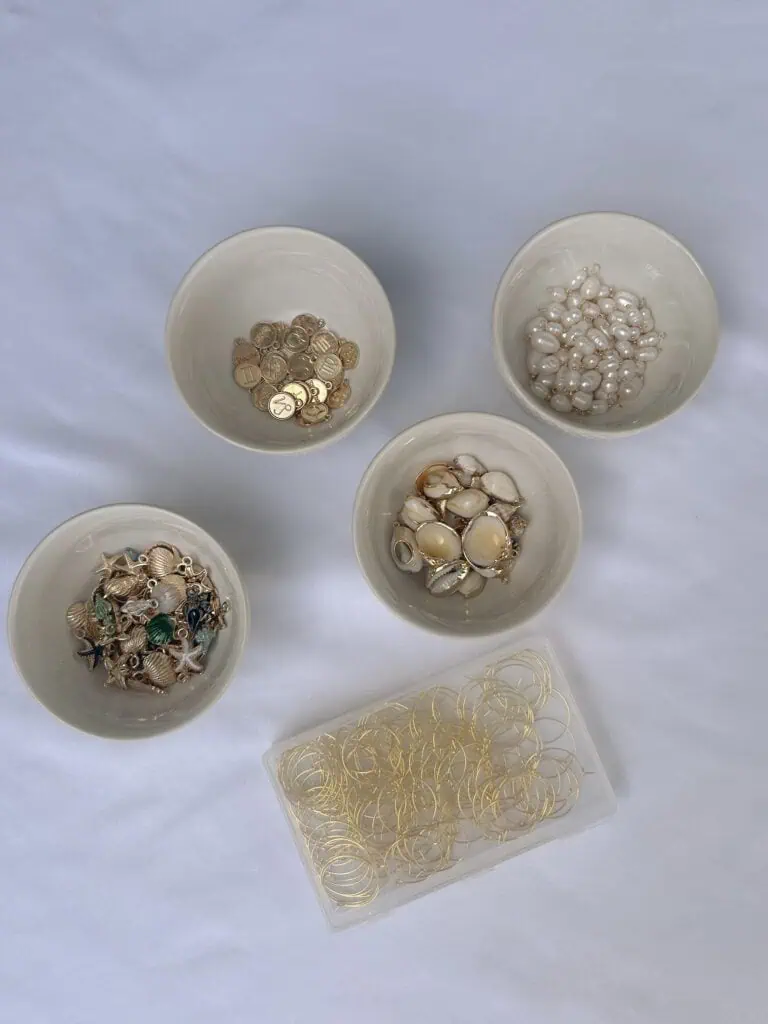
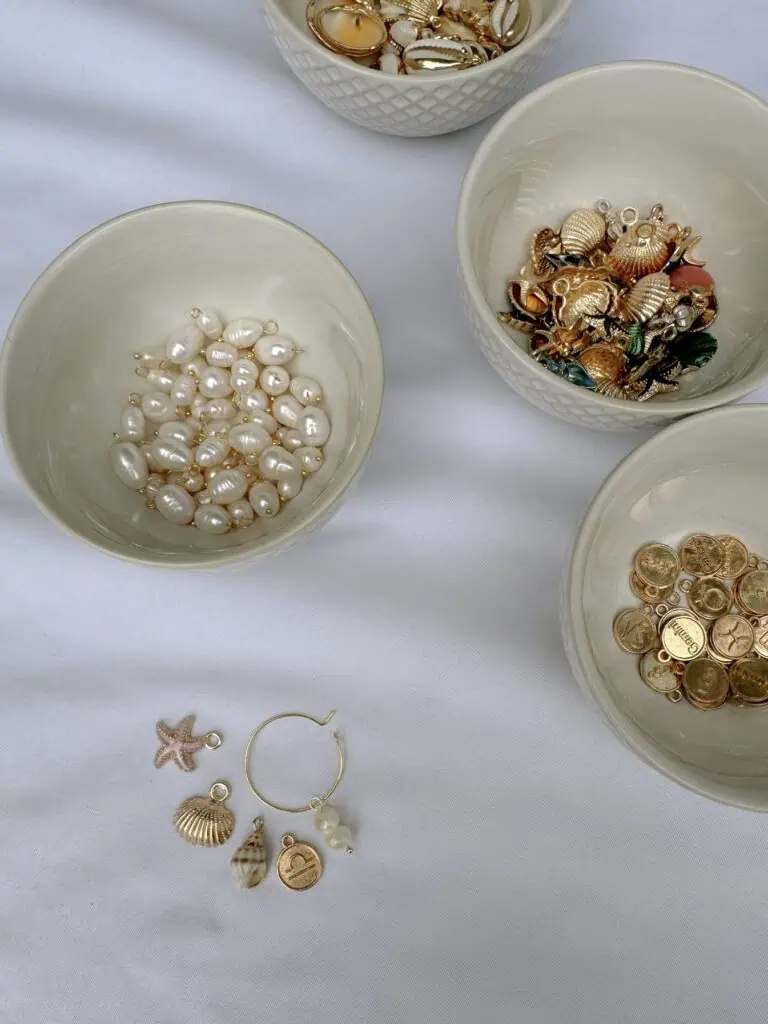
Step 2: Choose Charms
At this step, be mindful that you want each ring to differ enough that at first glance you’ll know the difference between them! I used about 5 or 6 for each but you can’t go wrong here!
You can make them even more personalized by using a specific marker like I did with the zodiac charms. It’d also be really cute to do this with initials or numbers to represent birthdays or angel numbers!
Step 3: Add Charms
It’s as simple as guiding the charm through the opening of the ring here! I also tried to separate the charms by color, for example I put a white shell between two gold charms.
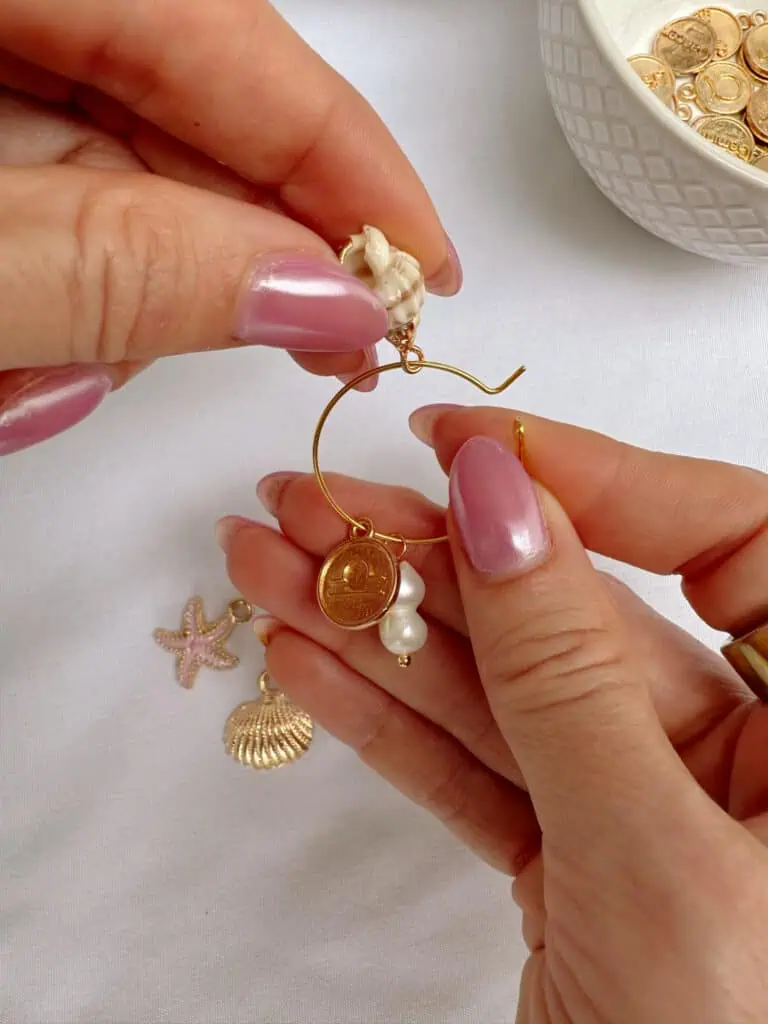

Step 4: Close Ring Around Stem
I’m planning to keep the charms on my glasses because I think they are so cute! But you could also store them in a drawer with utensils or straws for easy access!
& just like that, you’re all done! I said this was the easiest craft yet! 🙂
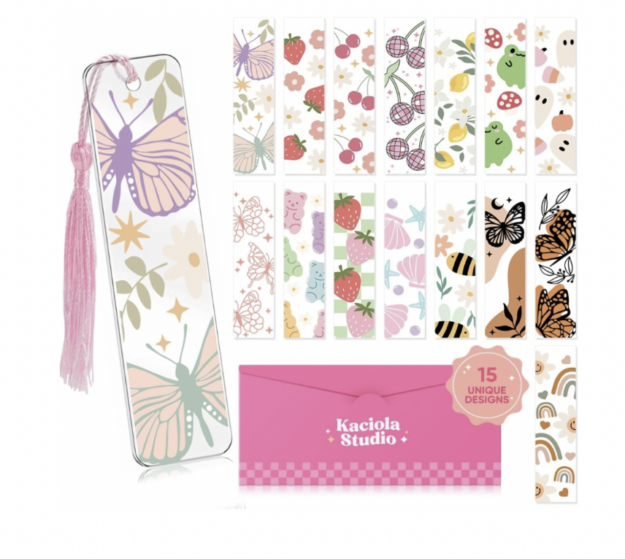
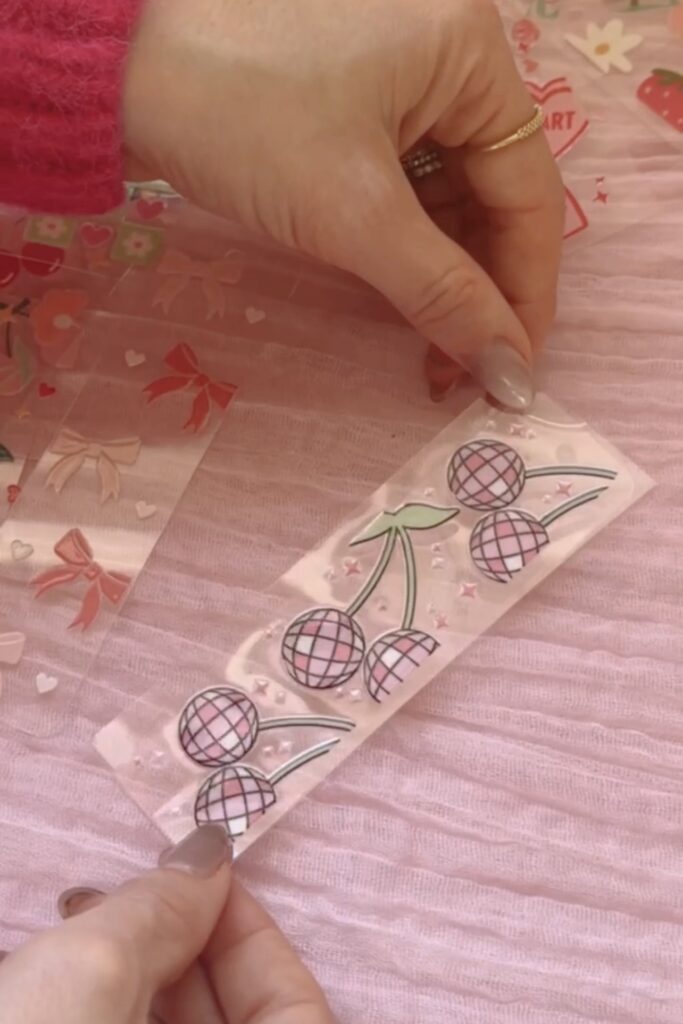
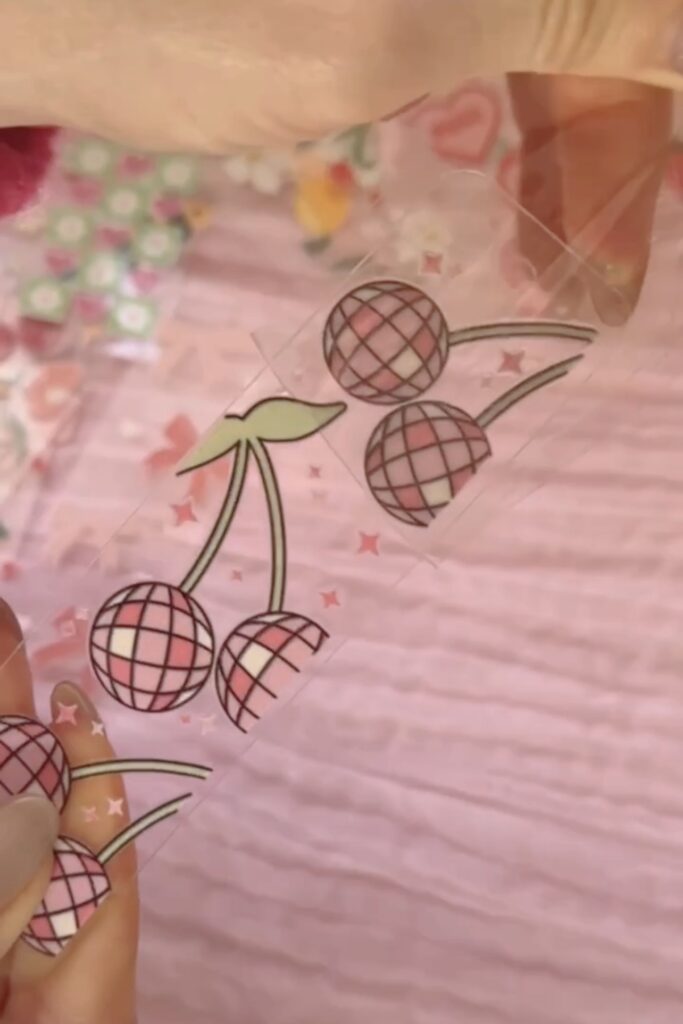
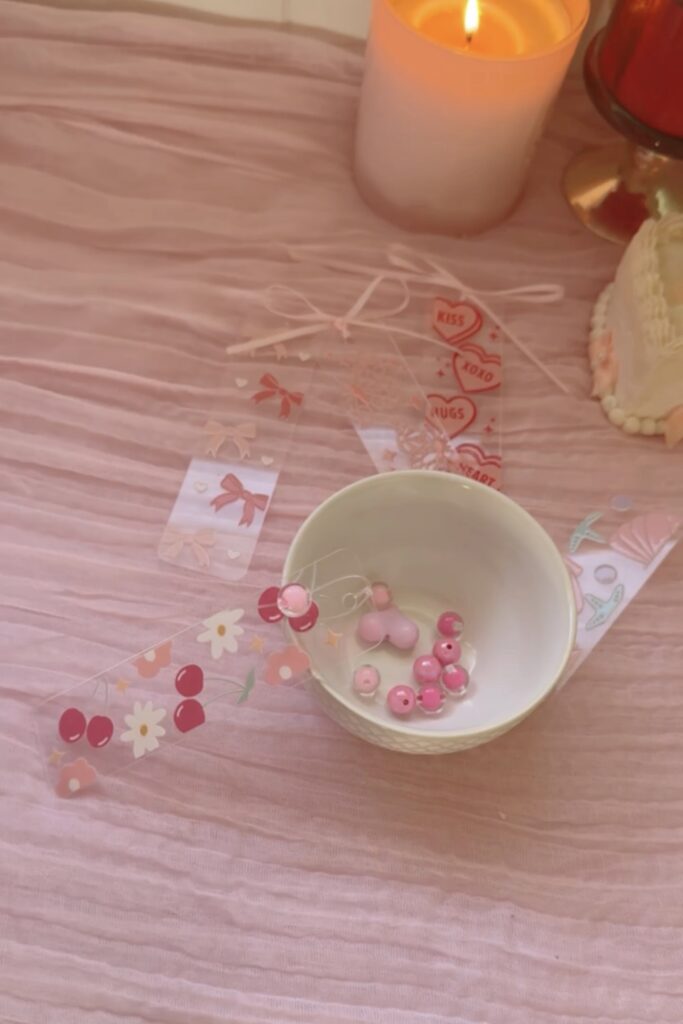
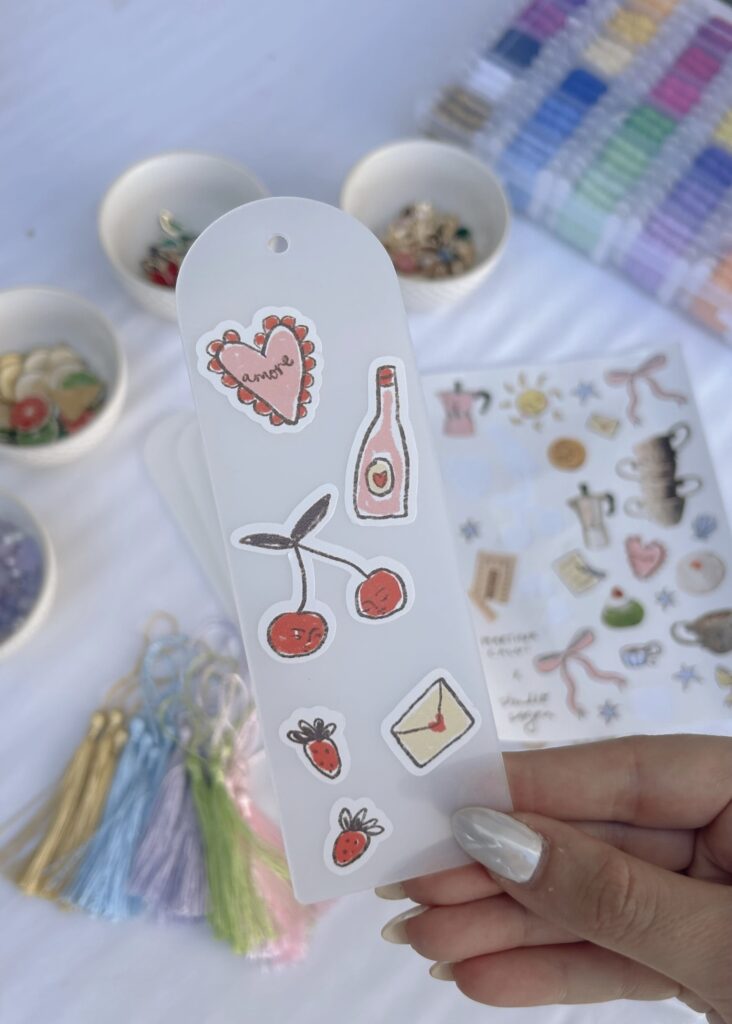
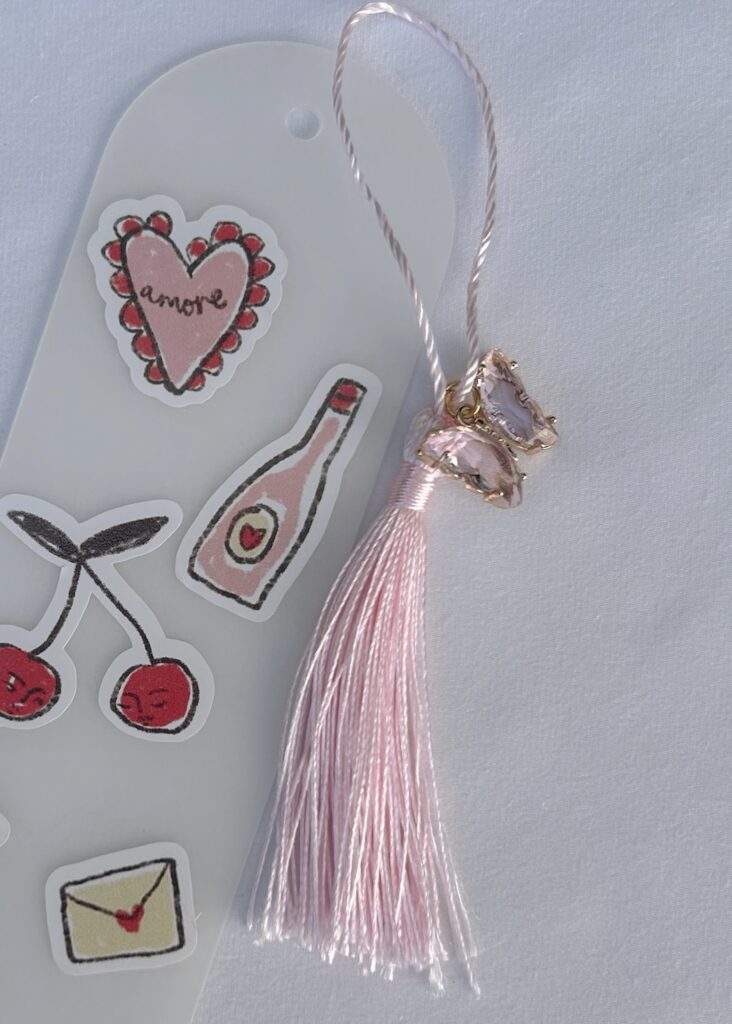
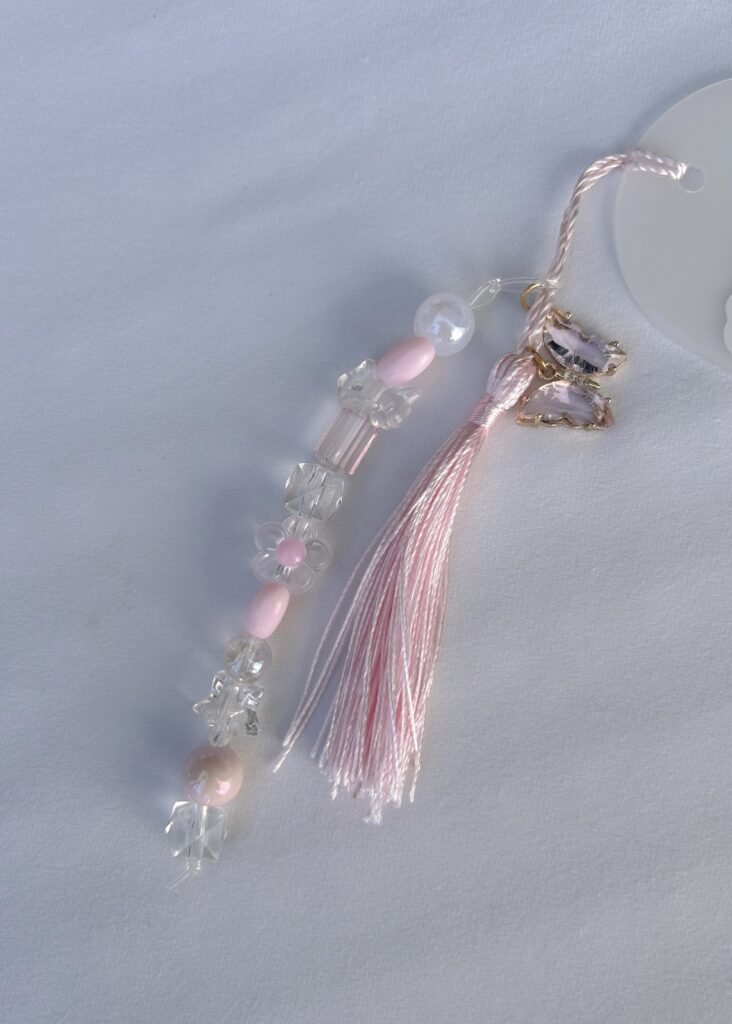
Cute Bookmarks
Shop What I Used:

I’ve made bookmarks a few times, and they always turn out so fun and cute! If you’re a book lover and avid reader like me, this project is especially perfect! I think it’d be so cute to do at your next book club or girls night.
More Detailed Tutorial:
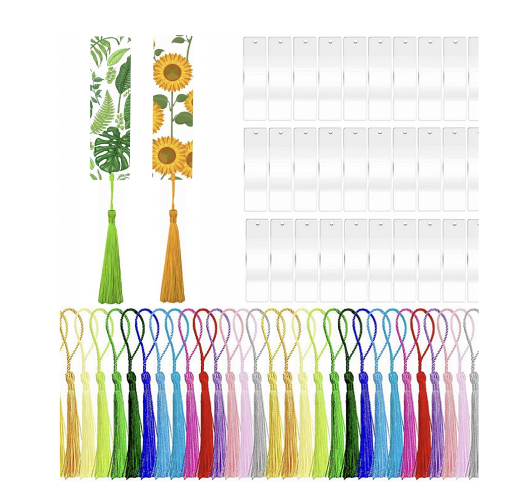


Bookmarks Method #1

Step 1 – peel the plastic coating off
Peel off both sides of the acrylic bookmark. Set aside.
Step 2 – pick a bookmark sticker wrap
Peel the backside off of the bookmark sticker wrap.


Step 3 – carefully center the sticker on the bookmark
Avoid covering the hole and placing the sticker off of the edge of the bookmark. Press it down firmly to make sure it’s fully adhered.
Step 4 – peel the top layer of clear plastic off of the sticker
Leaving behind the cute designs.
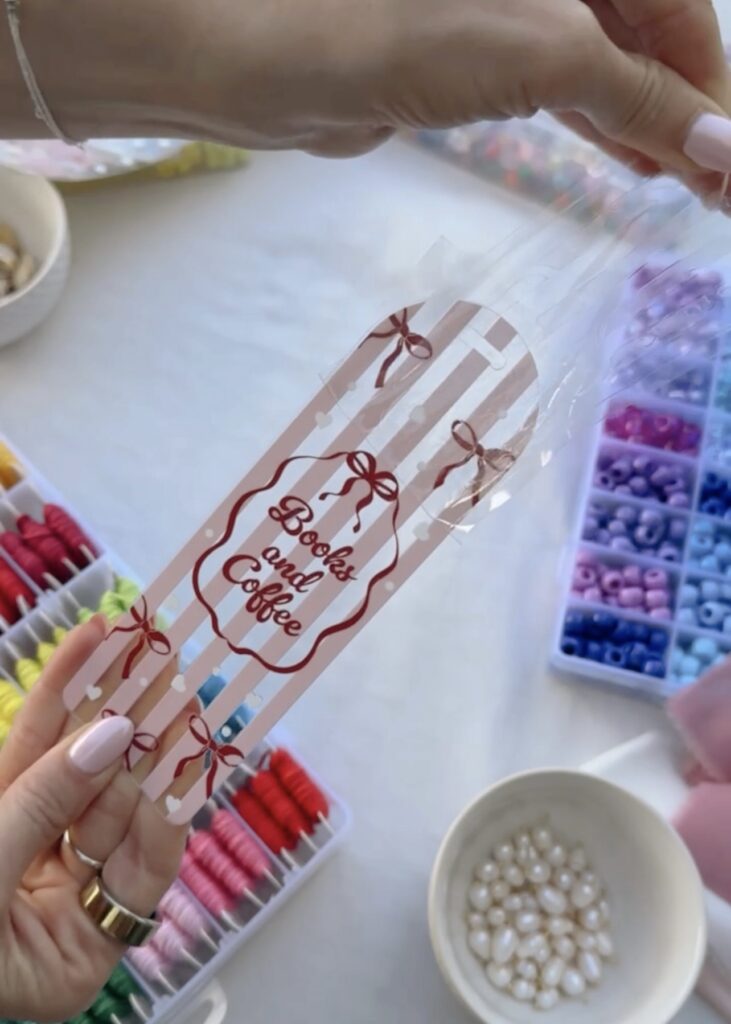
Step 5 – add ribbon or charms
You can loop clear elastic string or ribbon through the hole and tie a double knot. Add the beads onto the string and tie a thick knot at the bottom to stop them from falling off.
You can also tie the ribbon into a bow, or add a tassel!

Bookmarks Method #2
Step 1: peel the plastic coating off of both sides of the acrylic bookmark.
Set aside.
Step 2: peel the backside off of the bookmark sticker wrap.
Step 3: carefully center the sticker on the bookmark.
Avoid covering the hole and placing the sticker off of the edge of the bookmark. Press it down firmly to make sure it’s fully adhered.
Step 4: peel the top layer of clear plastic off of the sticker, leaving behind the cute designs!
Step 5: add ribbon or charms.
You can loop clear elastic string or ribbon through the hole and tie a double knot. Add the beads onto the string and tie a thick knot at the bottom to stop them from falling off.
You can also tie the ribbon into a bow! Or use the tassels that came with the bookmarks.
Watch Me Make Them:
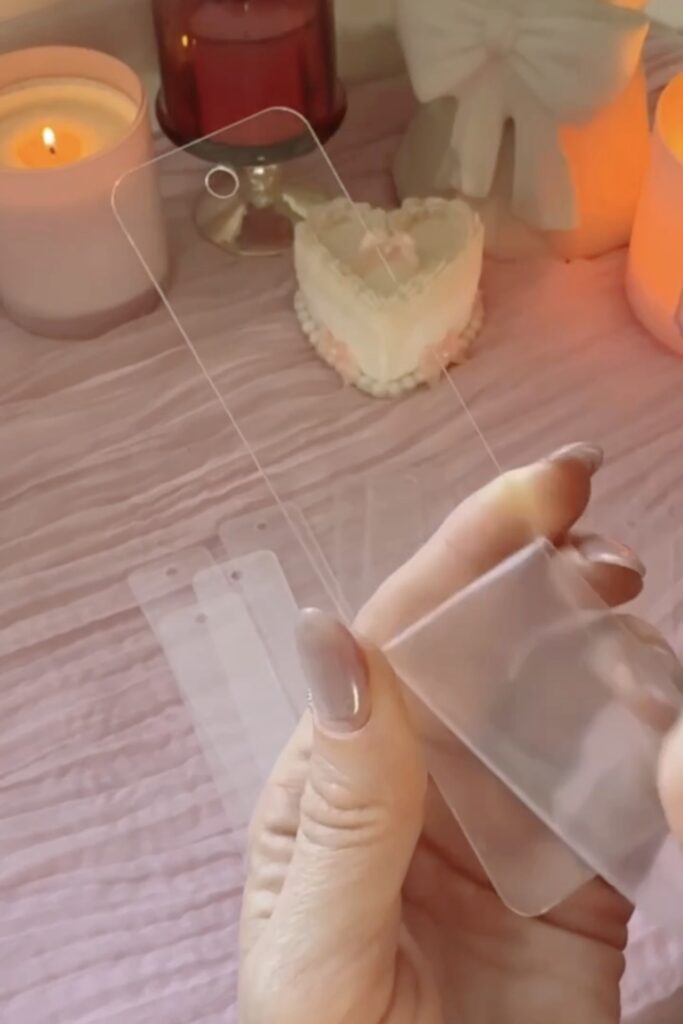
Bookmarks Method #3
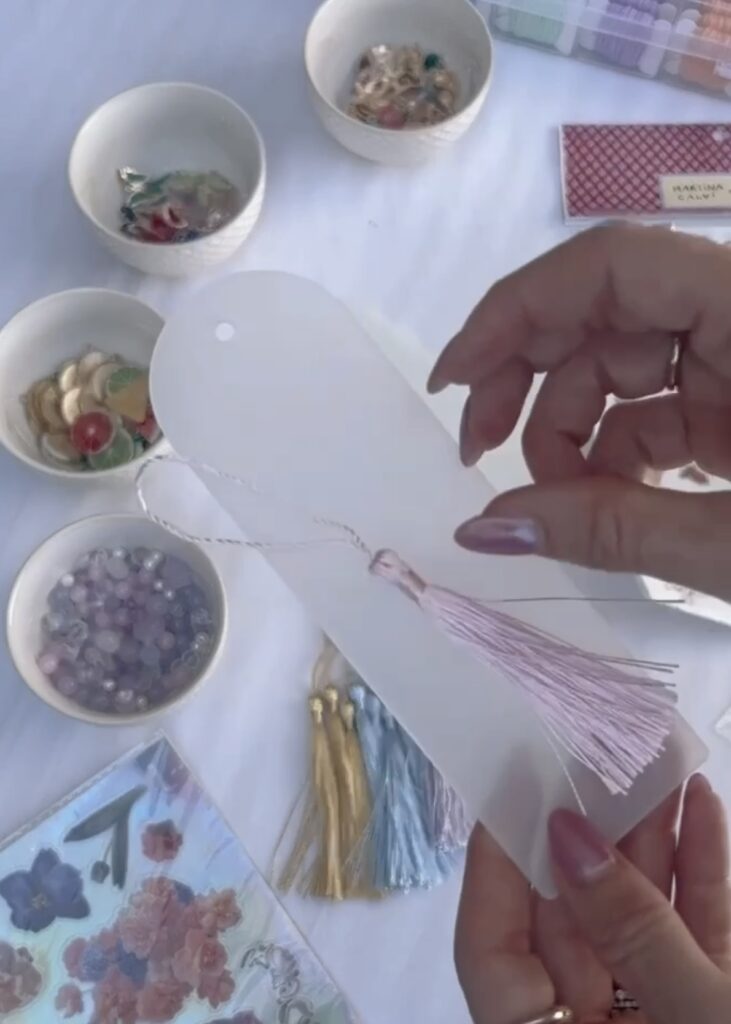
Step 1 – select bookmark and tassel
You can peel the plastic off the acrylic bookmark if you want it to be transparent (shown above).

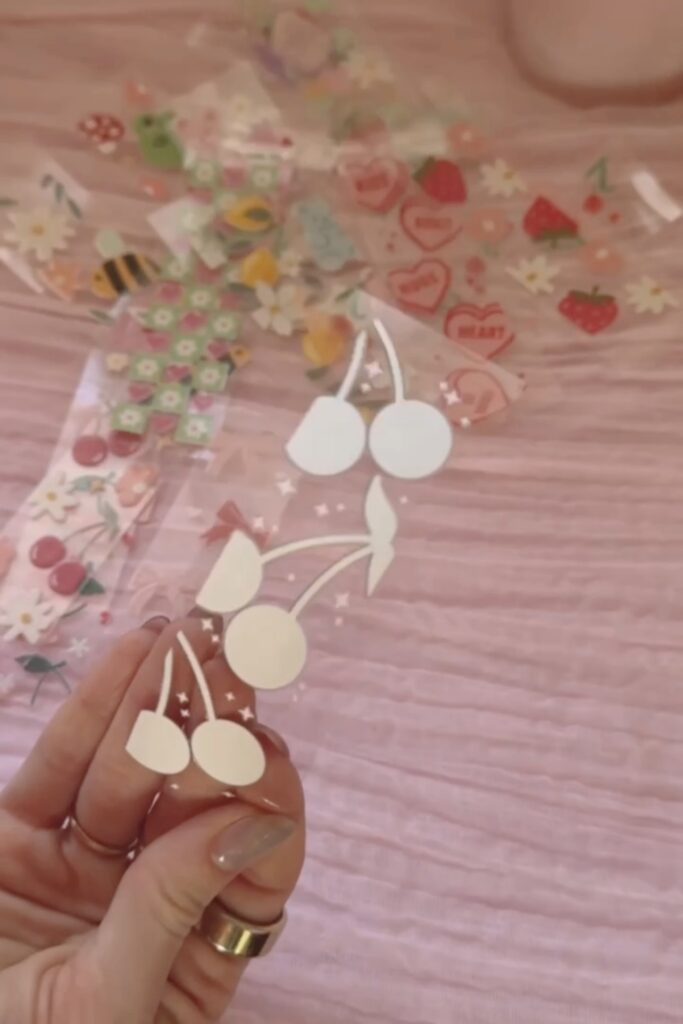
Step 2 – decorate with stickers.
This part is so fun! You can really do anything. You could even decorate the back of it since it’s opaque! It would even be cute to print a quote from your favorite book on the other side or create a book log on the back of it!
Step 4 – create bead chain.
For this part, start with 12-20 inches of elastic thread. I used .8mm elastic but other materials or sizes work too. When cutting the string, leave a lot of excess, otherwise it can be really hard to tie the knots at the end. Next, make a slipknot (this TikTok tutorial by user Knits and Bits was super helpful if you don’t know how to tie a slip knot) and adjust it to pinky width.
Then, tie 2 knots using both ends of the thread, gathering them around the slipknot. Next, you’re going to add the beads through both strings (depending on size, I used 12-15). Keep in mind, you want it to be longer than the tassel by a couple inches.
Once the beaded chains are complete, knot the end twice using both strings, making sure the knot is bigger than the bead directly next to it so they won’t fall off. I used elastic from my bead box but you can buy them separately too or use colored thread. Attach the keychain to the tassel using a ring and pliers (same as in step 3).
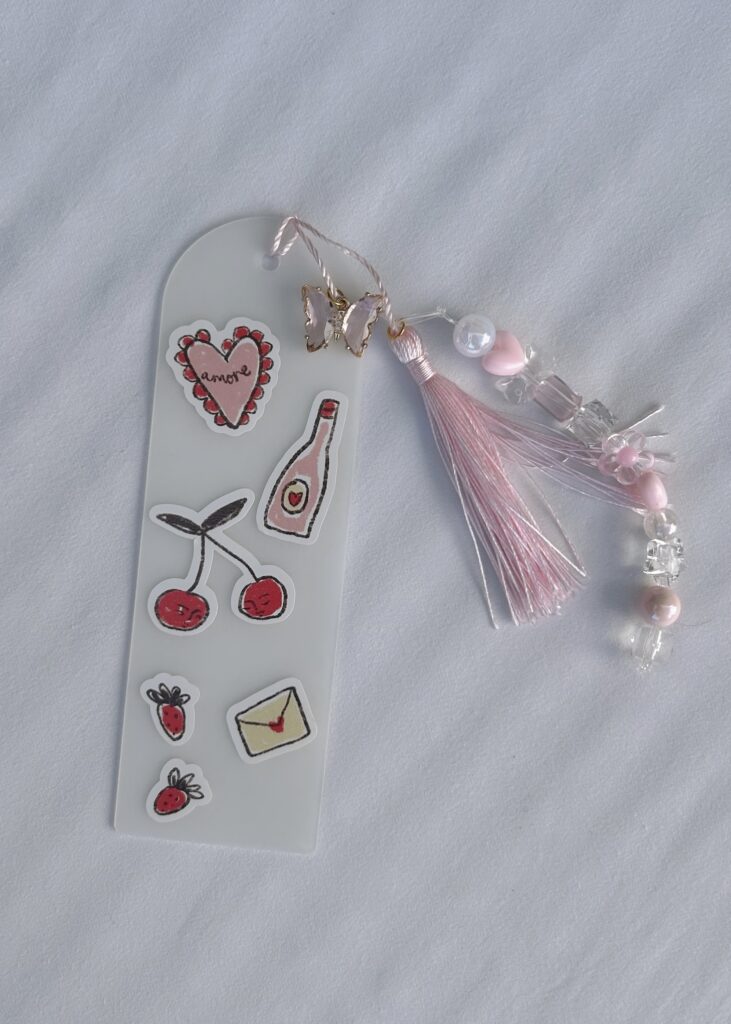
Step 5 – attach the tassel.
String the end loop of the tassel through the hole, and then pull the tassel, charms and beads through the loop (closer look below).
And just like that you’re done!
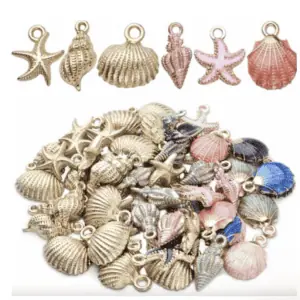
Charm Necklaces

I made charm necklaces with my friends the other day and they turned out so cute! I found so many cute charm packs on Amazon. So it was actually a really affordable activity. I have so many leftover that I can use for other crafts.
More Detailed Tutorial:
Shop What I Used:


How to Make A Charm Necklace
Step 1: Choose Charms & Plan Order
I used charms from all 3 packs I bought and chose based on colors and just overall cuteness! I went for a pink and gold coastal theme. Some of the charms had special meanings to me which makes it even more special when I wear it. I also added a cute charm at the clasp that said “Made with Love”. I chose to space my charms with 2 rings in between each item.
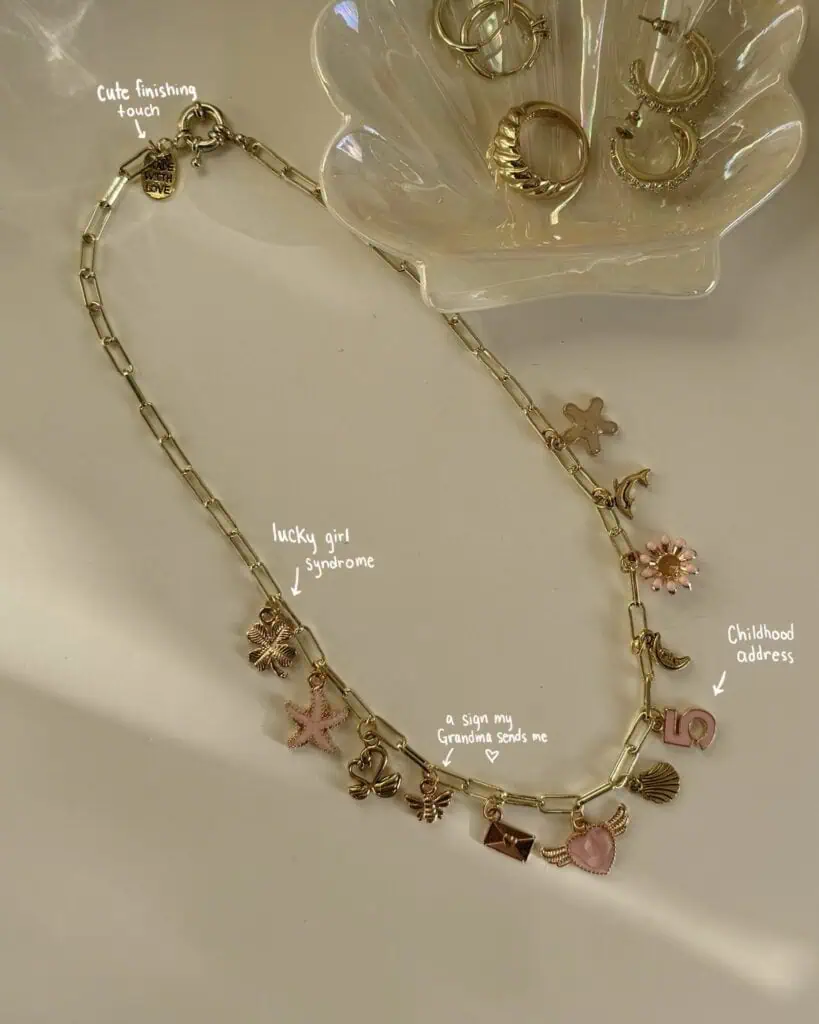

Step 2: Attach Jump Rings to Charms
sing two pliers, I open the jump ring and then slide it through the charm. Don’t close it yet!
Step 3: Attach Charms to Chain
If you’re using a chain like mine, then the charms will be directly attached to a ring. However, if the chain was tightly knit, then the charms will slide around and not be separated. Repeat step 2 and 3 for all of the charms.

Watch Me Make Them:
DIY Fridge Magnets
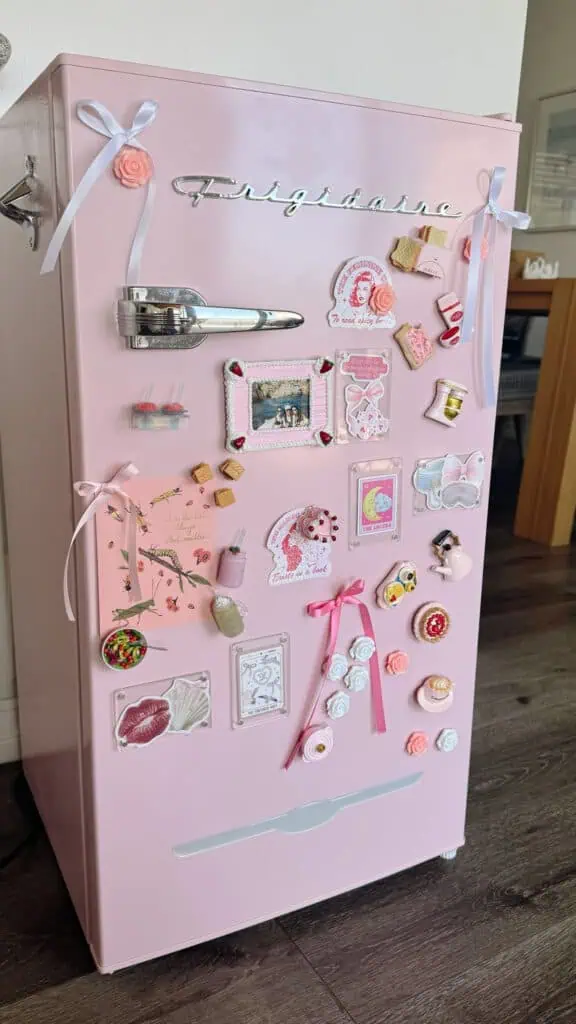
This DIY refrigerator magnet craft idea is perfect for an easy activity for a girls night in! The first step to a craft night is a cute setup! These placemats are my favorite for craft nights because they’re so easy to clean! The resin from this project wiped right off. These MiniVerse crafts are so much fun! I used the diner collection, but they have so many collections to to choose from!
More Detailed Tutorial:
Shop What I Used:


How to Make DIY Refrigerator Magnets
Step One:
Unwrap the MiniVerse, and using the collector’s guide, follow the instructions to make each MiniVerse item.

*Be sure to follow safety guide and warnings when making the MiniVerse as you are working with resin!

Step Two:
Allow the resin to dry completely in UV light for around 5-15 minutes, depending on the item.
Step Three:
Once the MiniVerse food item is completely dry, use super glue to attach a magnet to the back of the MiniVerse item.


Step Four:
Decorate your refrigerator with your DIY magnets
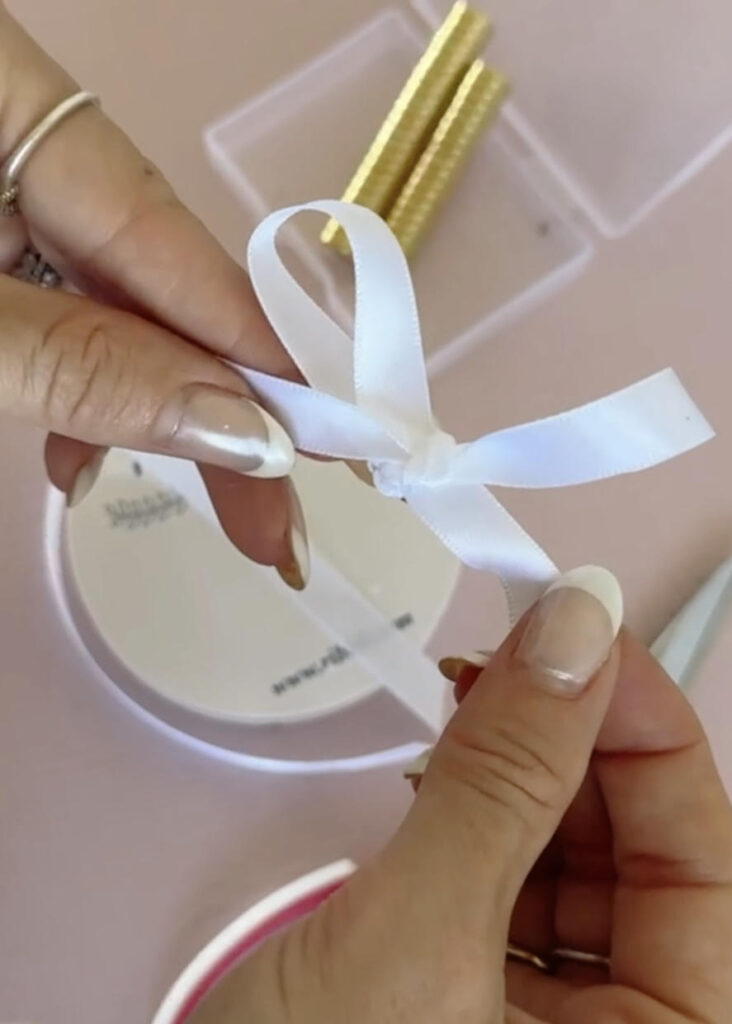
Additional DIY Fridge Magnets
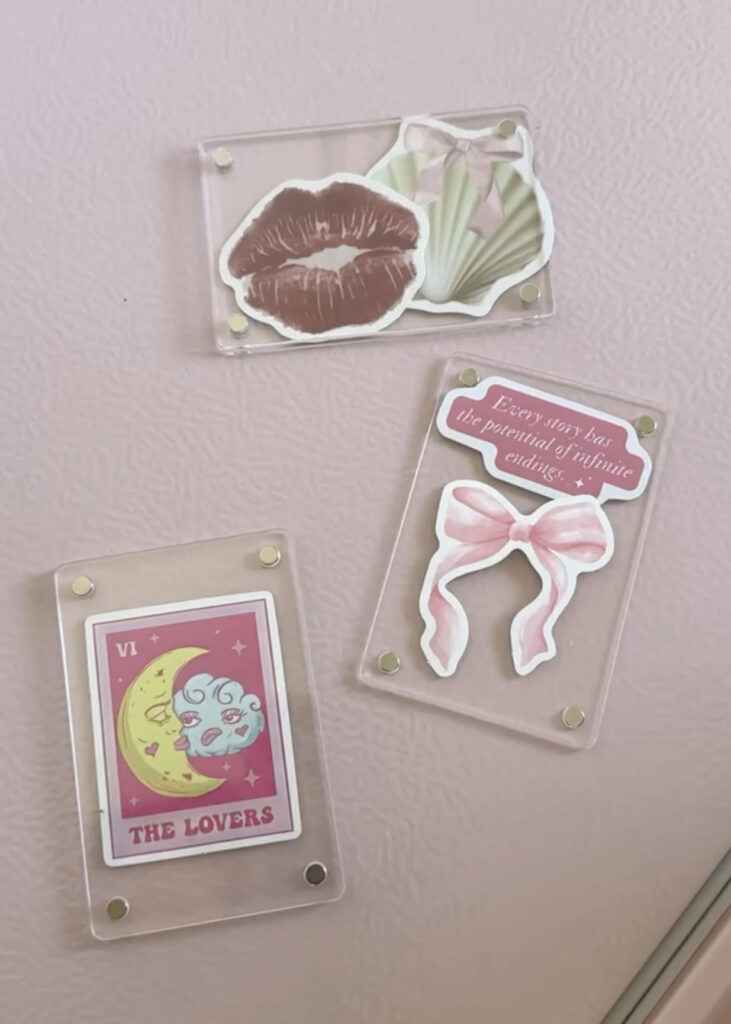
How to Make Sticker Collages:
Using my frames, I layered stickers together to make collages, and they turned out super cute! You don’t need to peel the stickers to keep them in place so it’s really easy to reuse the stickers and redecorate in the future!


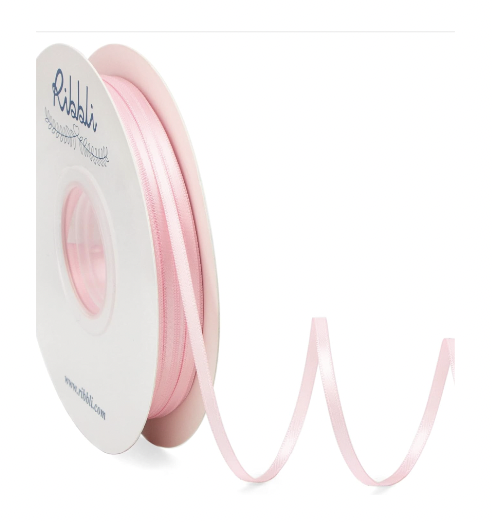
How to make DIY bow magnets:
Using 3/8 inch satin ribbon, tie one knot in the middle, and then form one loop on either side.


Watch Me Make Them:
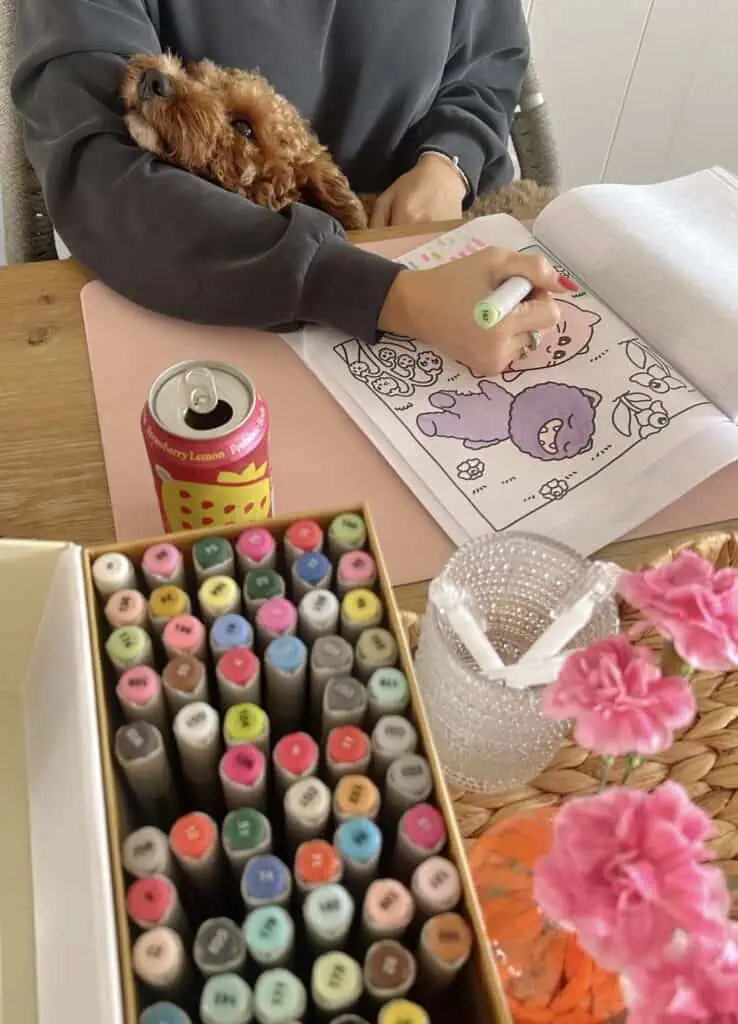
Halloween Coloring Finds
To kick off the fall season, my bestie and I made Halloween cookies, played fall Taylor Swift songs, and colored all night. There are so many adorable and affordable coloring books to choose from on Amazon. The best part of these books is that they’re truly so fun for any age because the pages aren’t too challenging, but the drawings are so cute! It’s so relaxing but also so much fun – I think I’ve definitely unlocked a new obsession.
More Details:
Shop What I Used:


Watch Us Color:
Shop all of my favorite craft finds on Amazon:
More Cozy Finds

Reading Corner
There are few things that bring me more joy than browsing bookstores, buying books & reading. Having a reading corner in my home has always been on my wishlist & we’re finally making it happen! My book collection keeps growing and the TBR pile under my need deserved a proper home. I found the perfect solution on Amazon I think you’ll love too! I also included a list so you can browse all of the books on my shelves here!
Video:
Shop What I Used:


Fall Reading Corner
As fun as this summer was, I am so excited for fall! I love cozy season, and I’m fully embracing it this year and decorating my reading corner accordingly! I stocked my bookshelf with my fall TBR list so I’m officially ready to go. All of my fall decor and 2024 fall book recommendations are linked below!
Video:

Shop What I Used:


Shop all of my books and book finds on Amazon:
You might also like